Dell 948 User Guide - Page 86
Networking Problems, Check power
 |
View all Dell 948 manuals
Add to My Manuals
Save this manual to your list of manuals |
Page 86 highlights
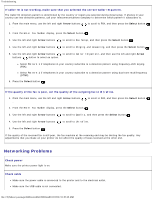
Troubleshooting If caller ID is not working, make sure that you selected the correct Caller ID pattern. The Caller ID detection pattern is determined by the country or region you selected during initial setup. If phones in your country use two detection patterns, call your telecommunications company to determine which pattern it subscribes to. 1. From the main menu, use the left and right Arrow buttons . to scroll to FAX, and then press the Select button 2. From the Enter Fax Number display, press the Select button . 3. Use the left and right Arrow buttons to scroll to Fax Setup, and then press the Select button . 4. Use the left and right Arrow buttons to scroll to Ringing and Answering, and then press the Select button . 5. Use the left and right Arrow buttons to scroll to Caller ID pattern, and then use the left and right Arrow buttons button to select an option. Select Pattern 1 if telephones in your country subscribe to a detection pattern using frequency-shift keying (FSK). Select Pattern 2 if telephones in your country subscribe to a detection pattern using dual tone multifrequency (DTMF). 6. Press the Select button . If the quality of the fax is poor, set the quality of the outgoing fax to Ultrafine. 1. From the main menu, use the left and right Arrow buttons . to scroll to FAX, and then press the Select button 2. From the Enter Fax Number display, press the Select button . 3. Use the left and right Arrow buttons to scroll to Quality, and then press the Select button . 4. Use the left and right Arrow buttons to scroll to Ultrafine. 5. Press the Select button . If the quality of the received fax is still poor, the fax machine at the receiving end may be limiting the fax quality. Any adjustments that you make on your printer do not affect the quality of faxes received at the other end. Networking Problems Check power Make sure the printer power light is on. Check cable Make sure the power cable is connected to the printer and to the electrical outlet. Make sure the USB cable is not connected. file:///T|/htdocs/systems/prn948/en/en/d0e10686.html[10/10/2012 11:05:40 AM]
-
 1
1 -
2
-
3
-
4
-
5
-
6
-
7
-
8
-
9
-
10
-
11
-
12
-
13
-
14
-
15
-
16
-
17
-
18
-
19
-
20
-
21
-
22
-
23
-
24
-
25
-
26
-
27
-
28
-
29
-
30
-
31
-
32
-
33
-
34
-
35
-
36
-
37
-
38
-
39
-
40
-
41
-
42
-
43
-
44
-
45
-
46
-
47
-
48
-
49
-
50
-
51
-
52
-
53
-
54
-
55
-
56
-
57
-
58
-
59
-
60
-
61
-
62
-
63
-
64
-
65
-
66
-
67
-
68
-
69
-
70
-
71
-
72
-
73
-
74
-
75
-
76
-
77
-
78
-
79
-
80
-
 81
81 -
 82
82 -
 83
83 -
 84
84 -
 85
85 -
 86
86 -
 87
87 -
 88
88 -
 89
89 -
 90
90 -
 91
91 -
92
-
93
-
94
-
95
-
96
-
97
-
98
-
99
-
100
-
101
-
102
-
103
-
104
-
105
-
106
-
107
-
108
-
109
-
110
-
111
-
112
-
113
-
114
-
115
-
116
-
117
-
118
-
119
-
120
-
121
-
122
-
123
-
124
-
125
-
126
-
127
-
128
-
129
-
130
-
131
-
132
-
133
-
134
-
135
-
136
-
137
-
138
-
139
-
140
-
141
-
142
-
143
-
144
 |
 |
