Dell 948 User Guide - Page 133
Receiving a Fax, Sending a Fax Through an Automated Answering System, Receiving a Fax Automatically
 |
View all Dell 948 manuals
Add to My Manuals
Save this manual to your list of manuals |
Page 133 highlights
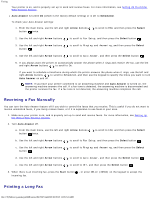
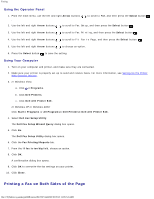
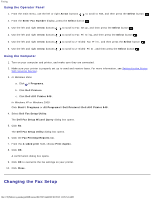
Faxing a. Click ® Programs. b. Click Dell Printers. c. Click Dell AIO Printer 948. In Windows XP and Windows 2000: Click Start® Programs or All Programs® Dell Printers® Dell AIO Printer 948. 2. Click Dell Fax Solutions. The Dell Fax Solutions Software dialog box opens. 3. Click the appropriate links on the Dell Fax Solutions Software dialog box to accomplish your task. 4. Follow the instructions on the computer screen. Sending a Fax Through an Automated Answering System Some companies have automated answering systems that require you to respond to a series of questions to route you to the department you wish to call. After answering the questions by pressing the appropriate buttons, you eventually get connected to the proper department. To send a fax to a company that employs automated answering systems to answer their calls, set up your printer for On Hook dialing. 1. Make sure your printer is properly set up to send and receive faxes. For more information, see Setting Up the Printer With External Devices. 2. Load the original document facing down on the scanner glass. For more information, see Loading Original Documents. 3. From the operator panel, use the left and right Arrow buttons . to scroll to FAX, and then press the Select button 4. Use the left and right Arrow buttons to scroll to On Hook Dial, and then press the Select button . 5. Press the Select button again to activate On Hook Dial. 6. Using the keypad, dial the telephone number of the company. 7. Using the keypad, navigate through the automated answering system. 8. When you hear the fax tone, press the Start button to begin sending your fax. To cancel the fax job, press the Cancel button on your printer. Receiving a Fax Receiving a Fax Automatically The printer automatically receives and prints any incoming faxes without any necessary intervention from you. Make sure: file:///T|/htdocs/systems/prn948/en/en/d0e7047.html[10/10/2012 11:05:54 AM]
-
 1
1 -
2
-
3
-
4
-
5
-
6
-
7
-
8
-
9
-
10
-
11
-
12
-
13
-
14
-
15
-
16
-
17
-
18
-
19
-
20
-
21
-
22
-
23
-
24
-
25
-
26
-
27
-
28
-
29
-
30
-
31
-
32
-
33
-
34
-
35
-
36
-
37
-
38
-
39
-
40
-
41
-
42
-
43
-
44
-
45
-
46
-
47
-
48
-
49
-
50
-
51
-
52
-
53
-
54
-
55
-
56
-
57
-
58
-
59
-
60
-
61
-
62
-
63
-
64
-
65
-
66
-
67
-
68
-
69
-
70
-
71
-
72
-
73
-
74
-
75
-
76
-
77
-
78
-
79
-
80
-
81
-
82
-
83
-
84
-
85
-
86
-
87
-
88
-
89
-
90
-
91
-
92
-
93
-
94
-
95
-
96
-
97
-
98
-
99
-
100
-
101
-
102
-
103
-
104
-
105
-
106
-
107
-
108
-
109
-
110
-
111
-
112
-
113
-
114
-
115
-
116
-
117
-
118
-
119
-
120
-
121
-
122
-
123
-
124
-
125
-
126
-
127
-
 128
128 -
 129
129 -
 130
130 -
 131
131 -
 132
132 -
 133
133 -
 134
134 -
 135
135 -
 136
136 -
 137
137 -
 138
138 -
139
-
140
-
141
-
142
-
143
-
144
 |
 |
