Dell 948 User Guide - Page 81
Copying Problems, Printing Preferences, Advanced, Sided Printing, Extend dry time, Print, Preferences - scanner software
 |
View all Dell 948 manuals
Add to My Manuals
Save this manual to your list of manuals |
Page 81 highlights
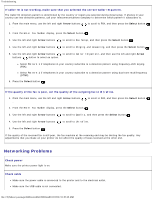
Troubleshooting 3. Select Printing Preferences. The Printing Preferences dialog box opens. 4. Click the Advanced tab. 5. From the 2-Sided Printing area, select Extend dry time. 6. Click OK. To apply this feature to your current duplex print job only: 1. With your document open, click File® Print. The Print dialog box opens. 2. Click Preferences, Properties, Options, or Setup (depending on the program or operating system). The Printing Preferences dialog box opens. 3. Click the Advanced tab. 4. From the 2-Sided Printing area, select Extend dry time. 5. Click OK. Free up memory resources on your computer when print speed is slow Close all applications not in use. Try minimizing the number and size of graphics and images in your document. Consider purchasing more Random Access Memory (RAM) for your computer. Remove fonts that you rarely use from your system. Uninstall the printer software, and then reinstall it. For more information, see Removing and Reinstalling Software. Select a lower print quality from the Printing Preferences dialog box. Make sure you loaded the paper correctly. For more information, see Loading Paper. Copying Problems Check for blinking lights or error messages on the printer. For more information, see Error Messages. Make sure the scanner glass is clean. Gently wipe the scanner glass as well as the thin strip of glass beside it with a clean, lint-free cloth dampened with water. file:///T|/htdocs/systems/prn948/en/en/d0e10686.html[10/10/2012 11:05:40 AM]
-
 1
1 -
2
-
3
-
4
-
5
-
6
-
7
-
8
-
9
-
10
-
11
-
12
-
13
-
14
-
15
-
16
-
17
-
18
-
19
-
20
-
21
-
22
-
23
-
24
-
25
-
26
-
27
-
28
-
29
-
30
-
31
-
32
-
33
-
34
-
35
-
36
-
37
-
38
-
39
-
40
-
41
-
42
-
43
-
44
-
45
-
46
-
47
-
48
-
49
-
50
-
51
-
52
-
53
-
54
-
55
-
56
-
57
-
58
-
59
-
60
-
61
-
62
-
63
-
64
-
65
-
66
-
67
-
68
-
69
-
70
-
71
-
72
-
73
-
74
-
75
-
 76
76 -
 77
77 -
 78
78 -
 79
79 -
 80
80 -
 81
81 -
 82
82 -
 83
83 -
 84
84 -
 85
85 -
 86
86 -
87
-
88
-
89
-
90
-
91
-
92
-
93
-
94
-
95
-
96
-
97
-
98
-
99
-
100
-
101
-
102
-
103
-
104
-
105
-
106
-
107
-
108
-
109
-
110
-
111
-
112
-
113
-
114
-
115
-
116
-
117
-
118
-
119
-
120
-
121
-
122
-
123
-
124
-
125
-
126
-
127
-
128
-
129
-
130
-
131
-
132
-
133
-
134
-
135
-
136
-
137
-
138
-
139
-
140
-
141
-
142
-
143
-
144
 |
 |
