Dell Inspiron 15R 5521 Me and My Dell - Page 107
Setting Up a Wireless Internet Connection, Open the Charms Bar.
 |
View all Dell Inspiron 15R 5521 manuals
Add to My Manuals
Save this manual to your list of manuals |
Page 107 highlights
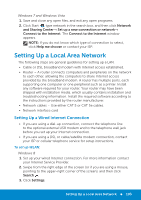
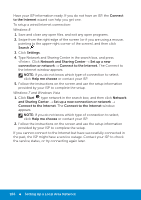
Setting Up a Wireless Internet Connection NOTE: To set up your wireless router, see the documentation that shipped with your router. Before you can use your wireless Internet connection, you need to connect to your wireless router. Windows 8 1. Ensure that wireless is enabled on your computer. 2. Open the Charms Bar. 3. Select the Settings Charm. 4. Select the Network Icon. 5. Click on the network you wish to connect. 6. Enter the network key. 7. Turn on/off file sharing. NOTE: Actual steps may vary based on the operating system installed in your computer. Windows 7 To set up your connection to a wireless router on Microsoft Windows 7 or Windows Vista: 1. Ensure that wireless is enabled on your computer. 2. Click Start , type network in the search box, and then click Network and Sharing Center → Set up a new connection or network → Connect to the Internet. The Connect to the Internet window appears. 3. Follow the instructions on the screen to complete the setup. Setting Up a Local Area Network 107
-
 1
1 -
2
-
3
-
4
-
5
-
6
-
7
-
8
-
9
-
10
-
11
-
12
-
13
-
14
-
15
-
16
-
17
-
18
-
19
-
20
-
21
-
22
-
23
-
24
-
25
-
26
-
27
-
28
-
29
-
30
-
31
-
32
-
33
-
34
-
35
-
36
-
37
-
38
-
39
-
40
-
41
-
42
-
43
-
44
-
45
-
46
-
47
-
48
-
49
-
50
-
51
-
52
-
53
-
54
-
55
-
56
-
57
-
58
-
59
-
60
-
61
-
62
-
63
-
64
-
65
-
66
-
67
-
68
-
69
-
70
-
71
-
72
-
73
-
74
-
75
-
76
-
77
-
78
-
79
-
80
-
81
-
82
-
83
-
84
-
85
-
86
-
87
-
88
-
89
-
90
-
91
-
92
-
93
-
94
-
95
-
96
-
97
-
98
-
99
-
100
-
101
-
 102
102 -
 103
103 -
 104
104 -
 105
105 -
 106
106 -
 107
107 -
 108
108 -
 109
109 -
 110
110 -
 111
111 -
 112
112 -
113
-
114
-
115
-
116
-
117
-
118
-
119
-
120
-
121
-
122
-
123
-
124
-
125
-
126
-
127
-
128
-
129
-
130
-
131
-
132
-
133
-
134
-
135
-
136
-
137
-
138
-
139
-
140
-
141
-
142
-
143
-
144
-
145
-
146
-
147
-
148
-
149
-
150
-
151
-
152
-
153
-
154
-
155
-
156
-
157
-
158
-
159
-
160
-
161
-
162
-
163
-
164
-
165
-
166
-
167
-
168
 |
 |