Dell Inspiron 15R 5521 Me and My Dell - Page 63
Set up the NVIDIA 3DTV Play application, NVIDIA Control Panel
 |
View all Dell Inspiron 15R 5521 manuals
Add to My Manuals
Save this manual to your list of manuals |
Page 63 highlights
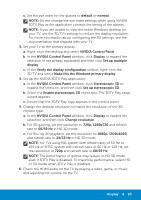
c. Set the eye order for the glasses to default or normal. NOTE: Do not change the eye order settings when using NVIDIA 3DTV Play as the application controls the timing of the glasses. NOTE: If you are unable to view the entire Windows desktop on your TV, use the 3D TV's settings to reduce the display resolution. For more information about configuring the 3D settings, see the documentation that shipped with your TV. 3. Set your TV as the primary display: a. Right-click the desktop and select NVIDIA Control Panel. b. In the NVIDIA Control Panel window, click Display to expand the selection (if not already expanded) and then click Set up multiple display. c. In the Verify the display configuration section, right-click the 3D TV and select Make this the Windows primary display. 4. Set up the NVIDIA 3DTV Play application: a. In the NVIDIA Control Panel window, click Stereoscopic 3D to expand the selection, and then click Set up stereoscopic 3D. b. Select the Enable stereoscopic 3D check box. The 3DTV Play setup wizard appears. c. Ensure that the 3DTV Play logo appears in the control panel. 5. Change the desktop resolution to match the resolution of the 3D content type: a. In the NVIDIA Control Panel window, click Display to expand the selection, and then click Change resolution. b. For 3D gaming, set the resolution to 720p, 1280x720 and refresh rate to 60/59 Hz in HD 3D mode. c. For Blu-ray 3D playback, set the resolution to 1080p, 1920x1080 and refresh rate to 24/23 Hz in HD 3D mode. NOTE: For TVs using PAL system with refresh rates of 50 Hz or 100 Hz or NTSC system with refresh rates of 60 Hz or 120 Hz, set the resolution to 720p and refresh rate to 60/59 Hz. NOTE: The performance of games may reduce in HD 3D mode even if 3DTV Play is disabled. To maximize performance, select HD or SD mode when 3DTV Play is disabled. 6. Check the HDMI audio on the TV by playing a video, game, or music and adjusting the volume on the TV. Display 63
-
 1
1 -
2
-
3
-
4
-
5
-
6
-
7
-
8
-
9
-
10
-
11
-
12
-
13
-
14
-
15
-
16
-
17
-
18
-
19
-
20
-
21
-
22
-
23
-
24
-
25
-
26
-
27
-
28
-
29
-
30
-
31
-
32
-
33
-
34
-
35
-
36
-
37
-
38
-
39
-
40
-
41
-
42
-
43
-
44
-
45
-
46
-
47
-
48
-
49
-
50
-
51
-
52
-
53
-
54
-
55
-
56
-
57
-
 58
58 -
 59
59 -
 60
60 -
 61
61 -
 62
62 -
 63
63 -
 64
64 -
 65
65 -
 66
66 -
 67
67 -
 68
68 -
69
-
70
-
71
-
72
-
73
-
74
-
75
-
76
-
77
-
78
-
79
-
80
-
81
-
82
-
83
-
84
-
85
-
86
-
87
-
88
-
89
-
90
-
91
-
92
-
93
-
94
-
95
-
96
-
97
-
98
-
99
-
100
-
101
-
102
-
103
-
104
-
105
-
106
-
107
-
108
-
109
-
110
-
111
-
112
-
113
-
114
-
115
-
116
-
117
-
118
-
119
-
120
-
121
-
122
-
123
-
124
-
125
-
126
-
127
-
128
-
129
-
130
-
131
-
132
-
133
-
134
-
135
-
136
-
137
-
138
-
139
-
140
-
141
-
142
-
143
-
144
-
145
-
146
-
147
-
148
-
149
-
150
-
151
-
152
-
153
-
154
-
155
-
156
-
157
-
158
-
159
-
160
-
161
-
162
-
163
-
164
-
165
-
166
-
167
-
168
 |
 |