Dell Vostro 220 Service Manual - Page 22
Keyboard Problems
 |
UPC - 884116011958
View all Dell Vostro 220 manuals
Add to My Manuals
Save this manual to your list of manuals |
Page 22 highlights
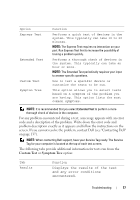
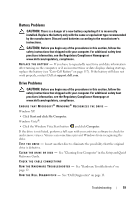
NOTE: Your computer supports only IEEE 1394a standard. ENSURE THAT THE CABLE FOR THE IEEE 1394 DEVICE IS PROPERLY INSERTED INTO THE DEVICE AND INTO THE CONNECTOR ON THE COMPUTER E N S U R E T H A T T H E I E E E 1 3 9 4 D E V I C E I S E N A B L E D I N S YS T E M S E T U P - See "System Setup Program" on page 129 for assistance. ENSURE THAT THE IEEE 1394 DEVICE IS RECOGNIZED BY WINDOWS - Windows XP: 1 Click Start and click Control Panel. 2 Under Pick a Category, click Performance and Maintenance→ System→ System Properties → Hardware→ Device Manager. Windows Vista: 1 Click Start → Control Panel→ Hardware and Sound. 2 Click Device Manager. If your IEEE 1394 device is listed, Windows recognizes the device. I F Y O U H A V E P R O B L E M S W I T H A D E L L I E E E 1 3 9 4 D E V I C E - Contact Dell (see "Contacting Dell" on page 137). IF YOU HAVE PROBLEMS WITH AN IEEE 1394 DEVICE NOT PROVIDED BY DELL - Contact the IEEE 1394 device manufacturer. Keyboard Problems CAUTION: Before you begin any of the procedures in this section, follow the safety instructions that shipped with your computer. For additional safety best practices information, see the Regulatory Compliance Homepage at www.dell.com/regulatory_compliance. CHECK THE KEYBOARD CABLE - • Ensure that the keyboard cable is firmly connected to the computer. • Shut down the computer (see "Before Working on Your Computer" on page 35), reconnect the keyboard cable as shown on the setup diagram for your computer, and then restart the computer. • Ensure that the cable is not damaged or frayed and check cable connectors for bent or broken pins. Straighten any bent pins. • Remove any keyboard extension cables and connect the keyboard directly to the computer. TE S T T H E K E Y B O A R D - Connect a properly working keyboard to the computer, and 22 Troubleshooting
-
 1
1 -
2
-
3
-
4
-
5
-
6
-
7
-
8
-
9
-
10
-
11
-
12
-
13
-
14
-
15
-
16
-
 17
17 -
 18
18 -
 19
19 -
 20
20 -
 21
21 -
 22
22 -
 23
23 -
 24
24 -
 25
25 -
 26
26 -
 27
27 -
28
-
29
-
30
-
31
-
32
-
33
-
34
-
35
-
36
-
37
-
38
-
39
-
40
-
41
-
42
-
43
-
44
-
45
-
46
-
47
-
48
-
49
-
50
-
51
-
52
-
53
-
54
-
55
-
56
-
57
-
58
-
59
-
60
-
61
-
62
-
63
-
64
-
65
-
66
-
67
-
68
-
69
-
70
-
71
-
72
-
73
-
74
-
75
-
76
-
77
-
78
-
79
-
80
-
81
-
82
-
83
-
84
-
85
-
86
-
87
-
88
-
89
-
90
-
91
-
92
-
93
-
94
-
95
-
96
-
97
-
98
-
99
-
100
-
101
-
102
-
103
-
104
-
105
-
106
-
107
-
108
-
109
-
110
-
111
-
112
-
113
-
114
-
115
-
116
-
117
-
118
-
119
-
120
-
121
-
122
-
123
-
124
-
125
-
126
-
127
-
128
-
129
-
130
-
131
-
132
-
133
-
134
-
135
-
136
-
137
-
138
 |
 |
