Dell Vostro 220 Service Manual - Page 29
Scanner Problems - locks up
 |
UPC - 884116011958
View all Dell Vostro 220 manuals
Add to My Manuals
Save this manual to your list of manuals |
Page 29 highlights
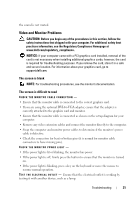
3 Click Properties and click Ports. 4 Adjust the settings, as needed. R E I N S T A L L T H E P R I N T E R D R I V E R - See the printer documentation for information on reinstalling the printer driver. Scanner Problems CAUTION: Before you begin any of the procedures in this section, follow the safety instructions that shipped with your computer. For additional safety best practices information, see the Regulatory Compliance Homepage at www.dell.com/regulatory_compliance. NOTE: If you need technical assistance for your scanner, contact the scanner's manufacturer. C H E C K T H E S C A N N E R D O C U M E N T A T I O N - See the scanner documentation for setup and troubleshooting information. U N L O C K T H E S C A N N E R - Ensure that your scanner is unlocked (if the scanner has a locking tab or button). RESTART THE COMPUTER AND TRY THE SCANNER AGAIN CHECK THE CABLE CONNECTIONS - • See the scanner documentation for information on cable connections. • Ensure that the scanner cables are securely connected to the scanner and the computer. VERIFY THAT THE SCANNER IS RECOGNIZED BY MICROSOFT WINDOWS - Windows XP: 1 Click Start→ Control Panel→ Printers and Other Hardware→ Scanners and Cameras. 2 If your scanner is listed, Windows recognizes the scanner. Windows Vista: 1 Click Start → Control Panel→ Hardware and Sound→ Scanners and Cameras. 2 If the scanner is listed, Windows recognizes the scanner. R E I N S T A L L T H E S C A N N E R D R I V E R - See the scanner documentation for instructions. Troubleshooting 29
-
 1
1 -
2
-
3
-
4
-
5
-
6
-
7
-
8
-
9
-
10
-
11
-
12
-
13
-
14
-
15
-
16
-
17
-
18
-
19
-
20
-
21
-
22
-
23
-
 24
24 -
 25
25 -
 26
26 -
 27
27 -
 28
28 -
 29
29 -
 30
30 -
 31
31 -
 32
32 -
 33
33 -
 34
34 -
35
-
36
-
37
-
38
-
39
-
40
-
41
-
42
-
43
-
44
-
45
-
46
-
47
-
48
-
49
-
50
-
51
-
52
-
53
-
54
-
55
-
56
-
57
-
58
-
59
-
60
-
61
-
62
-
63
-
64
-
65
-
66
-
67
-
68
-
69
-
70
-
71
-
72
-
73
-
74
-
75
-
76
-
77
-
78
-
79
-
80
-
81
-
82
-
83
-
84
-
85
-
86
-
87
-
88
-
89
-
90
-
91
-
92
-
93
-
94
-
95
-
96
-
97
-
98
-
99
-
100
-
101
-
102
-
103
-
104
-
105
-
106
-
107
-
108
-
109
-
110
-
111
-
112
-
113
-
114
-
115
-
116
-
117
-
118
-
119
-
120
-
121
-
122
-
123
-
124
-
125
-
126
-
127
-
128
-
129
-
130
-
131
-
132
-
133
-
134
-
135
-
136
-
137
-
138
 |
 |