Epson ActionLaser 1100 User Manual - Page 47
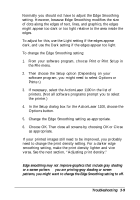
Optimizing Print Quality, Adjusting Edge Smoothing - driver windows 7
 |
View all Epson ActionLaser 1100 manuals
Add to My Manuals
Save this manual to your list of manuals |
Page 47 highlights
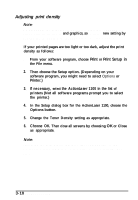
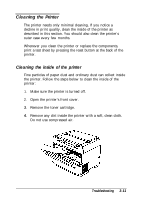
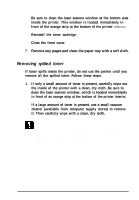
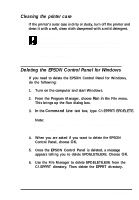
Take out the toner cartridge, shake it gently from side to side to distribute the toner, and then reinstall it. If the problem persists, replace the toner cartridge as described in Read This First. Use the printer driver's Density item for darker print. See "Adjusting print density" later in this chapter. Image is too dark Use the printer driver's Density item for lighter print. See "Adjusting print density" later in this chapter. If the problem persists, replace the toner cartridge as described in Read This First. Non-printed side of the page is dirty Toner may have spilled in the paper feed path. Turn off the printer. Remove the toner cartridge and then clean the paper path of the printer using a clean, soft, lint-free cloth. Be sure to clean the laser scanner window, which is located immediately in front of the orange strip at the bottom of the printer interior. Optimizing Print Quality If the quality of your printouts is not good, read the following sections for information on enhancing the print quality. Adjusting edge smoothing The edge smoothing feature improves the appearance of text and graphics by smoothing the jagged edges of characters and line art, resulting in higher quality output. The settings for the printer driver's Edge Smoothing setting are Light, Medium (default), and Dark 3-8 Troublshooting
-
 1
1 -
2
-
3
-
4
-
5
-
6
-
7
-
8
-
9
-
10
-
11
-
12
-
13
-
14
-
15
-
16
-
17
-
18
-
19
-
20
-
21
-
22
-
23
-
24
-
25
-
26
-
27
-
28
-
29
-
30
-
31
-
32
-
33
-
34
-
35
-
36
-
37
-
38
-
39
-
40
-
41
-
 42
42 -
 43
43 -
 44
44 -
 45
45 -
 46
46 -
 47
47 -
 48
48 -
 49
49 -
 50
50 -
 51
51 -
 52
52 -
53
-
54
-
55
-
56
-
57
-
58
-
59
-
60
-
61
-
62
-
63
-
64
-
65
-
66
-
67
-
68
-
69
-
70
-
71
-
72
-
73
-
74
-
75
-
76
-
77
-
78
-
79
-
80
-
81
-
82
-
83
-
84
-
85
-
86
-
87
-
88
-
89
 |
 |