Fluke 199C/S FE 192,196,199 C Users Manual - Page 79
Setting up the Printing Configuration, Printing a Screen, User Options, Printer Setup, Postscript
 |
View all Fluke 199C/S manuals
Add to My Manuals
Save this manual to your list of manuals |
Page 79 highlights
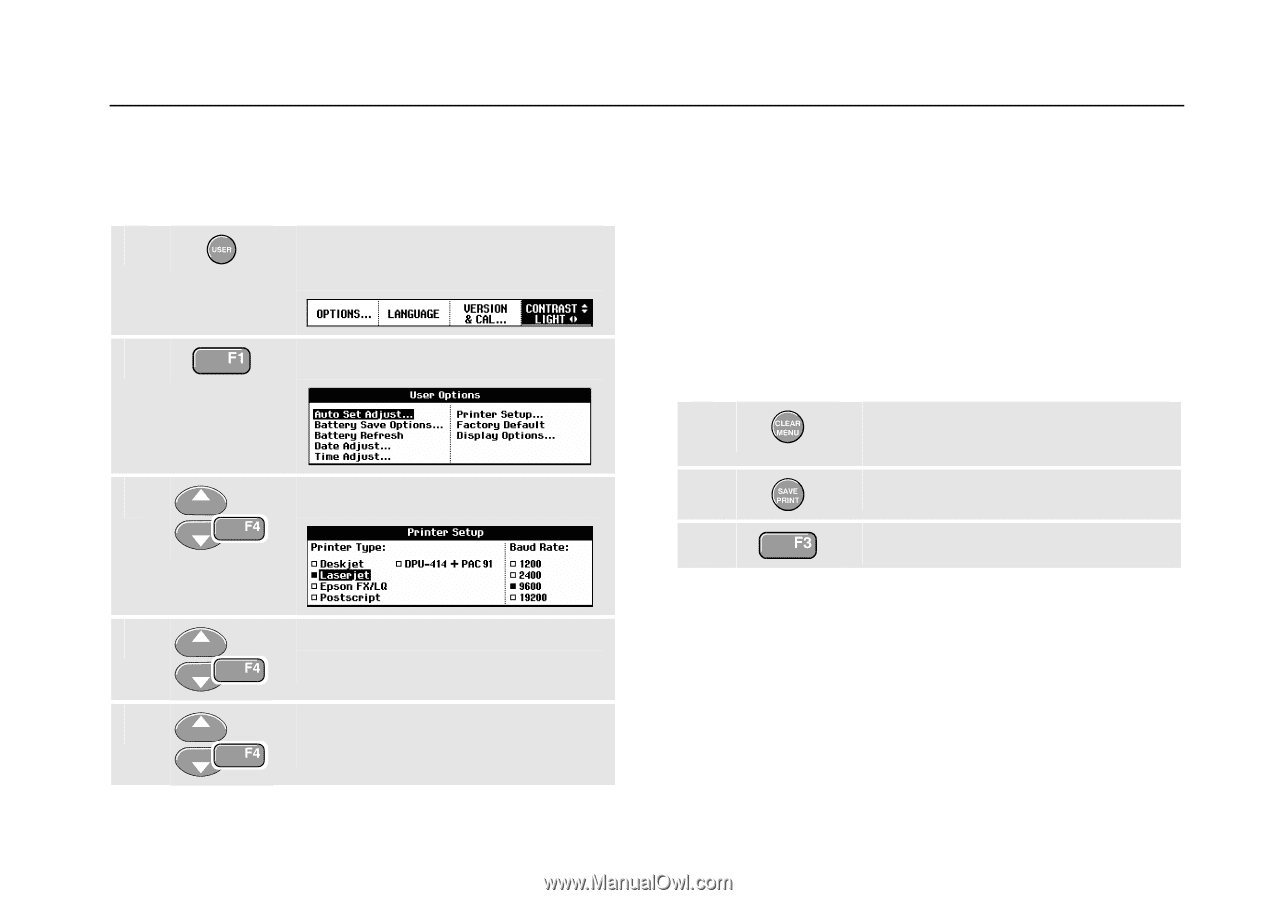
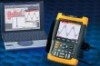
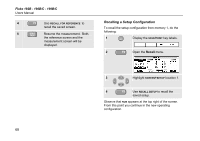
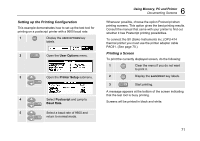
Setting up the Printing Configuration This example demonstrates how to set up the test tool for printing on a postscript printer with a 9600 baud rate: 1 Display the USER OPTIONS key labels. 2 Open the User Options menu. 3 Open the Printer Setup submenu. 4 Select Postscript and jump to Baud Rate. 5 Select a baud rate of 9600 and return to normal mode. 6 Using Memory, PC and Printer Documenting Screens Whenever possible, choose the option Postscript when printing screens. This option gives the best printing results. Consult the manual that came with your printer to find out whether it has Postscript printing possibilities. To connect the SII (Seiko Instruments Inc.) DPU-414 thermal printer you must use the printer adapter cable PAC91. (See page 70.) Printing a Screen To print the currently displayed screen, do the following: 1 Clear the menu if you do not want to print it. 2 Display the SAVE/PRINT key labels. 3 Start printing. A message appears at the bottom of the screen indicating that the test tool is busy printing. Screens will be printed in black and white. 71
-
 1
1 -
2
-
3
-
4
-
5
-
6
-
7
-
8
-
9
-
10
-
11
-
12
-
13
-
14
-
15
-
16
-
17
-
18
-
19
-
20
-
21
-
22
-
23
-
24
-
25
-
26
-
27
-
28
-
29
-
30
-
31
-
32
-
33
-
34
-
35
-
36
-
37
-
38
-
39
-
40
-
41
-
42
-
43
-
44
-
45
-
46
-
47
-
48
-
49
-
50
-
51
-
52
-
53
-
54
-
55
-
56
-
57
-
58
-
59
-
60
-
61
-
62
-
63
-
64
-
65
-
66
-
67
-
68
-
69
-
70
-
71
-
72
-
73
-
 74
74 -
 75
75 -
 76
76 -
 77
77 -
 78
78 -
 79
79 -
 80
80 -
 81
81 -
 82
82 -
 83
83 -
 84
84 -
85
-
86
-
87
-
88
-
89
-
90
-
91
-
92
-
93
-
94
-
95
-
96
-
97
-
98
-
99
-
100
-
101
-
102
-
103
-
104
-
105
-
106
-
107
-
108
-
109
-
110
-
111
-
112
-
113
-
114
-
115
-
116
-
117
-
118
-
119
-
120
-
121
-
122
 |
 |