Garmin GPSMAP 298C Owner's Manual - Page 15
Creating Waypoints Using the Map, To create a new waypoint from a map location
 |
UPC - 753759052072
View all Garmin GPSMAP 298C manuals
Add to My Manuals
Save this manual to your list of manuals |
Page 15 highlights
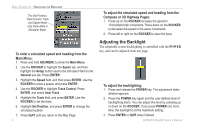
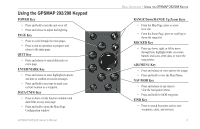
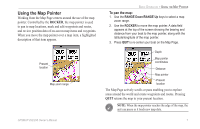
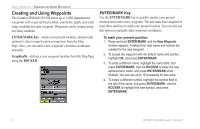
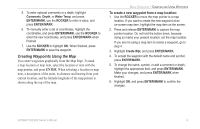
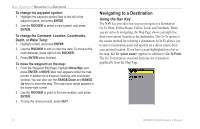
5. To enter optional comments or a depth, highlight Comments, Depth, or Water Temp, and press ENTER/MARK, use the ROCKER to enter a value, and press ENTER/MARK. 6. To manually enter a set of coordinates, highlight the coordinates, and press ENTER/MARK, use the ROCKER to enter the new coordinates, and press ENTER/MARK when finished. 7. Use the ROCKER to highlight OK. When finished, press ENTER/MARK to save the waypoint. Creating Waypoints Using the Map You create waypoints graphically from the Map Page. To mark a map location or map item, select the location or item with the map pointer, and press ENTER. When selecting a location or map item, a description of the point, its distance and bearing from your current location, and the latitude/longitude of the map pointer is shown along the top of the map. BASIC OPERATION > CREATING AND USING WAYPOINTS To create a new waypoint from a map location: 1. Use the ROCKER to move the map pointer to a map location. If you want to create the new waypoint at an on-screen map item, highlight the map item on the screen. 2. Press and release ENTER/MARK to capture the map pointer location. Do not hold the button down, because doing so marks your present location, not the map location. If you are not using a map item to create a waypoint, go to step 4. 3. Highlight Create Wpt, and press ENTER/MARK. 4. To accept the waypoint with the default name and symbol, press ENTER/MARK. 5. To change the name, symbol, or add a comment or depth, highlight the appropriate field, and press ENTER/MARK. Make your changes, and press ENTER/MARK when finished. 6. Highlight OK, and press ENTER/MARK to confirm the changes. GPSMAP 292/298 Owner's Manual 9
-
 1
1 -
2
-
3
-
4
-
5
-
6
-
7
-
8
-
9
-
 10
10 -
 11
11 -
 12
12 -
 13
13 -
 14
14 -
 15
15 -
 16
16 -
 17
17 -
 18
18 -
 19
19 -
 20
20 -
21
-
22
-
23
-
24
-
25
-
26
-
27
-
28
-
29
-
30
-
31
-
32
-
33
-
34
-
35
-
36
-
37
-
38
-
39
-
40
-
41
-
42
-
43
-
44
-
45
-
46
-
47
-
48
-
49
-
50
-
51
-
52
-
53
-
54
-
55
-
56
-
57
-
58
-
59
-
60
-
61
-
62
-
63
-
64
-
65
-
66
-
67
-
68
-
69
-
70
-
71
-
72
-
73
-
74
-
75
-
76
-
77
-
78
-
79
-
80
-
81
-
82
-
83
-
84
-
85
-
86
-
87
-
88
-
89
-
90
-
91
-
92
-
93
-
94
-
95
-
96
-
97
-
98
-
99
-
100
-
101
-
102
-
103
-
104
-
105
-
106
-
107
-
108
-
109
-
110
-
111
-
112
-
113
-
114
-
115
-
116
-
117
-
118
-
119
-
120
 |
 |
