Garmin GPSMAP 298C Owner's Manual - Page 95
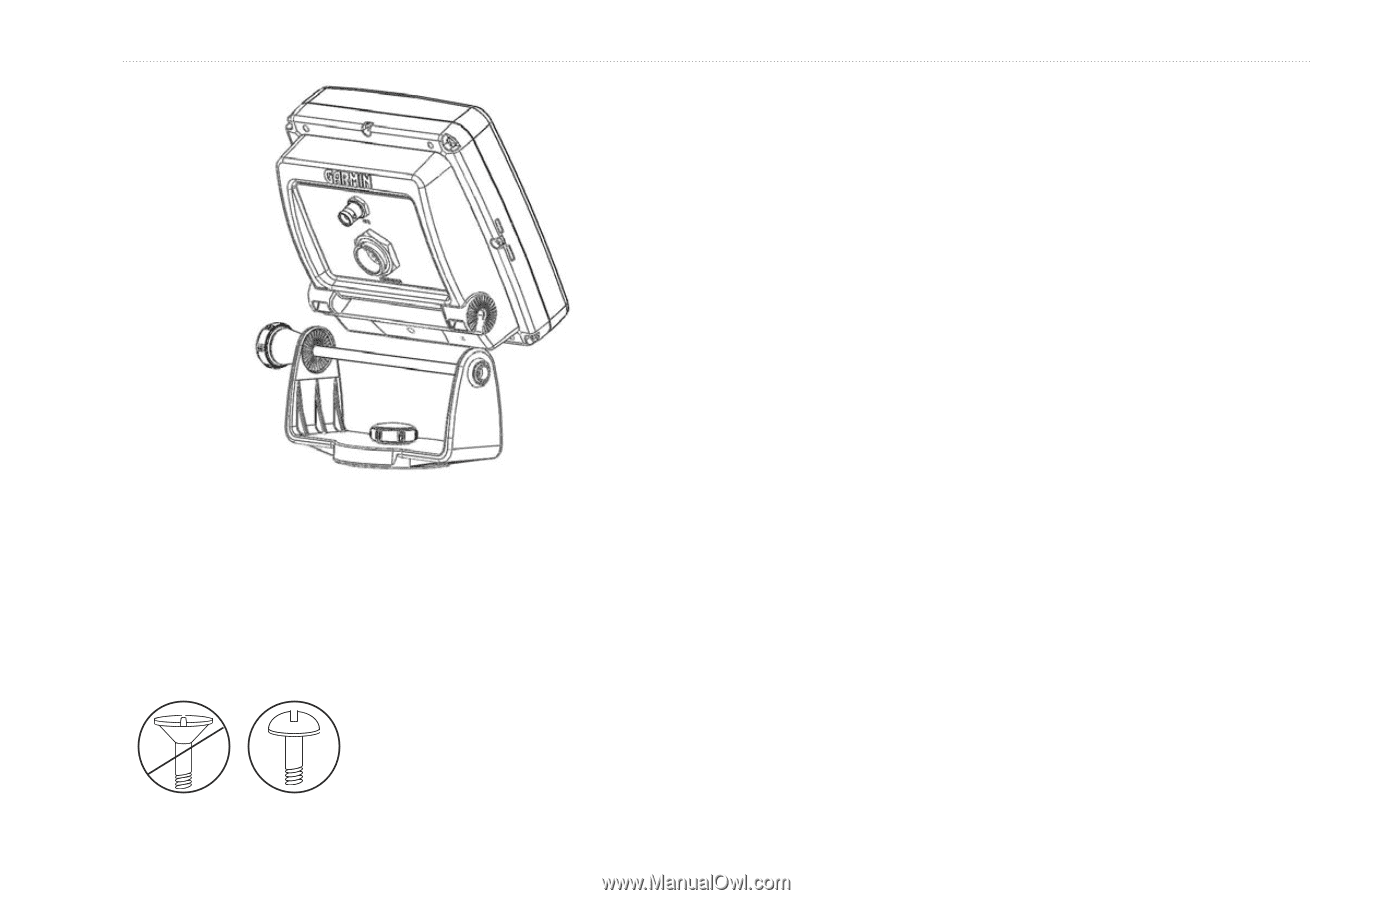
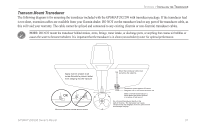
Flush Mounting the GPSMAP 292/298, External Antenna only, To install the GPSMAP 292/298 swivel base
 |
UPC - 753759052072
View all Garmin GPSMAP 298C manuals
Add to My Manuals
Save this manual to your list of manuals |
Page 95 highlights
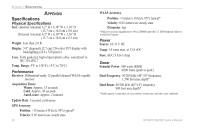
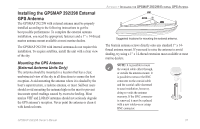
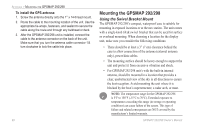
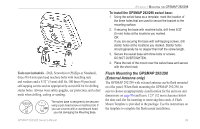
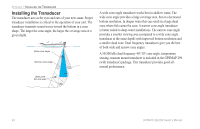
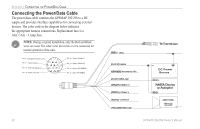
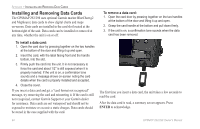
Tools (not included)-Drill, Screwdriver (Phillips or Standard), three #8 (4 mm) pan head machine bolts with matching nuts and washers and a 5/32" (5 mm) drill bit, OR three #8 pan head self-tapping screws and an appropriately-sized drill bit for drilling starter holes. Always wear safety goggles, ear protection, and a dust mask when drilling, cutting or sanding. The swivel base is designed to be secured using a pan head screw or machine bolt. If OK you use a screw with a countersunk head, you risk damaging the Mounting Base. APPENDIX > MOUNTING THE GPSMAP 292/298 To install the GPSMAP 292/298 swivel base: 1. Using the swivel base as a template, mark the location of the three holes that are used to secure the bracket to the mounting surface. 2. If securing the base with machine bolts, drill three 5/32" (5 mm) holes at the locations you marked. OR If you are securing the base with self-tapping screws, drill starter holes at the locations you marked. Starter holes should generally be no deeper than half the screw length. 3. Secure the swivel base with three bolts or screws. DO NOT OVERTIGHTEN. 4. Place the rest of the mount over the swivel base and secure with the short knob. Flush Mounting the GPSMAP 292/298 (External Antenna only) The GPSMAP 292/298 with external antenna can be flush mounted on a flat panel. When flush mounting the GPSMAP 292/298, be sure to choose an appropriately sized location for the unit (see unit dimensions on page 86) and leave 1.25" (32 mm) clearance below the data card slot for inserting or removing data cards. A Flush Mount Template is provided in the package. Use the instructions on the template to complete the flush mount installation. GPSMAP 292/298 Owner's Manual 89
-
 1
1 -
2
-
3
-
4
-
5
-
6
-
7
-
8
-
9
-
10
-
11
-
12
-
13
-
14
-
15
-
16
-
17
-
18
-
19
-
20
-
21
-
22
-
23
-
24
-
25
-
26
-
27
-
28
-
29
-
30
-
31
-
32
-
33
-
34
-
35
-
36
-
37
-
38
-
39
-
40
-
41
-
42
-
43
-
44
-
45
-
46
-
47
-
48
-
49
-
50
-
51
-
52
-
53
-
54
-
55
-
56
-
57
-
58
-
59
-
60
-
61
-
62
-
63
-
64
-
65
-
66
-
67
-
68
-
69
-
70
-
71
-
72
-
73
-
74
-
75
-
76
-
77
-
78
-
79
-
80
-
81
-
82
-
83
-
84
-
85
-
86
-
87
-
88
-
89
-
 90
90 -
 91
91 -
 92
92 -
 93
93 -
 94
94 -
 95
95 -
 96
96 -
 97
97 -
 98
98 -
 99
99 -
 100
100 -
101
-
102
-
103
-
104
-
105
-
106
-
107
-
108
-
109
-
110
-
111
-
112
-
113
-
114
-
115
-
116
-
117
-
118
-
119
-
120
 |
 |