HP 5940 User Guide - Page 51
Set the order, Print multiple s on a single sheet of paper, Print preview
 |
View all HP 5940 manuals
Add to My Manuals
Save this manual to your list of manuals |
Page 51 highlights
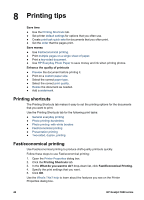
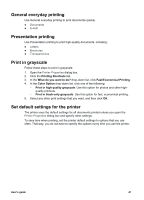
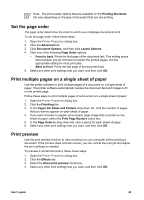
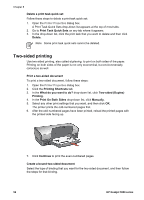
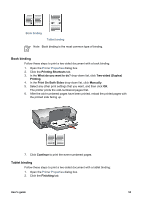
Note The print quality options that are available on the Printing Shortcuts tab vary depending on the type of document that you are printing. Set the page order The page order determines the order in which your multipage documents print. To set the page order, follow these steps: 1. Open the Printer Properties dialog box. 2. Click the Advanced tab. 3. Click Document Options, and then click Layout Options. 4. Click one of the following Page Order options: - Front to back: Prints the first page of the document last. This setting saves time because you do not have to reorder the printed pages. It is the appropriate setting for most print jobs. - Back to front: Prints the last page of the document last. 5. Select any other print settings that you want, and then click OK. Print multiple pages on a single sheet of paper Use the printer software to print multiple pages of a document on a single sheet of paper. The printer software automatically resizes the document text and images to fit on the printed page. Follow these steps to print multiple pages of a document on a single sheet of paper: 1. Open the Printer Properties dialog box. 2. Click the Finishing tab. 3. In the Pages Per Sheet and Posters drop-down list, click the number of pages that you want to appear on each sheet of paper. 4. If you want a border to appear around each page image that is printed on the sheet of paper, select the Print Page Borders check box. 5. In the Page Order Is drop-down list, click a layout for each sheet of paper. 6. Select any other print settings that you want, and then click OK. Print preview Use the print preview function to view a printout on your computer before printing a document. If the printout does not look correct, you can cancel the print job and adjust the print settings as needed. To preview a printed document, follow these steps: 1. Open the Printer Properties dialog box. 2. Click the Effects tab. 3. Select the Show print preview check box. 4. Select any other print settings that you want, and then click OK. User's guide 49
-
 1
1 -
2
-
3
-
4
-
5
-
6
-
7
-
8
-
9
-
10
-
11
-
12
-
13
-
14
-
15
-
16
-
17
-
18
-
19
-
20
-
21
-
22
-
23
-
24
-
25
-
26
-
27
-
28
-
29
-
30
-
31
-
32
-
33
-
34
-
35
-
36
-
37
-
38
-
39
-
40
-
41
-
42
-
43
-
44
-
45
-
 46
46 -
 47
47 -
 48
48 -
 49
49 -
 50
50 -
 51
51 -
 52
52 -
 53
53 -
 54
54 -
 55
55 -
 56
56 -
57
-
58
-
59
-
60
-
61
-
62
-
63
-
64
-
65
-
66
-
67
-
68
-
69
-
70
-
71
-
72
-
73
-
74
-
75
-
76
-
77
-
78
-
79
-
80
-
81
-
82
-
83
-
84
-
85
-
86
-
87
-
88
-
89
-
90
-
91
-
92
-
93
-
94
-
95
-
96
-
97
-
98
-
99
-
100
-
101
-
102
 |
 |
