HP 5940 User Guide - Page 52
Set a custom paper size, Select a paper type, Print to HP Deskjet - paper sensor
 |
View all HP 5940 manuals
Add to My Manuals
Save this manual to your list of manuals |
Page 52 highlights
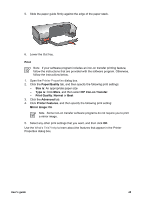
Chapter 8 Before the document prints, a preview appears. 5. Do one of the following: - Click File and then click Print to HP Deskjet to print the document. - Click File and then click Cancel Printing to cancel the print job. Adjust the print settings as needed before trying to print the document again. Set a custom paper size Use the Custom paper size dialog box to print on a special paper size. Note This feature is not available for all paper types. Follow these steps to define a custom paper size: 1. Open the Printer Properties dialog box. 2. Click the Paper/Quality tab. 3. Click the Custom button. The Custom paper size dialog box appears. 4. In the Name drop-down list, click a custom paper size name. 5. Type the paper dimensions in the Width and Length boxes. The minimum and maximum dimensions appear beneath each of the boxes. 6. Click the unit of measurement: Inches or Millimeters. 7. Click Save to save the custom paper size. 8. Click OK to exit the Custom Paper Size dialog box. Select a paper type To determine the paper type used for a printing job, select Automatic to use the automatic paper-type sensor or select a specific paper type. Use the automatic paper-type sensor Automatic is the default paper-type setting. When it is used, the auto paper-type sensor automatically selects the print settings that are appropriate for the media that you are printing, particularly when HP paper and media are used. Follow these steps to use the auto paper-type sensor: 1. Open the Printer Properties dialog box. 2. Click the Printing Shortcuts tab. 3. In the Paper type drop-down list, click Automatic. 4. Select any other print settings that you want, and then click OK. Note Do not use the Automatic setting for high-quality printouts. Instead, select a specific paper type. Select a specific paper type When printing a higher-quality document, HP recommends that you select a specific paper type. 50 HP Deskjet 5900 series
-
 1
1 -
2
-
3
-
4
-
5
-
6
-
7
-
8
-
9
-
10
-
11
-
12
-
13
-
14
-
15
-
16
-
17
-
18
-
19
-
20
-
21
-
22
-
23
-
24
-
25
-
26
-
27
-
28
-
29
-
30
-
31
-
32
-
33
-
34
-
35
-
36
-
37
-
38
-
39
-
40
-
41
-
42
-
43
-
44
-
45
-
46
-
 47
47 -
 48
48 -
 49
49 -
 50
50 -
 51
51 -
 52
52 -
 53
53 -
 54
54 -
 55
55 -
 56
56 -
 57
57 -
58
-
59
-
60
-
61
-
62
-
63
-
64
-
65
-
66
-
67
-
68
-
69
-
70
-
71
-
72
-
73
-
74
-
75
-
76
-
77
-
78
-
79
-
80
-
81
-
82
-
83
-
84
-
85
-
86
-
87
-
88
-
89
-
90
-
91
-
92
-
93
-
94
-
95
-
96
-
97
-
98
-
99
-
100
-
101
-
102
 |
 |
