HP 5940 User Guide - Page 57
Resize a document, Watermarks, Print on a different paper size, Effects, Print document on, Objective
 |
View all HP 5940 manuals
Add to My Manuals
Save this manual to your list of manuals |
Page 57 highlights
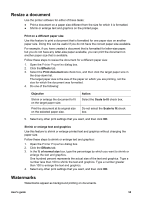
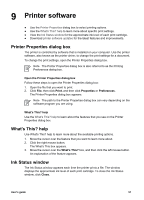
Resize a document Use the printer software for either of these tasks: ● Print a document on a paper size different from the size for which it is formatted. ● Shrink or enlarge text and graphics on the printed page. Print on a different paper size Use this feature to print a document that is formatted for one paper size on another paper size. Doing this can be useful if you do not have the correct paper size available. For example, if you have created a document that is formatted for letter-size paper, but you do not have any letter-size paper available, you can print the document on another paper size that is available. Follow these steps to resize the document for a different paper size: 1. Open the Printer Properties dialog box. 2. Click the Effects tab. 3. Select the Print document on check box, and then click the target paper size in the drop-down list. The target paper size is the size of the paper on which you are printing, not the size for which the document was formatted. 4. Do one of the following: Objective Shrink or enlarge the document to fit on the target paper size. Print the document at its original size on the selected paper size. Action Select the Scale to fit check box. Do not select the Scale to fit check box. 5. Select any other print settings that you want, and then click OK. Shrink or enlarge text and graphics Use this feature to shrink or enlarge printed text and graphics without changing the paper size. Follow these steps to shrink or enlarge text and graphics: 1. Open the Printer Properties dialog box. 2. Click the Effects tab. 3. In the % of normal size box, type the percentage by which you want to shrink or enlarge the text and graphics. One hundred percent represents the actual size of the text and graphics. Type a number less than 100 to shrink the text and graphics. Type a number greater than 100 to enlarge the text and graphics. 4. Select any other print settings that you want, and then click OK. Watermarks Watermarks appear as background printing on documents. User's guide 55
-
 1
1 -
2
-
3
-
4
-
5
-
6
-
7
-
8
-
9
-
10
-
11
-
12
-
13
-
14
-
15
-
16
-
17
-
18
-
19
-
20
-
21
-
22
-
23
-
24
-
25
-
26
-
27
-
28
-
29
-
30
-
31
-
32
-
33
-
34
-
35
-
36
-
37
-
38
-
39
-
40
-
41
-
42
-
43
-
44
-
45
-
46
-
47
-
48
-
49
-
50
-
51
-
 52
52 -
 53
53 -
 54
54 -
 55
55 -
 56
56 -
 57
57 -
 58
58 -
 59
59 -
 60
60 -
 61
61 -
 62
62 -
63
-
64
-
65
-
66
-
67
-
68
-
69
-
70
-
71
-
72
-
73
-
74
-
75
-
76
-
77
-
78
-
79
-
80
-
81
-
82
-
83
-
84
-
85
-
86
-
87
-
88
-
89
-
90
-
91
-
92
-
93
-
94
-
95
-
96
-
97
-
98
-
99
-
100
-
101
-
102
 |
 |
