HP LaserJet Enterprise 600 HP LaserJet Enterprise 600 M601, M602, and M603 Ser - Page 118
Inspect the print cartridge for damage, If you see any scratches, fingerprints
 |
View all HP LaserJet Enterprise 600 manuals
Add to My Manuals
Save this manual to your list of manuals |
Page 118 highlights
Inspect the print cartridge for damage 1. Remove the print cartridge from the product, and verify that the sealing tape has been removed. 2. Check the memory chip for damage. 3. Examine the surface of the green imaging drum on the bottom of the print cartridge. CAUTION: Do not touch the green roller (imaging drum) on the bottom of the cartridge. Fingerprints on the imaging drum can cause print-quality problems. 4. If you see any scratches, fingerprints, or other damage on the imaging drum, replace the print cartridge. 5. If the imaging drum does not appear to be damaged, rock the print cartridge gently several times and reinstall it. Print a few pages to see if the problem has resolved. 102 Chapter 7 Print cartridges ENWW
-
 1
1 -
2
-
3
-
4
-
5
-
6
-
7
-
8
-
9
-
10
-
11
-
12
-
13
-
14
-
15
-
16
-
17
-
18
-
19
-
20
-
21
-
22
-
23
-
24
-
25
-
26
-
27
-
28
-
29
-
30
-
31
-
32
-
33
-
34
-
35
-
36
-
37
-
38
-
39
-
40
-
41
-
42
-
43
-
44
-
45
-
46
-
47
-
48
-
49
-
50
-
51
-
52
-
53
-
54
-
55
-
56
-
57
-
58
-
59
-
60
-
61
-
62
-
63
-
64
-
65
-
66
-
67
-
68
-
69
-
70
-
71
-
72
-
73
-
74
-
75
-
76
-
77
-
78
-
79
-
80
-
81
-
82
-
83
-
84
-
85
-
86
-
87
-
88
-
89
-
90
-
91
-
92
-
93
-
94
-
95
-
96
-
97
-
98
-
99
-
100
-
101
-
102
-
103
-
104
-
105
-
106
-
107
-
108
-
109
-
110
-
111
-
112
-
 113
113 -
 114
114 -
 115
115 -
 116
116 -
 117
117 -
 118
118 -
 119
119 -
 120
120 -
 121
121 -
 122
122 -
 123
123 -
124
-
125
-
126
-
127
-
128
-
129
-
130
-
131
-
132
-
133
-
134
-
135
-
136
-
137
-
138
-
139
-
140
-
141
-
142
-
143
-
144
-
145
-
146
-
147
-
148
-
149
-
150
-
151
-
152
-
153
-
154
-
155
-
156
-
157
-
158
-
159
-
160
-
161
-
162
-
163
-
164
-
165
-
166
-
167
-
168
-
169
-
170
-
171
-
172
-
173
-
174
-
175
-
176
-
177
-
178
-
179
-
180
-
181
-
182
-
183
-
184
-
185
-
186
-
187
-
188
-
189
-
190
-
191
-
192
-
193
-
194
-
195
-
196
-
197
-
198
-
199
-
200
-
201
-
202
-
203
-
204
-
205
-
206
-
207
-
208
-
209
-
210
-
211
-
212
-
213
-
214
-
215
-
216
-
217
-
218
-
219
-
220
-
221
-
222
-
223
-
224
-
225
-
226
-
227
-
228
-
229
-
230
-
231
-
232
-
233
-
234
-
235
-
236
-
237
-
238
-
239
-
240
-
241
-
242
-
243
-
244
-
245
-
246
-
247
-
248
-
249
-
250
-
251
-
252
-
253
-
254
-
255
-
256
-
257
-
258
-
259
-
260
-
261
-
262
-
263
-
264
 |
 |
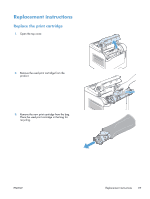
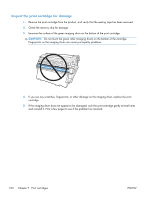
Inspect the print cartridge for damage
1.
Remove the print cartridge from the product, and verify that the sealing tape has been removed.
2.
Check the memory chip for damage.
3.
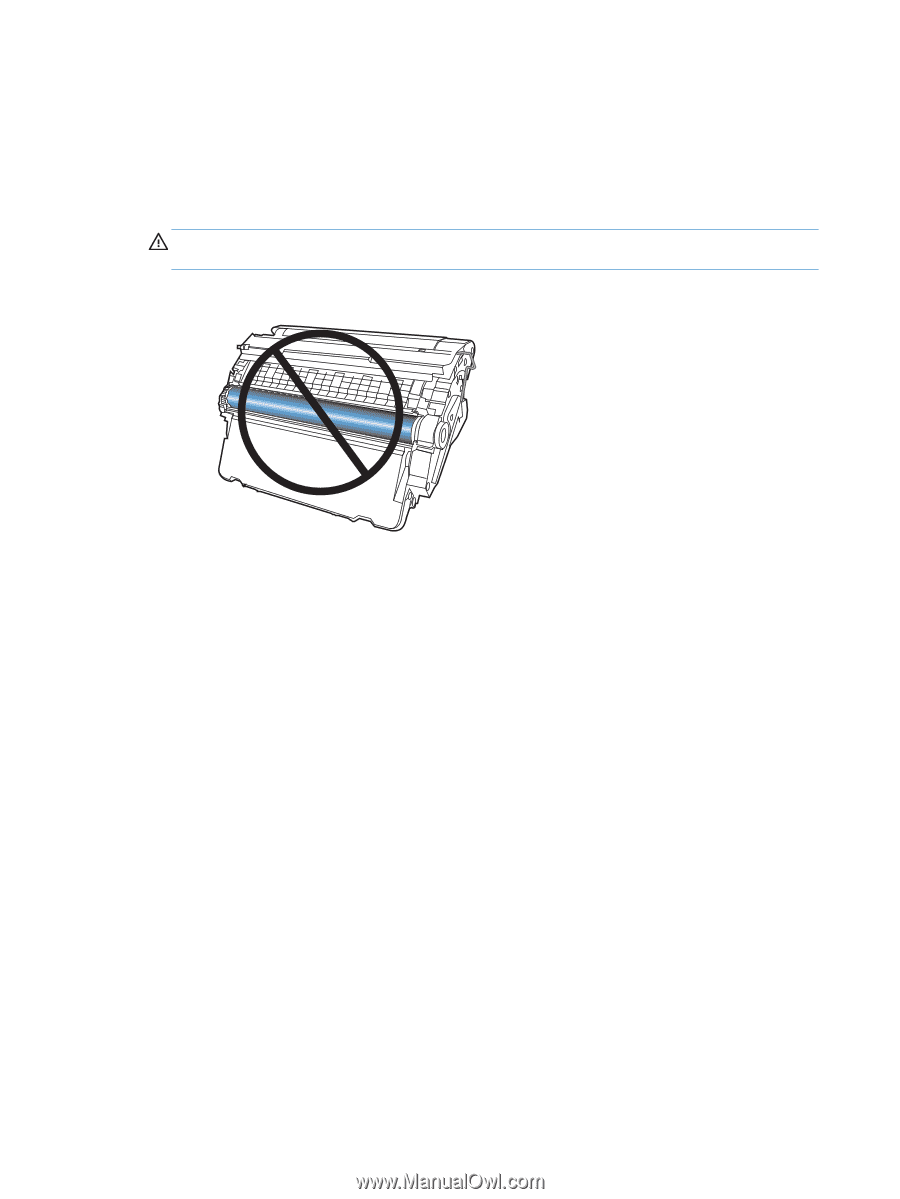
Examine the surface of the green imaging drum on the bottom of the print cartridge.
CAUTION:
Do not touch the green roller (imaging drum) on the bottom of the cartridge.
Fingerprints on the imaging drum can cause print-quality problems.
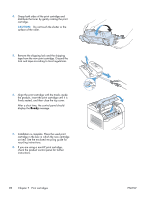
4.
If you see any scratches, fingerprints, or other damage on the imaging drum, replace the print
cartridge.
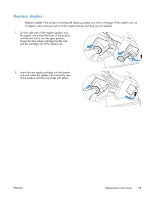
5.
If the imaging drum does not appear to be damaged, rock the print cartridge gently several times
and reinstall it. Print a few pages to see if the problem has resolved.
102
Chapter 7
Print cartridges
ENWW