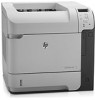
HP LaserJet Enterprise 600 HP LaserJet Enterprise 600 M601, M602, and M603 Ser - Page 70
Basic print tasks with Mac, Cancel a print job with Mac, Change the paper size and type with Mac
 |
View all HP LaserJet Enterprise 600 manuals
Add to My Manuals
Save this manual to your list of manuals |
Page 70 highlights
Basic print tasks with Mac Cancel a print job with Mac 1. If the print job is currently printing, cancel it by following this procedure: a. Press the Stop button on the product control panel. b. The product prompts you to confirm the deletion. Press the OK button. 2. You can also cancel a print job from a software program or a print queue. ● Software program: Typically, a dialog box appears briefly on the computer screen, allowing you to cancel the print job. ● Mac print queue: Open the print queue by double-clicking the product icon in the Dock. Highlight the print job, and then click the Delete button. Change the paper size and type with Mac 1. On the File menu in the software program, click the Print option. 2. In the Copies & Pages menu, click the Page Setup button. 3. Select a size from the Paper Size drop-down list, and then click the OK button. 4. Open the Finishing menu. 5. Select a type from the Media-type drop-down list. 6. Click the Print button. Resize documents or print on a custom paper size with Mac Mac OS X 10.5 and 10.6 Use one of these methods. 1. On the File menu, click the Print option. 2. Click the Page Setup button. 3. Select the product, and then select the correct settings for the Paper Size and Orientation options. 1. On the File menu, click the Print option. 2. Open the Paper Handling menu. 3. In the Destination Paper Size area, click the Scale to fit paper size box, and then select the size from the drop-down list. Create and use printing presets with Mac Use printing presets to save the current printer driver settings for reuse. 54 Chapter 4 Use the product with Mac ENWW
-
 1
1 -
2
-
3
-
4
-
5
-
6
-
7
-
8
-
9
-
10
-
11
-
12
-
13
-
14
-
15
-
16
-
17
-
18
-
19
-
20
-
21
-
22
-
23
-
24
-
25
-
26
-
27
-
28
-
29
-
30
-
31
-
32
-
33
-
34
-
35
-
36
-
37
-
38
-
39
-
40
-
41
-
42
-
43
-
44
-
45
-
46
-
47
-
48
-
49
-
50
-
51
-
52
-
53
-
54
-
55
-
56
-
57
-
58
-
59
-
60
-
61
-
62
-
63
-
64
-
 65
65 -
 66
66 -
 67
67 -
 68
68 -
 69
69 -
 70
70 -
 71
71 -
 72
72 -
 73
73 -
 74
74 -
 75
75 -
76
-
77
-
78
-
79
-
80
-
81
-
82
-
83
-
84
-
85
-
86
-
87
-
88
-
89
-
90
-
91
-
92
-
93
-
94
-
95
-
96
-
97
-
98
-
99
-
100
-
101
-
102
-
103
-
104
-
105
-
106
-
107
-
108
-
109
-
110
-
111
-
112
-
113
-
114
-
115
-
116
-
117
-
118
-
119
-
120
-
121
-
122
-
123
-
124
-
125
-
126
-
127
-
128
-
129
-
130
-
131
-
132
-
133
-
134
-
135
-
136
-
137
-
138
-
139
-
140
-
141
-
142
-
143
-
144
-
145
-
146
-
147
-
148
-
149
-
150
-
151
-
152
-
153
-
154
-
155
-
156
-
157
-
158
-
159
-
160
-
161
-
162
-
163
-
164
-
165
-
166
-
167
-
168
-
169
-
170
-
171
-
172
-
173
-
174
-
175
-
176
-
177
-
178
-
179
-
180
-
181
-
182
-
183
-
184
-
185
-
186
-
187
-
188
-
189
-
190
-
191
-
192
-
193
-
194
-
195
-
196
-
197
-
198
-
199
-
200
-
201
-
202
-
203
-
204
-
205
-
206
-
207
-
208
-
209
-
210
-
211
-
212
-
213
-
214
-
215
-
216
-
217
-
218
-
219
-
220
-
221
-
222
-
223
-
224
-
225
-
226
-
227
-
228
-
229
-
230
-
231
-
232
-
233
-
234
-
235
-
236
-
237
-
238
-
239
-
240
-
241
-
242
-
243
-
244
-
245
-
246
-
247
-
248
-
249
-
250
-
251
-
252
-
253
-
254
-
255
-
256
-
257
-
258
-
259
-
260
-
261
-
262
-
263
-
264
 |
 |
