HP LaserJet Enterprise 600 HP LaserJet Enterprise 600 M601, M602, and M603 Ser - Page 178
Check DIMM installation, Memory allocation
 |
View all HP LaserJet Enterprise 600 manuals
Add to My Manuals
Save this manual to your list of manuals |
Page 178 highlights
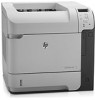
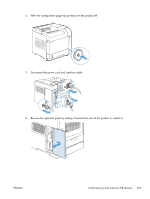
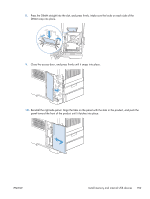
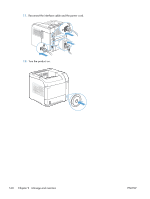
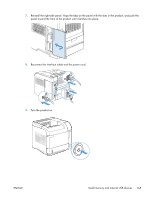
Check DIMM installation After installing the DIMM, make sure that the installation was successful. 1. Turn the product on. Check that the Ready light is illuminated after the product has gone through the startup sequence. If an error message appears, a DIMM might have been incorrectly installed. 2. Print a configuration page. 3. Check the memory section on the configuration page and compare it to the configuration page that was printed before the memory installation. If the amount of memory has not increased, the DIMM might not be installed correctly, or the DIMM might be defective. Repeat the installation procedure. If necessary, install a different DIMM. NOTE: If you installed a product language (personality), check the "Installed Personalities and Options" section on the configuration page. This area should list the new product language. Memory allocation Utilities or jobs that you download to the product sometimes include resources (for example, fonts, macros, or patterns). Resources that are internally marked as permanent remain in the product memory until you turn the product off. Use the following guidelines if you use the page description language (PDL) ability to mark resources as permanent. For technical details, see an appropriate PDL reference for PCL or PS. ● Mark resources as permanent only when it is absolutely necessary that they remain in memory while the product is turned on. ● Send permanent resources to the product only at the beginning of a print job and not while the product is printing. NOTE: Overusing permanent resources or downloading them while the product is printing might affect product performance or the ability to print complex pages. 162 Chapter 9 Manage and maintain ENWW
-
 1
1 -
2
-
3
-
4
-
5
-
6
-
7
-
8
-
9
-
10
-
11
-
12
-
13
-
14
-
15
-
16
-
17
-
18
-
19
-
20
-
21
-
22
-
23
-
24
-
25
-
26
-
27
-
28
-
29
-
30
-
31
-
32
-
33
-
34
-
35
-
36
-
37
-
38
-
39
-
40
-
41
-
42
-
43
-
44
-
45
-
46
-
47
-
48
-
49
-
50
-
51
-
52
-
53
-
54
-
55
-
56
-
57
-
58
-
59
-
60
-
61
-
62
-
63
-
64
-
65
-
66
-
67
-
68
-
69
-
70
-
71
-
72
-
73
-
74
-
75
-
76
-
77
-
78
-
79
-
80
-
81
-
82
-
83
-
84
-
85
-
86
-
87
-
88
-
89
-
90
-
91
-
92
-
93
-
94
-
95
-
96
-
97
-
98
-
99
-
100
-
101
-
102
-
103
-
104
-
105
-
106
-
107
-
108
-
109
-
110
-
111
-
112
-
113
-
114
-
115
-
116
-
117
-
118
-
119
-
120
-
121
-
122
-
123
-
124
-
125
-
126
-
127
-
128
-
129
-
130
-
131
-
132
-
133
-
134
-
135
-
136
-
137
-
138
-
139
-
140
-
141
-
142
-
143
-
144
-
145
-
146
-
147
-
148
-
149
-
150
-
151
-
152
-
153
-
154
-
155
-
156
-
157
-
158
-
159
-
160
-
161
-
162
-
163
-
164
-
165
-
166
-
167
-
168
-
169
-
170
-
171
-
172
-
 173
173 -
 174
174 -
 175
175 -
 176
176 -
 177
177 -
 178
178 -
 179
179 -
 180
180 -
 181
181 -
 182
182 -
 183
183 -
184
-
185
-
186
-
187
-
188
-
189
-
190
-
191
-
192
-
193
-
194
-
195
-
196
-
197
-
198
-
199
-
200
-
201
-
202
-
203
-
204
-
205
-
206
-
207
-
208
-
209
-
210
-
211
-
212
-
213
-
214
-
215
-
216
-
217
-
218
-
219
-
220
-
221
-
222
-
223
-
224
-
225
-
226
-
227
-
228
-
229
-
230
-
231
-
232
-
233
-
234
-
235
-
236
-
237
-
238
-
239
-
240
-
241
-
242
-
243
-
244
-
245
-
246
-
247
-
248
-
249
-
250
-
251
-
252
-
253
-
254
-
255
-
256
-
257
-
258
-
259
-
260
-
261
-
262
-
263
-
264
 |
 |