Konica Minolta bizhub PRESS C6000 IC-601 Job Centro User Guide - Page 68
Delete Rotate Insert Blank
 |
View all Konica Minolta bizhub PRESS C6000 manuals
Add to My Manuals
Save this manual to your list of manuals |
Page 68 highlights
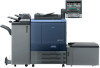
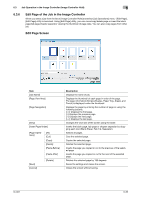
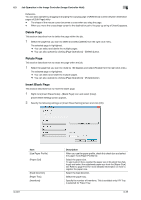
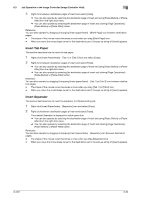
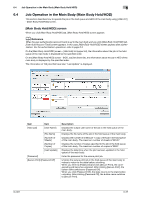
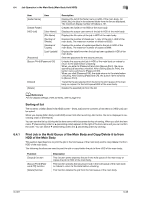
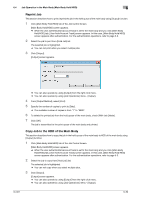
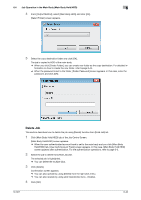
6.3 Job Operation in the Image Controller (Image Controller Hold) 6 Reference You can also operate by dragging & dropping the copying page of [Reference] screen between destination pages of [Edit Page] utility - The shape of the mouse cursor becomes a cross when you drag the page. - When you move the cross shape cursor to the destination point, the pop-up string of [Insert] appears. Delete Page This section describes how to delete the page within the job. 1 Select the page that you want to delete and select [Delete] from the right click menu. The selected page is highlighted. % You can select and delete the multiple pages. % You can also operate by clicking [Page Operations] - [Delete] button. Rotate Page This section describes how to rotate the page within the job. 1 Select the page that you want to rotate by 180 degrees and select [Rotate] from the right click menu. The selected page is highlighted. % You can select and rotate the multiple pages. % You can also operate by clicking [Page Operations] - [Rotate] button. Insert Blank Page This section describes how to insert the blank page. 1 Right click [Insert Paper/Index] - [Blank Page] icon and select [Copy]. [Insert Sheet Setting] screen appears. 2 Specify the following settings on [Insert Sheet Setting] screen and click [OK]. Item [Use Paper Profile] [Paper Size] [Feed Direction] [Paper Tray] [Insertions] IC-601 Description When you use the paper profile, check this check box and select the paper from [Paper Profile] list. Select the paper size. To use Custom Size, register the paper size in [Custom Size Settings] and select the registered paper size from the [Paper Size] list. Refer to page 6-23 for more detailed information on how to register the paper size. Select the feed direction. Select the paper tray. Specify the number of insertions. This is available only if PI Tray is selected for Paper Tray. 6-35
-
 1
1 -
2
-
3
-
4
-
5
-
6
-
7
-
8
-
9
-
10
-
11
-
12
-
13
-
14
-
15
-
16
-
17
-
18
-
19
-
20
-
21
-
22
-
23
-
24
-
25
-
26
-
27
-
28
-
29
-
30
-
31
-
32
-
33
-
34
-
35
-
36
-
37
-
38
-
39
-
40
-
41
-
42
-
43
-
44
-
45
-
46
-
47
-
48
-
49
-
50
-
51
-
52
-
53
-
54
-
55
-
56
-
57
-
58
-
59
-
60
-
61
-
62
-
 63
63 -
 64
64 -
 65
65 -
 66
66 -
 67
67 -
 68
68 -
 69
69 -
 70
70 -
 71
71 -
 72
72 -
 73
73 -
74
-
75
-
76
-
77
-
78
-
79
-
80
-
81
-
82
-
83
-
84
-
85
-
86
-
87
-
88
-
89
-
90
-
91
-
92
 |
 |