Konica Minolta bizhub C650 bizhub C650 Print Operations User Guide - Page 273
Print/Fax Output Setting
 |
View all Konica Minolta bizhub C650 manuals
Add to My Manuals
Save this manual to your list of manuals |
Page 273 highlights
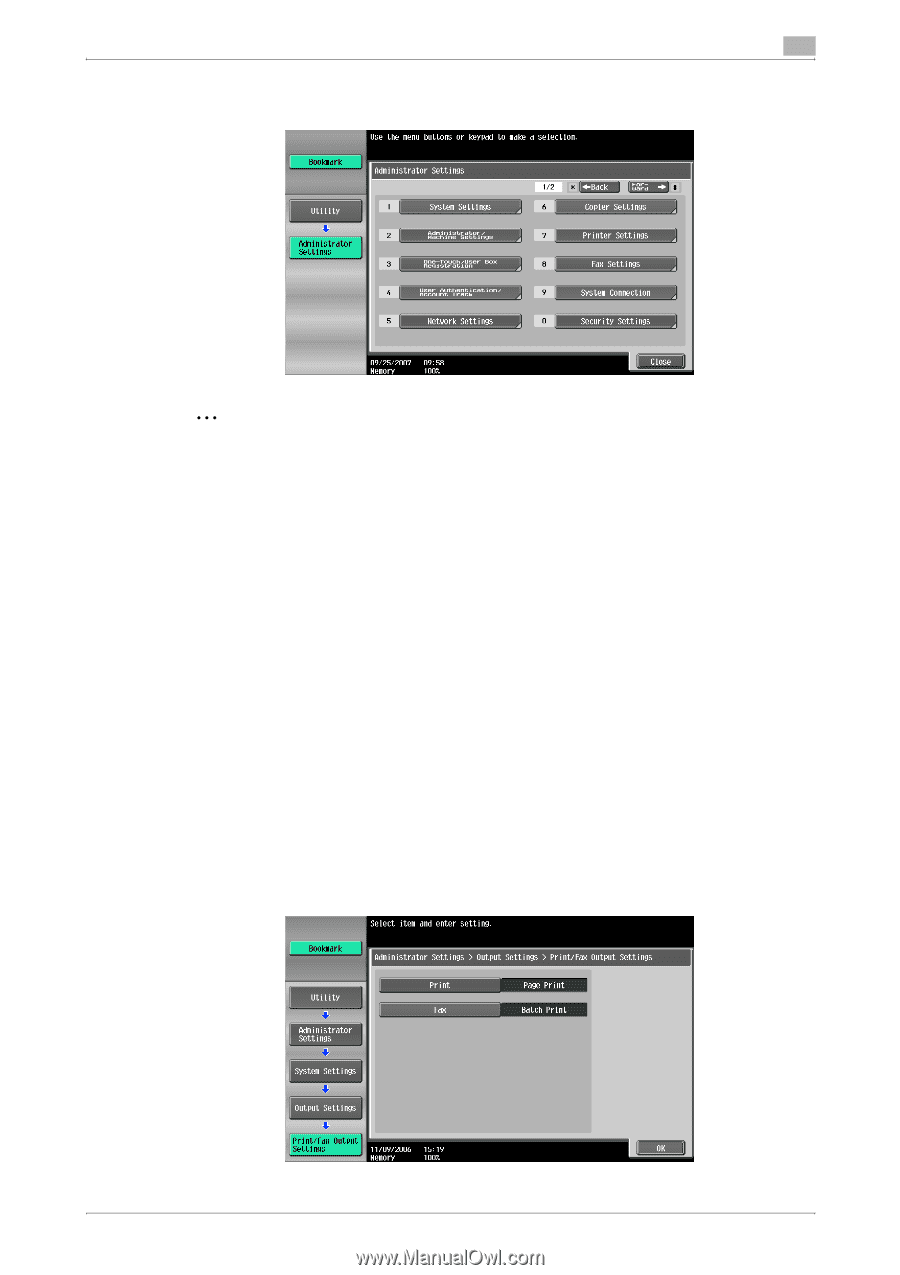
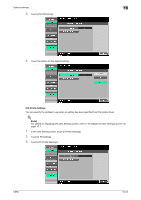
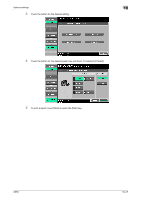
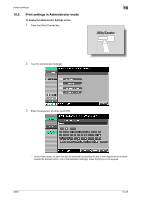
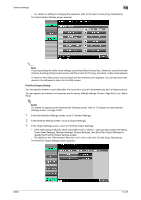
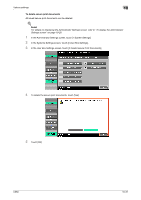
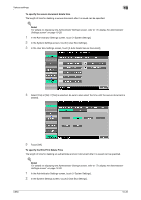
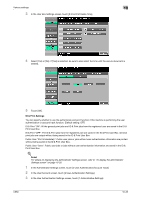
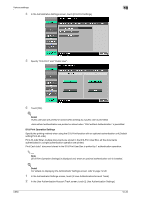
Various settings 10 - For details on setting or changing the password, refer to the User's Guide [Copy Operations]. The Administrator Settings screen appears. 2 Note To quit specifying the Utility mode settings, press the [Utility/Counter] key. Otherwise, cancel the Utility mode by touching [Close] in each screen until the screen for the Copy, Fax/Scan, or Box mode appears. To return to the Utility screen, touch [Close] until the desired screen appears. You can also touch the menus in the left panel to return to the Utility screen. Print/Fax Output Setting You can specify whether to print data after it is received or to print it simultaneously as it is being received. You can specify this function for the printer and for faxing. (Default settings: Printer - Page Print; Fax - Batch Print) ! Detail For details on displaying the Administrator Settings screen, refer to "To display the Administrator Settings screen" on page 10-28. 1 In the Administrator Settings screen, touch [1 System Settings]. 2 In the Systems Settings screen, touch [2 Output Settings]. 3 In the Output Settings screen, touch [1 Print/Fax Output Settings]. - If the "Administrator Security Level" parameter is set to "Level 2", users can also specify this setting. Touch [User Settings], [System Settings], [Output Settings], then [Print/Fax Output Settings] to display the Print/Fax Output Settings screen. - For details on the "Administrator Security Level" refer to the User's Guide [Copy Operations]. The Print/Fax Output Settings screen appears. C650 10-29
-
 1
1 -
2
-
3
-
4
-
5
-
6
-
7
-
8
-
9
-
10
-
11
-
12
-
13
-
14
-
15
-
16
-
17
-
18
-
19
-
20
-
21
-
22
-
23
-
24
-
25
-
26
-
27
-
28
-
29
-
30
-
31
-
32
-
33
-
34
-
35
-
36
-
37
-
38
-
39
-
40
-
41
-
42
-
43
-
44
-
45
-
46
-
47
-
48
-
49
-
50
-
51
-
52
-
53
-
54
-
55
-
56
-
57
-
58
-
59
-
60
-
61
-
62
-
63
-
64
-
65
-
66
-
67
-
68
-
69
-
70
-
71
-
72
-
73
-
74
-
75
-
76
-
77
-
78
-
79
-
80
-
81
-
82
-
83
-
84
-
85
-
86
-
87
-
88
-
89
-
90
-
91
-
92
-
93
-
94
-
95
-
96
-
97
-
98
-
99
-
100
-
101
-
102
-
103
-
104
-
105
-
106
-
107
-
108
-
109
-
110
-
111
-
112
-
113
-
114
-
115
-
116
-
117
-
118
-
119
-
120
-
121
-
122
-
123
-
124
-
125
-
126
-
127
-
128
-
129
-
130
-
131
-
132
-
133
-
134
-
135
-
136
-
137
-
138
-
139
-
140
-
141
-
142
-
143
-
144
-
145
-
146
-
147
-
148
-
149
-
150
-
151
-
152
-
153
-
154
-
155
-
156
-
157
-
158
-
159
-
160
-
161
-
162
-
163
-
164
-
165
-
166
-
167
-
168
-
169
-
170
-
171
-
172
-
173
-
174
-
175
-
176
-
177
-
178
-
179
-
180
-
181
-
182
-
183
-
184
-
185
-
186
-
187
-
188
-
189
-
190
-
191
-
192
-
193
-
194
-
195
-
196
-
197
-
198
-
199
-
200
-
201
-
202
-
203
-
204
-
205
-
206
-
207
-
208
-
209
-
210
-
211
-
212
-
213
-
214
-
215
-
216
-
217
-
218
-
219
-
220
-
221
-
222
-
223
-
224
-
225
-
226
-
227
-
228
-
229
-
230
-
231
-
232
-
233
-
234
-
235
-
236
-
237
-
238
-
239
-
240
-
241
-
242
-
243
-
244
-
245
-
246
-
247
-
248
-
249
-
250
-
251
-
252
-
253
-
254
-
255
-
256
-
257
-
258
-
259
-
260
-
261
-
262
-
263
-
264
-
265
-
266
-
267
-
 268
268 -
 269
269 -
 270
270 -
 271
271 -
 272
272 -
 273
273 -
 274
274 -
 275
275 -
 276
276 -
 277
277 -
 278
278 -
279
-
280
-
281
-
282
-
283
-
284
-
285
-
286
-
287
-
288
-
289
-
290
-
291
-
292
-
293
-
294
-
295
-
296
-
297
-
298
-
299
-
300
-
301
-
302
-
303
 |
 |