Lexmark Optra S 1620 User's Guide (7.1 MB) - Page 207
Paper Jam, Remove Cartridge, Jam Recovery, Open Rear Door, Check Duplex, 24x Paper Jam, Check Tray x
 |
View all Lexmark Optra S 1620 manuals
Add to My Manuals
Save this manual to your list of manuals |
Page 207 highlights
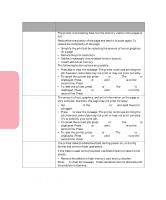
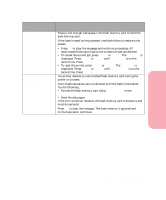
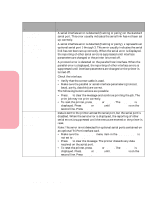
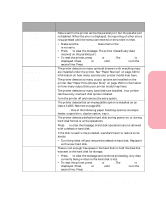
Caring for Your Printer Understanding Printer Messages Attendance Message 201 Paper Jam Remove Cartridge 202 Paper Jam Open Rear Door 230 Paper Jam Check Duplex 24x Paper Jam Check Tray x 250 Paper Jam Check MP Feeder Meaning and Required Action The printer detects a paper jam under the printer cartridge and further back in the printer. Open the upper front door, remove the print cartridge, and remove the jammed print material. Reinstall the cartridge and close the door. See "200 and 201 Paper Jam - Remove Cartridge" on page 212 for more information. Press Go to resume printing. The printer prints a new copy of the page that jammed if Jam Recovery is set to On or Auto. The printer detects a paper jam behind the printer rear door. Open the printer rear door and remove the jammed print material. Close the printer rear door. See "202 Paper Jam - Open Rear Door" on page 214 for more information. Press Go to resume printing. The printer prints a new copy of the page that jammed if Jam Recovery is set to On or Auto. The printer detects a paper jam in the duplex option. Remove the duplex front access cover. Remove the jammed print material if it is visible. If not, replace the duplex front access cover. Open the duplex rear door. Remove the jammed print material. Close the duplex rear door. Occasionally, print material may jam as it enters the duplex option. In this case, most of the print material is visible from the rear of the printer. Open the printer rear door and remove the jammed print material. Close the printer rear door. See "230 Paper Jam - Check Duplex" on page 218 for more information. Press Go to resume printing. The printer prints a new copy of the page that jammed if Jam Recovery is set to On or Auto. The printer detects a paper jam in the paper path of one of the paper trays. x represents the tray with the jam. Open Tray x and remove the jammed print material. If the tray is difficult to remove, remove the trays above and below this tray to access the jammed print material. See "24x Paper Jam - Check Tray x" on page 224 for more information. Press Go to resume printing. The printer prints a new copy of the page that jammed if Jam Recovery is set to On or Auto. The printer detects a paper jam in the multipurpose feeder. If the paper is visible from the front of the multipurpose feeder, pull it out. If only a small portion is visible, open the upper front door, remove the print cartridge, and remove the jammed print material. Reinstall the cartridge and close the door. See "250 Paper Jam - Check MP Feeder" on page 234 for more information. Press Go to resume printing. The printer prints a new copy of the page that jammed if Jam Recovery is set to On or Auto. 191 Understanding Printer Messages
-
 1
1 -
2
-
3
-
4
-
5
-
6
-
7
-
8
-
9
-
10
-
11
-
12
-
13
-
14
-
15
-
16
-
17
-
18
-
19
-
20
-
21
-
22
-
23
-
24
-
25
-
26
-
27
-
28
-
29
-
30
-
31
-
32
-
33
-
34
-
35
-
36
-
37
-
38
-
39
-
40
-
41
-
42
-
43
-
44
-
45
-
46
-
47
-
48
-
49
-
50
-
51
-
52
-
53
-
54
-
55
-
56
-
57
-
58
-
59
-
60
-
61
-
62
-
63
-
64
-
65
-
66
-
67
-
68
-
69
-
70
-
71
-
72
-
73
-
74
-
75
-
76
-
77
-
78
-
79
-
80
-
81
-
82
-
83
-
84
-
85
-
86
-
87
-
88
-
89
-
90
-
91
-
92
-
93
-
94
-
95
-
96
-
97
-
98
-
99
-
100
-
101
-
102
-
103
-
104
-
105
-
106
-
107
-
108
-
109
-
110
-
111
-
112
-
113
-
114
-
115
-
116
-
117
-
118
-
119
-
120
-
121
-
122
-
123
-
124
-
125
-
126
-
127
-
128
-
129
-
130
-
131
-
132
-
133
-
134
-
135
-
136
-
137
-
138
-
139
-
140
-
141
-
142
-
143
-
144
-
145
-
146
-
147
-
148
-
149
-
150
-
151
-
152
-
153
-
154
-
155
-
156
-
157
-
158
-
159
-
160
-
161
-
162
-
163
-
164
-
165
-
166
-
167
-
168
-
169
-
170
-
171
-
172
-
173
-
174
-
175
-
176
-
177
-
178
-
179
-
180
-
181
-
182
-
183
-
184
-
185
-
186
-
187
-
188
-
189
-
190
-
191
-
192
-
193
-
194
-
195
-
196
-
197
-
198
-
199
-
200
-
201
-
 202
202 -
 203
203 -
 204
204 -
 205
205 -
 206
206 -
 207
207 -
 208
208 -
 209
209 -
 210
210 -
 211
211 -
 212
212 -
213
-
214
-
215
-
216
-
217
-
218
-
219
-
220
-
221
-
222
-
223
-
224
-
225
-
226
-
227
-
228
-
229
-
230
-
231
-
232
-
233
-
234
-
235
-
236
-
237
-
238
-
239
-
240
-
241
-
242
-
243
-
244
-
245
-
246
-
247
-
248
-
249
-
250
-
251
-
252
-
253
-
254
-
255
-
256
-
257
-
258
-
259
-
260
-
261
-
262
-
263
-
264
-
265
-
266
-
267
-
268
-
269
-
270
-
271
-
272
-
273
-
274
-
275
-
276
-
277
-
278
-
279
-
280
-
281
-
282
-
283
-
284
-
285
-
286
-
287
-
288
-
289
-
290
-
291
-
292
-
293
-
294
-
295
-
296
-
297
-
298
-
299
-
300
-
301
-
302
-
303
-
304
-
305
-
306
-
307
-
308
-
309
-
310
-
311
-
312
-
313
-
314
-
315
-
316
-
317
-
318
-
319
-
320
-
321
-
322
-
323
-
324
-
325
-
326
-
327
-
328
-
329
-
330
-
331
-
332
-
333
-
334
-
335
-
336
-
337
-
338
-
339
-
340
-
341
-
342
-
343
-
344
-
345
-
346
-
347
-
348
-
349
-
350
-
351
-
352
-
353
-
354
-
355
-
356
-
357
-
358
-
359
-
360
-
361
-
362
-
363
-
364
-
365
-
366
-
367
-
368
-
369
-
370
-
371
-
372
-
373
-
374
-
375
-
376
-
377
-
378
-
379
-
380
-
381
-
382
-
383
-
384
-
385
-
386
-
387
-
388
-
389
-
390
-
391
-
392
-
393
-
394
-
395
-
396
-
397
-
398
-
399
-
400
-
401
-
402
-
403
-
404
-
405
-
406
-
407
-
408
-
409
-
410
-
411
-
412
-
413
-
414
-
415
-
416
-
417
-
418
-
419
-
420
-
421
-
422
-
423
-
424
-
425
-
426
-
427
 |
 |
