Motorola i856 User Guide - Sprint - Page 60
Adding More Message Options
 |
View all Motorola i856 manuals
Add to My Manuals
Save this manual to your list of manuals |
Page 60 highlights
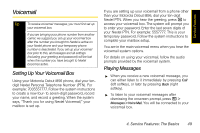
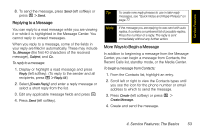
Tip To remove a phone number or email address from the list of message recipients, highlight the phone number or email address and press Remove (left softkey). 3. To enter or edit the body of the message: Ⅲ Select Message and then use any of the following options to enter your message. Note If you have created a signature, the signature automatically appears in this field. Text you enter appears before your signature. (See "Adding a Customized Signature" on page 78.) ● Enter text from the keypad. ● Use a Quick Note. See "Quick Notes" on page 54. ● Insert a picture, a ring tone, or an audio file. See page 54. When you are finished, press r. 4. To send the message without additional options, press Send (left softkey) or press / > Send. Adding More Message Options 1. To view more fields in a message, scroll to MORE and press r. 2. To create or edit the subject line, select Subject, enter a subject, and press r. 3. To attach a picture, audio, voice recording, or video, select Attach > [New Attach] and then select an option to attach a file. 4. To add CC's, select Cc and add recipient(s). 5. To insert replies the recipient can choose from when replying to your message, select Auto Replies. Ⅲ Enter text from the keypad or select a Quick Note (see "Quick Notes" on page 54). Press Back (right softkey) when you are finished. 6. To set the priority of the message, select Priority and then select a setting. 7. To set a date after which attempts to deliver the message end: Ⅲ Select Valid Until, enter a date, and press r. Ⅲ To set no date, press No Date (left softkey). 52 4. Service Features: The Basics
-
 1
1 -
2
-
3
-
4
-
5
-
6
-
7
-
8
-
9
-
10
-
11
-
12
-
13
-
14
-
15
-
16
-
17
-
18
-
19
-
20
-
21
-
22
-
23
-
24
-
25
-
26
-
27
-
28
-
29
-
30
-
31
-
32
-
33
-
34
-
35
-
36
-
37
-
38
-
39
-
40
-
41
-
42
-
43
-
44
-
45
-
46
-
47
-
48
-
49
-
50
-
51
-
52
-
53
-
54
-
 55
55 -
 56
56 -
 57
57 -
 58
58 -
 59
59 -
 60
60 -
 61
61 -
 62
62 -
 63
63 -
 64
64 -
 65
65 -
66
-
67
-
68
-
69
-
70
-
71
-
72
-
73
-
74
-
75
-
76
-
77
-
78
-
79
-
80
-
81
-
82
-
83
-
84
-
85
-
86
-
87
-
88
-
89
-
90
-
91
-
92
-
93
-
94
-
95
-
96
-
97
-
98
-
99
-
100
-
101
-
102
-
103
-
104
-
105
-
106
-
107
-
108
-
109
-
110
-
111
-
112
-
113
-
114
-
115
-
116
-
117
-
118
-
119
-
120
-
121
-
122
-
123
-
124
-
125
-
126
-
127
-
128
-
129
-
130
-
131
-
132
-
133
-
134
-
135
-
136
-
137
-
138
-
139
-
140
-
141
-
142
-
143
-
144
-
145
-
146
-
147
-
148
-
149
-
150
-
151
-
152
-
153
-
154
-
155
-
156
-
157
-
158
-
159
-
160
-
161
-
162
-
163
-
164
-
165
-
166
-
167
-
168
-
169
-
170
-
171
-
172
-
173
-
174
-
175
-
176
-
177
-
178
-
179
-
180
-
181
-
182
-
183
-
184
-
185
-
186
-
187
-
188
-
189
-
190
-
191
 |
 |