Nikon D100 Product Manual
Nikon D100 - Digital Camera SLR Manual
 |
UPC - 018208252718
View all Nikon D100 manuals
Add to My Manuals
Save this manual to your list of manuals |
Nikon D100 manual content summary:
- Nikon D100 | Product Manual - Page 1
- Nikon D100 | Product Manual - Page 2
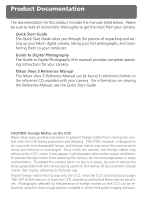
for this product includes the manuals listed below. Please be sure to read all instructions thoroughly to get the most from your camera. Quick Start Guide The Quick Start Guide takes you through the process of unpacking and setting up your Nikon digital camera, taking your first photographs, and - Nikon D100 | Product Manual - Page 3
on optional accessories, camera care, and troubleshooting. Overview Getting to Know the Camera First Steps Basic Photography Basic Playback Choosing a Shooting Mode Image Quality and Size Sensitivity (ISO Equivalency) White Balance Image Adjustment Focus Exposure Flash Photography Self-Timer Mode - Nikon D100 | Product Manual - Page 4
parts could result in injury. In the event of a malfunction, the product should be repaired only by a qualified technician. Should the product break open as the result of a fall or other accident, remove the battery and/or AC adapter and then take the product to a Nikonauthorized service center - Nikon D100 | Product Manual - Page 5
to prevent infants from putting the battery or other small parts into their mouths. Removing memory cards Memory cards may become hot during use. Observe due caution when removing memory cards from the camera. CD-ROMs The CD-ROMs on which the software and manuals are distributed should not be played - Nikon D100 | Product Manual - Page 6
could scratch, deform, or tear the curtain. Handle all moving parts with care Do not apply force to the battery-chamber, card-slot, or connector covers. These parts are especially susceptible to damage. iv Cleaning • When cleaning the camera body, use a blower to remove dust and lint, then wipe - Nikon D100 | Product Manual - Page 7
before use. • After removing the battery from the camera, be sure to replace the terminal cover. Memory cards • Turn the power off before inserting or re- moving memory cards. Inserting or removing cards with the power on could render them unusable. •Insert memory cards as shown in the illustration - Nikon D100 | Product Manual - Page 8
Notices • No part of the manuals included with this product may be reproduced, transmitted, transcribed, stored in a retrieval system, or translated into any language in any form, by any means, without Nikon's prior written permission. • Nikon reserves the right to change the specifications of the - Nikon D100 | Product Manual - Page 9
that has been digitally copied or reproduced by means of a scanner, digital camera or other device licenses issued by public agencies and private groups, ID cards, and tickets, such as passes and meal coupons. in this manual or the other documentation provided with your Nikon product are trademarks - Nikon D100 | Product Manual - Page 10
Know the Camera: Camera Controls and Displays 4 First Steps: Getting the Camera Ready for Use 14 Step 1-Attach the Camera Strap 15 Step 2-Insert the Battery 16 Step 3-Choose a Language 18 Step 4-Set the Time and Date 19 Step 5-Attach a Lens 20 Step 6-Insert a Memory Card 22 Tutorial: Basic - Nikon D100 | Product Manual - Page 11
Using the Built-in Speedlight 98 Flash Exposure Compensation 102 Using an Optional Speedlight 103 Self-Timer Mode: Delaying Shutter Release 108 Two-Button Reset: Restoring Default Settings 110 More About Playback: Playback Options 111 Single-Image Playback 112 Photo Information 114 Viewing - Nikon D100 | Product Manual - Page 12
Other Accessories 176 Lenses for the D100 176 Other Accessories 180 Approved Memory Cards 183 Caring for Your Camera: Storage and Maintenance 184 Storage ...184 Cleaning ...185 Troubleshooting: Understanding Error Messages and Displays 188 Web Resources: On-Line Resources for Nikon Users 192 - Nikon D100 | Product Manual - Page 13
to it as you read through the manual for information on the names and functions of camera parts. First Steps This section details the steps you will take when using your camera for the first time: inserting the battery and memory card, attaching a lens and camera strap, and setting the date, time - Nikon D100 | Product Manual - Page 14
with the advanced Nikon D100 single-lens reflex (SLR) digital camera. First-time users who can't wait to experience the simplicity and immediacy of digital photography can follow the step-by-step instructions in the Quick Start Guide or read "First Steps" and "Tutorial" in this manual, referring to - Nikon D100 | Product Manual - Page 15
profits that may result from product malfunction. Life-Long Learning As part of Nikon's "Life-Long Learning" commitment to ongoing product support and education, continually-updated information is available on-line at the following sites: • For users in the U.S.A.: http://www.nikonusa.com/ • For - Nikon D100 | Product Manual - Page 16
Body Introduction-Getting to Know the Camera 5 6 7 8 9 1 10 2 11 3 1 4 12 13 14 1 Eyelet for camera strap 15 2 Shooting-mode dial lock release ... 41 3 Shooting mode dial 41 4 Accessory shoe 104 5 Depth-of-field preview button ...... 76 6 AF-assist illuminator 72 Self-timer - Nikon D100 | Product Manual - Page 17
Introduction-Getting to Know the Camera 15 17 16 18 19 20 21 15 Built-in Speedlight 94, 98 16 Sub-command dial 12 17 Function dial 12 See also: Exposure mode 76 Sensitivity (ISO equivalency) ....... 48 White balance 50 Image quality 44 Image size 46 AF-area mode 65 18 Speedlight lock - Nikon D100 | Product Manual - Page 18
to Know the Camera Getting to Know the Camera Camera Body (continued) 30 22 31 32 23 24 33 25 34 35 26 36 27 37 28 38 29 39 22 Viewfinder eyepiece 30 23 Flash exposure compensation ( ) button 102 Format ( ) button 23 24 Bracketing ( ) button 88 25 Monitor ( ) button 35 - Nikon D100 | Product Manual - Page 19
Introduction-Getting to Know the Camera Camera Controls and Displays 42 43 44 45 40 41 40 Tripod socket 41 Connectors for MB-D100 180 42 Metering selector 75 43 Diopter adjustment control 30 44 Battery-chamber cover latch ......... 16 45 Battery-chamber cover ......... 16, 180 7 - Nikon D100 | Product Manual - Page 20
Introduction-Getting to Know the Camera Getting to Know the Camera Control Panel 1 2 9 3 10 11 4 12 5 13 6 14 7 15 16 8 17 8 - Nikon D100 | Product Manual - Page 21
Introduction-Getting to Know the Camera Camera Controls and Displays 1 Shutter speed 79-80 Sensitivity 48 Exposure compensation value ....... 86 Flash compensation value 102 Number of shots in bracketing sequence 88 White balance adjustment 90 2 Battery indicator 17 3 Image size 46 4 Image - Nikon D100 | Product Manual - Page 22
the Camera Getting to Know the Camera The Viewfinder Display 1 2 2 3 456 7 89 10 11 12 13 14 15 16 No Battery When the battery is totally exhausted or no battery is inserted, the display in the viewfinder will dim. This is normal and does not indicate a malfunction. The viewfinder display - Nikon D100 | Product Manual - Page 23
compensation indicator ..... 102 9 Exposure compensation indicator .. 86 10 "K" (appears when memory remains for over 1,000 exposures 42 11 Flash-ready indicator 99 12 Battery indicator 17 13 Shutter speed 80, 82 14 Aperture 81-82 15 Electronic analog exposure display 83 Exposure compensation - Nikon D100 | Product Manual - Page 24
Getting to Know the Camera Getting to Know the Camera The Command Dials The main- and sub-command dials are used alone or in combination with other controls to adjust a variety of settings. Flash sync mode button Function dial Sub-command Bracketing button dial Exposure compensation button Flash - Nikon D100 | Product Manual - Page 25
AF-area mode + Exposure + + + + + + Flash settings + + Camera Controls and Displays Choose a setting for AF-area mode ( 65) Choose a combination of aperture and shutter speed (exposure mode P 78) Choose a shutter speed (exposure mode S or M; 80) Choose an aperture (exposure mode A or M; 81-82) Set - Nikon D100 | Product Manual - Page 26
for the Camera and Battery iv-v Choose a Language 18 Set the Time and Date 19 Attach a Lens 20-21 To learn more about the lenses available for the D100, see: • Technical Notes: Optional Accessories 176-183 Insert a Memory Card To learn more about compatible memory cards, see: • Technical - Nikon D100 | Product Manual - Page 27
securely to the two eyelets on the camera body as shown below. Introduction-First Steps The Monitor Cover A clear plastic cover (the BM-2 LCD monitor cover) is provided with the camera to keep the monitor clean, and to protect the monitor when the camera is not in use or when you are transporting - Nikon D100 | Product Manual - Page 28
in the MH-18 quick charger provided with your camera; instructions for use may be found in the documentation provided with the charger. 2.2 Turn the camera off Turn the camera off before inserting or removing batteries. 2.3 Open the battery-chamber cover Slide the battery-chamber cover latch to - Nikon D100 | Product Manual - Page 29
spare battery. (Flashes) (Flashes) Battery exhausted Shutter-release disabled. No pictures can be taken until battery has been replaced. * No icon displayed when camera powered by optional AC adapter. Removing the Battery To remove the battery, turn the camera off, open the battery chamber - Nikon D100 | Product Manual - Page 30
Language SET UP Language De Deutsch En English Fr Français OK Es Español Highlight option Display camera menus 3.4 SET UP Format LCD Brightness Mirror Lock-up Video Output Date Language Image Comment - - O OFF NTSC - - En OFF Position cursor in SET UP menu 3.6 SET UP Language De Deutsch En - Nikon D100 | Product Manual - Page 31
Minute, and Second 4.5 SET UP Format LCD Brightness Mirror Lock-up Video Output Date Language Image Comment - - O OFF NTSC - - En OFF Save changes to settings and return to SET UP menu • The camera clock is less accurate than most battery-powered timepieces, and should be regularly checked and - Nikon D100 | Product Manual - Page 32
have CPU contacts Type G lens 5.1 Turn the camera off Turn the camera off before attaching or removing lenses. Type D lens 5.2 Attach a lens Keeping the mounting mark on the lens aligned with the mounting mark on the camera body, position the lens in the camera's bayonet mount. Being careful - Nikon D100 | Product Manual - Page 33
lensrelease button while turning the lens clockwise. Non-CPU Lenses Non-CPU lenses can only be used when the function dial is set to M (manual exposure mode). In other exposure modes, the shutter release will be disabled. When a nonCPU lens is attached, the camera exposure meters will not function - Nikon D100 | Product Manual - Page 34
Steps Step 6-Insert a Memory Card In place of film, your Nikon digital camera uses CompactFlash™ memory cards or IBM Microdrive® cards to store photographs. For a list of approved memory cards, see "Technical Notes: Approved Memory Cards" ( 183). 6.1 Turn the camera off Turn the camera off before - Nikon D100 | Product Manual - Page 35
No Memory Card If no memory card is inserted in the camera when a charged EN-EL3 battery is inserted or the camera is pow- ered by an AC adapter, will appear control panel exposure-count display. When the camera is on and indicators are displayed in the viewfinder, the exposure- count display - Nikon D100 | Product Manual - Page 36
Memory Cards Memory cards may be hot after use. Observe due caution when removing memory cards from the camera. Removing Memory Cards Memory cards can be removed without loss of data when the camera is off. Before removing the memory card, wait for the green card access lamp next to the card - Nikon D100 | Product Manual - Page 37
Tutorial Basic Photography and Playback Basic Photography 26-34 Basic Playback This chapter takes you step-by-step through the process of taking your first photographs and playing them back. Basic Photography This section describes how to use autofocus and auto multi program autoexposure for - Nikon D100 | Product Manual - Page 38
composition after setting exposure, see: • Taking Photographs: Exposure 75-93 To learn more about flash photography, see: • Taking Photographs: Flash Photography 94-106 Take the Photograph To learn how to delay shutter release, see: • Taking Photographs: Self-Timer Mode 34 108-109 26 - Nikon D100 | Product Manual - Page 39
at current settings. When this number reaches zero, the shutter-speed display in the control panel will show a blinking , the viewfinder shutter-speed display, . You will need to delete pictures, insert a new memory card, or adjust image quality and size settings be- fore you will be able - Nikon D100 | Product Manual - Page 40
quality NORM (JPEG Normal) Pictures are compressed for a balance between image quality and file size that is ideal for snapshots. 43- 46 Image size L (Large) Images are 3,008 × 2,000 pixels in size. 46- 47 Sensitivity 200 Sensitivity (the digital equivalent of film speed) 48- is set to - Nikon D100 | Product Manual - Page 41
program) is only available when the lens mounted on the camera is a CPU lens. When a non-CPU lens is used, will flash in the aperture displays in the control panel and viewfinder and the shutter can not be released. Non- CPU lenses can only be used in manual exposure mode (exposure mode M). 29 - Nikon D100 | Product Manual - Page 42
support. Hold the handgrip in your right hand and cradle the camera body or lens with your left. The optional MB-D100 multi function battery pack is equipped with a shutter m-1. Corrective lenses (available separately; 180) allow diopters of -5 m-1 to +3 m-1. The rubber viewfinder eyepiece cup must - Nikon D100 | Product Manual - Page 43
is dark, the AF-assist illuminator will light automatically to assist with the autofocus operation. Viewfinder Display Meaning ● Subject in focus. ● (flashes) Camera unable to focus on subject in focus brackets using autofocus. If the camera is unable to focus using autofocus, use manual - Nikon D100 | Product Manual - Page 44
a higher sensitivity (ISO equivalency). Shutter Speed and Camera Shake To prevent blurring caused by camera shake, the shutter speed should be faster than the inverse of the focal length of the lens, in seconds (for example, if a lens has a focal length of 50 mm, shutter speed should be faster than - Nikon D100 | Product Manual - Page 45
Tutorial-Basic Photography 5 Taking Your First Photographs When Lighting Is Poor When lighting is poor, shutter speed slows and photographs may be blurred. At shutter speeds slower than 1/60 s, you can use the built-in Speedlight to prevent blur. A flash can also be used to "fill in" (illuminate) - Nikon D100 | Product Manual - Page 46
or disconnect the power source until the lamp has gone out. Removing the memory card or cutting power in these circumstances could result in loss of data. Do Not Photograph Strong Light Sources Avoid taking pictures with the camera focused on the sun or other strong light source. Intense light may - Nikon D100 | Product Manual - Page 47
most recent photograph Tutorial-Basic Playback 100-1 Viewing Additional Photographs To page through photographs in the order recorded, press the multi selector down. Press the multi selector up to view photographs in reverse order. To scroll rapidly through the images on the memory card, press and - Nikon D100 | Product Manual - Page 48
Basic Playback Take Additional Photographs To end playback and return to shooting mode, press the the shutter-release button halfway. button or press Tutorial-Basic Playback 6-Monitor Off ( 151) The monitor will turn off automatically to save power if no operations are performed for the time - Nikon D100 | Product Manual - Page 49
and when you can adjust camera settings for different shooting conditions. Choosing a Shooting Mode 41-42 Image Quality and Size 43-47 Sensitivity (ISO Equivalency) 48-49 White Balance 50-57 Image Adjustment Focus 58-62 63-74 Exposure 75-93 Flash Photography 94-107 Self-Timer Mode 108-109 Two - Nikon D100 | Product Manual - Page 50
Image Quality and Size Image shutter speed or aperture? ➡ Exposure: Exposure Mode Is my subject very bright, very dark, or high contrast? ➡ Exposure: Exposure Compensation Exposure: Bracketing Will I need the flash? ➡ Flash Photography Do I need to delay shutter release? ➡ Self-Timer - Nikon D100 | Product Manual - Page 51
settings (shooting mode, focus, metering, exposure mode, exposure compensation, flash sync mode, and flash exposure compensation) are made using the buttons and dials on the camera body. Others (image sharpening, tone compensation, color mode, and hue adjustment) are made from the shooting menu - Nikon D100 | Product Manual - Page 52
available while images are being recorded to the memory card. • The button performs the same function as pressing the multi selector to the right. In some cases, a selection by turning the camera off. To exit the menus and focus the camera for the next shot, press the shutter-release button halfway. - Nikon D100 | Product Manual - Page 53
is moving unpredictably. Use the self-timer to reduce blurring caused by camera shake or to Self-timer appear in photographs you take yourself ( 108). * Average obtained at 20 °C (68 °F) with manual focus, manual exposure, a shutter speed of 1/250 s or faster, and memory remaining in the buffer - Nikon D100 | Product Manual - Page 54
be lost. If the battery is exhausted while images remain in the buffer, the shutter release will be disabled and all images will be transferred to the memory card. Large-Capacity Memory Cards When enough memory remains on the memory card to record a thousand or more pictures at current settings, the - Nikon D100 | Product Manual - Page 55
NEF (RAW) images is approximately fifty to sixty percent of uncompressed NEF images. *** Number of exposures remaining shown in control and viewfinder is the same as in the case of uncompressed NEF (RAW) images. The actual number of images that can be stored on the memory card is higher than - Nikon D100 | Product Manual - Page 56
the memory card in Nikon Electronic Image Format (NEF). NEF files can only be viewed in Nikon View 5 or Nikon Capture D100 are stored as image files with names of the form "DSC_nnnn.xxx," where nnnn is a four-digit number between 0001 and 9999 assigned automatically in ascending order by the camera - Nikon D100 | Product Manual - Page 57
(Raw) OK RAW Comp. NEF (Raw) The Function Dial Pictures can only be taken when the function dial is set to P, S, A, or M. When the function dial set to QUAL, the shutter release will be disabled. At settings of QUAL, WB, and ISO, Image Quality can not be selected in the shooting menu. NEF - Nikon D100 | Product Manual - Page 58
, the larger the size at which it can be printed without becoming noticeably "grainy." Choose image size according to the space available on the memory card and the task at hand. Option Large Medium Small Size (pixels) 3,008 × 2,000 2,240 × 1,488 1,504 × 1,000 Size when printed at 200 dpi (approx - Nikon D100 | Product Manual - Page 59
Making Effective Use of Memory Image size can be set using the function dial, or using the Resolution option in the shooting menu. Image size can not be adjusted when image quality is set to NEF (Raw) or Comp. NEF (Raw). When opened in Nikon View 5 or Nikon Capture 3, NEF images are 3,008 × 2,000 - Nikon D100 | Product Manual - Page 60
digital equivalent of film speed. The higher the sensitivity, the less light needed to make an exposure, allowing higher shutter speeds The higher the sensitivity, the more likely pictures are to be subject to "noise" fast shutter speed is required to prevent blurring. We recommend that image - Nikon D100 | Product Manual - Page 61
set to ISO, the shutter release will be disabled. At settings of QUAL, WB, and ISO, ISO can not be selected in the shooting menu. 3-ISO Auto ( 148) When ON is selected for Custom Setting 3 (ISO Auto), the camera will automatically vary sensitivity from the value selected by the user to help ensure - Nikon D100 | Product Manual - Page 62
whether seen in the shade, direct sunlight, or under incandescent lighting. Unlike the film used in film cameras, digital cameras can mimic this adjustment by processing information from the camera's image sensor (CCD) according to the color of the light source. This is known as "white balance." For - Nikon D100 | Product Manual - Page 63
MENU Bank Select A Image Quality NORM Resolution ( 55). In other cases a white-balance fine-tuning accessory shoe adapter is used to connect optional Speedlights via a sync cable, the camera may not be able to set white balance appropriately in A (auto) mode. Set white balance to (flash - Nikon D100 | Product Manual - Page 64
(Fluorescent) (Direct Sunlight) (Preset) (Shade) (Cloudy) (Flash) The Function Dial Pictures can only be taken when the function dial is set to P, S, A, or M. When the function dial set to ISO, the shutter release will - Nikon D100 | Product Manual - Page 65
Flash Direct Sunlight Fluorescent† Incandescent Keeping Colors True Fine-Tuning White Balance At settings other than PRE (preset), white balance can be "fine tuned" to compensate for variations in the color of the light source or to introduce a deliberate "warm" or "cold" cast into an image camera - Nikon D100 | Product Manual - Page 66
Set ( 153) When WB Bracketing is selected for Custom Setting 11 (BKT Set; 153), the camera will create from two to three images each time the shutter is released. White balance will be varied for each image, "bracketing" the value selected using the White Bal menu or function dial. See "Bracketing - Nikon D100 | Product Manual - Page 67
balance from P (auto multi program), S (shutter-priority auto), A (aperture-priority auto), or M (manual), and press the multi selector to the right. Done OK Exposure mode Manual Exposure Mode To ensure accurate white balance, the amount of light entering the camera is increased. In exposure - Nikon D100 | Product Manual - Page 68
appear gray. Use Manual Focus When measuring preset white balance the focus-mode selector to M (manual focus; 74) and focus manually. At a setting of single-servo autofocus, lack of contrast may prevent the camera focusing on a neutral gray reference object, and the shutter-release will be disabled - Nikon D100 | Product Manual - Page 69
released, but no photograph will be taken). If the camera is able to measure a value for white balance, the letters will flash for two seconds in the control panel shutter-speed display, and the viewfinder shutter-speed display will show a flashing . The new value will be recorded when the - Nikon D100 | Product Manual - Page 70
shooting menu ( 135). Making Edges More Distinct: Image Sharpening When you take a photograph, the camera automatically processes the image to increase the distinction between light and dark areas, making the picture appear sharper. The options in the Image Sharpening menu give you control over the - Nikon D100 | Product Manual - Page 71
own tone curve and download it to the camera. Custom is used to select this user-defined curve. If no curve has been downloaded to the camera, this option is equivalent to Normal. * This feature is not available when the D100 is used with the Macintosh version of Nikon Capture 3. Auto Even when - Nikon D100 | Product Manual - Page 72
Custom Suiting Colors to Your Workflow: Color Mode Your Nikon digital camera offers a choice of color modes, which determine the than sRGB, making it the preferred choice for studio photography or images that will be modified as part of a commercial production work flow. III (sRGB) Choose for - Nikon D100 | Product Manual - Page 73
. If the image is converted to a color space with that supports a narrower gamut of colors, you may notice tonal discontinuities (colors changing abruptly instead of progressing gradually from one tone to the next). When photographs created with the D100 are opened in Nikon View 5 or Nikon Capture - Nikon D100 | Product Manual - Page 74
Image Adjustment Image Adjustment Controlling Color: Hue Adjustment Hue can be adjusted in the range about -9 ° to 9 ° in increments of 3 °. If red is taken as the starting Adjustment 0 OK Hue The RGB color model used in digital photographs reproduces colors using differing amounts of red, green, - Nikon D100 | Product Manual - Page 75
from two autofocus (AF) modes, in which the camera focuses automatically when the shutter-release button is pressed halfway, and one manual focus mode, in which focus must be adjusted manually using the focusing ring on the lens: Mode Description The camera focuses when the shutter-release button - Nikon D100 | Product Manual - Page 76
D100 offers a choice of five focus areas that together cover a wide area of the frame. Except when closest subject priority ( 67) is in effect, you can select the focus area manually The selected focus area will be displayed in the viewfinder, highlighted in red if necessary to establish contrast - Nikon D100 | Product Manual - Page 77
Camera Focuses Autofocus When the focus mode selector is set to S (single-servo autofocus) or C (continuous-servo autofocus), the camera focuses automatically when the shutter viewfinder does not change). Choose this option when you are following an erratically moving subjects and in other cases - Nikon D100 | Product Manual - Page 78
-servo autofocus, the camera will initiate predictive focus tracking if the subject was moving when the shutter-release button was pressed halfway. Focus will lock when the subject stops moving. In continuous-servo AF, the camera will also initiate predictive focus tracking if the subject starts - Nikon D100 | Product Manual - Page 79
area can not be selected manually, and no focusarea indicators are shown in the viewfinder or control panel. Instead, the camera automatically chooses the focus area containing the subject closest to the camera and focuses on this subject when the shutter-release button is pressed halfway. Note - Nikon D100 | Product Manual - Page 80
Taking Photographs-Focus Focus Summary of Autofocus Options Focus AF-area Closest subject Control panel Active focus Focus-area mode mode priority display area selection Singlearea AF - Shown in viewfinder and control panel Manual Off (default) AF-S Dynamicarea AF On (Custom Setting 20 - Nikon D100 | Product Manual - Page 81
-release button is pressed halfway. Use with subjects that are moving towards or away from you. Camera focuses on subject in selected focus area. While shutter-release button is pressed halfway, camera tracks subject as it moves from one focus area to the next. Use with subjects that are moving - Nikon D100 | Product Manual - Page 82
when the autofocus system is unable to manually using the AE-L/AF-L button. To recompose a photograph using focus lock: 1 Position the subject in the selected focus area and press the shutter-release button halfway to initiate focus. 2 Check that the in-focus indicator (●) appears in the viewfinder - Nikon D100 | Product Manual - Page 83
Taking Photographs-Focus Controlling How the Camera Focuses 3 Recompose the photograph and shoot. In single-servo AF, focus will remain locked between shots as long as you keep the shutter-release button pressed halfway, allowing you to take several photographs in succession at the same focus - Nikon D100 | Product Manual - Page 84
camera must be in single-servo AF with an AF-Nikkor lens attached, and the center focus area must be selected or closest subject priority in effect. If these conditions are met and the subject is poorly lit, the illuminator will light automatically to assist the autofocus operation when the shutter - Nikon D100 | Product Manual - Page 85
Taking Photographs-Focus Controlling How the Camera Focuses Getting Good Results with Autofocus Autofocus does not perform well under the following conditions: There is little or no row of windows An example would be a subject that is half in a skyscraper. Use manual focus ( 74). in the shade. Use - Nikon D100 | Product Manual - Page 86
the shutter-release button halfway and rotate the lens focusing ring until the in-focus indicator (●) is displayed. A-M Selection/Autofocus with Manual Priority When using a lens that offers A-M selection, select M when focusing manually. With lenses that support M/A (autofocus with manual priority - Nikon D100 | Product Manual - Page 87
˝) in diameter (use the 12-mm/0.47˝ circle in the center of the viewfinder as a reference when metering your subject at this setting). The camera meters a circle 3 mm (0.12˝) in diameter centered on the current focus area much brighter or darker. Metering is not available with non-CPU lenses. 75 - Nikon D100 | Product Manual - Page 88
how the camera sets shutter speed and aperture when adjusting exposure. Four modes are available: auto multi program (P), shutter-priority auto (S), aperture-priority auto (A), and manual (M). Taking Photographs-Exposure CPU Lenses (All Exposure Modes) If you are using a CPU lens equipped with - Nikon D100 | Product Manual - Page 89
camera in charge of shutter speed lenses. Non-CPU Lenses (Exposure Modes P, S, and A) Non-CPU lenses can only be used in manual exposure mode ( 82), when aperture can be adjusted manually using the lens aperture ring. If another exposure mode is selected when a non-CPU lens is attached, the shutter - Nikon D100 | Product Manual - Page 90
system are exceeded, one of the following indicators will be displayed in the control panel and viewfinder: Indicator Description Subject too bright. Use a Neutral Density (ND) filter or lower sensitivity (ISO equivalency; 48). Subject too dark. Use the flash restore default shutter speed and - Nikon D100 | Product Manual - Page 91
CPU lenses. Taking Photographs-Exposure Changing from Manual to Shutter-Priority Auto If you select a shutter speed of in manual exposure mode and then turn the function dial to S (shutter-priority auto) without changing the shutter speed, the indicator in the shutter-speed display will flash - Nikon D100 | Product Manual - Page 92
the main command dial to choose the desired shutter speed. 3 Frame a photograph and shoot. Exposure Warning If the camera is unable to produce the correct exposure at the selected shutter speed, the electronic analog exposure display ( 83) in the viewfinder will show the amount of under- or over - Nikon D100 | Product Manual - Page 93
camera is unable to produce the correct exposure at the selected aperture, the electronic analog exposure display ( 83) in the viewfinder will show the amount of under- or over-exposure and one of the following indicators will be displayed in the control panel and viewfinder shutter-speed displays - Nikon D100 | Product Manual - Page 94
until the desired exposure is achieved. 3 Frame a photograph and shoot. If shutter speed is set to , the shutter will remain open while the shutter-release button is held down. Non-CPU Lenses If a non-CPU lens is attached in manual exposure mode, will appear in the aperture displays in the control - Nikon D100 | Product Manual - Page 95
If the limits of the exposure metering system are exceeded, the electronic analog exposure display will flash. Custom Setting 9 set to "1/3 Step needed to save photographs to the memory card. 9-EV Step ( 151) This option controls whether changes to shutter speed and aperture are made in increments - Nikon D100 | Product Manual - Page 96
in the metered area when the picture is taken, exposure will be shutter-release button pressed halfway and your subject positioned in the focus area, press the AE-L/AF-L button to lock exposure (and focus, except in manual focus mode). Confirm that the in-focus indicator (●) appears in the viewfinder - Nikon D100 | Product Manual - Page 97
Controlling How the Camera Sets Exposure 3 Keeping the AE-L/AF-L button pressed, recompose your at the value metered in an 8-mm (0.31˝) circle at the center of the viewfinder. Adjusting Shutter Speed and Aperture While exposure lock is in effect, you can change the following settings without - Nikon D100 | Product Manual - Page 98
the value suggested by the camera. As a rule of compensation in the control panel or viewfinder. Exposure compensation can be set will be displayed in the control panel and viewfinder after you release the button, and the Exposure compensation is not reset when the camera is turned off. 9-EV Step ( - Nikon D100 | Product Manual - Page 99
bracketing is not available at image qualities of NEF (Raw) or Comp. NEF (Raw). Using the Self-Timer If exposure or flash bracketing is used in self-timer mode, one picture will be taken each time the shutter is released. If white-balance bracketing is used, the camera will create the number of - Nikon D100 | Product Manual - Page 100
number of shots specified in the bracketing program have been taken. Shooting will resume the next time the shutter-release button is pressed. Resuming Exposure or Flash Bracketing If the memory card fills before all shots in the sequence have been taken, shooting can be resumed from the next shot - Nikon D100 | Product Manual - Page 101
When AE & Flash or AE Only is selected for Custom Setting 11, the camera will modify exposure by varying shutter speed and/or aperture. What settings are affected depends on the exposure mode: Exposure mode Programmed auto Shutter-priority auto Aperture-priority auto Manual Camera sets exposure by - Nikon D100 | Product Manual - Page 102
more information on adjusting custom settings, see "Menu Guide" ( 121). CSM MENU F11 Bracketing Set AE & Flash AE Only Flash Only WB Bracketing OK 2 Pressing the BKT -balance bracketing is in effect, the shutter will be released only once each time the shutter-release button is pressed. Each shot - Nikon D100 | Product Manual - Page 103
will flash. II the camera. The this case the images can be adjusted using Nikon Capture 3 (available separately; 170). Resuming White Balance Bracketing If there is not enough memory remaining on the memory card to record all shots in a white-balance bracketing sequence, the shutter-speed - Nikon D100 | Product Manual - Page 104
selected for Custom Setting 11 and, in the cases of exposure and flash bracketing, on the size of the exposure increment selected for Custom Setting 9 (EV Step). Exposure/Flash Bracketing (Custom Setting 11 set to AE & Flash, AE Only, or Flash Only) Custom Setting 9 1/3 Step (default) 1/2 Step 92 - Nikon D100 | Product Manual - Page 105
Controlling How the Camera Sets Exposure Taking Photographs-Exposure Custom Setting 9 1/2 Step Control panel 0, -3 9-EV Step ( 151) This option controls the size of the increments for exposure and flash bracketing. 12-BKT Order ( 153) This option can be used to change the bracketing order. 93 - Nikon D100 | Product Manual - Page 106
) will be fixed at the value selected by the user. Using an Optional Speedlight If an optional Speedlight is used with spot metering, Standard TTL flash for digital SLR will be used. If the built-in Speedlight is raised when an optional Speedlight other than the SB-50DX is attached, the optional - Nikon D100 | Product Manual - Page 107
Photographs-Flash Photography D-TTL Flash Control The type of D-TTL flash control available varies with the type of lens used: Lens Flash control for built-in Speedlight 3D Multi-Sensor Balanced Fill-Flash for Digital SLR: Based on infor- mation from the matrix metering system, flash output - Nikon D100 | Product Manual - Page 108
other occasions when you want the camera to re- spond quickly to shutter-release button. After pressing shutter- release button, do not move camera to prevent blurwith slow sync ring caused by camera shake. Slow sync Flash is combined with speeds as slow as 30 s to capture both subject - Nikon D100 | Product Manual - Page 109
lens used and the position of your subject, the AF-assist illuminator (red-eye reduction lamp) may not be visible to your subject, with the result that red-eye reduction may not have the desired effect. Studio Flash Systems Speedlight attached, the Speedlight red-eye reduction lamp will be used. 97 - Nikon D100 | Product Manual - Page 110
and a type G or D lens. 1 To enjoy the benefits of 3D multi-sensor balanced fill-flash for digital SLR, choose matrix or center-weighted metering multi program and aper- ture-priority auto exposure modes. In shutter-priority auto and manual exposure modes, (red-eye reduction) will be selected when - Nikon D100 | Product Manual - Page 111
Photography 4 Choose an exposure mode ( 76). Note that if manual exposure is selected, standard TTL flash for digital SLR will be used. 5 Set shutter speed and aperture. The values that can be chosen for shutter speed and aperture when the built-in Speedlight is raised are shown below. Exposure - Nikon D100 | Product Manual - Page 112
for aperture will be the maximum aperture of the lens. D-TTL flash control can be used to adjust flash output at sensitivity (ISO equivalency) settings between 200 time the shutter-release button is pressed. Vibration reduction (available with VR lenses) will not take effect if the shutter-release - Nikon D100 | Product Manual - Page 113
Taking Photographs-Flash Photography Using Built-in and Optional Speedlights Compatible Lenses The built-in Speedlight can be used with any CPU lens having a focal length of 20- 300 mm (35-mm equivalent). Note, however, that if the following zoom lenses are not used at the zoom positions and - Nikon D100 | Product Manual - Page 114
other than ±0, a icon will be displayed in the control panel and viewfinder after you release the button. The current value for flash exposure compensation can be confirmed by pressing the button. 2 Take a picture as instructed in the preceding section, "Using the Built-in Speedlight" ( 98). Normal - Nikon D100 | Product Manual - Page 115
lens attached: Lens Type G or D CPU lens Other CPU lens All types Flash control 3D Multi-Sensor Balanced Fill-Flash for Digital SLR Multi-Sensor Balanced Fill-Flash for Digital SLR Standard TTL Flash for Digital SLR The SB-80DX and SB-50DX Speedlights The SB-80DX and SB-50DX support D-TTL flash - Nikon D100 | Product Manual - Page 116
Taking Photographs-Flash Photography Flash Photography Nikon SB-50DX Speedlight The SB-50DX has a guide number of 32/105 (m/ft, manual mode, 35-mm zoom-head position, ISO 200, 20 °C/68 °F; GN at ISO 100 is 22/72) and is powered by two CR123A (DL123A) three-volt lithium batteries. In addition to - Nikon D100 | Product Manual - Page 117
, contact a Nikon-authorized service representative for more information. Read the Speedlight Manual For complete information on using optional Speedlights, refer to the Speedlight manual. If your Speedlight supports D-TTL flash control, read the section on digital single-lens reflex cameras in the - Nikon D100 | Product Manual - Page 118
is set to D, shutter speed will be set to under 1/125 s. 2 When an SB-27 is mounted on the D100, the flash mode is automatically set to TTL, and the shutterrelease will be disabled. Set the SB-27 to A (non-TTL auto flash). 3 Manual mode only. Use is not recommended. 4 Autofocus is only available - Nikon D100 | Product Manual - Page 119
in the viewfinder, but the amount of flash compensation will not be displayed. When an SC-17 sync cable is used for off-camera flash photography, correct exposure may not be achieved in D-TTL mode. We recommend that you choose spot metering to select Standard TTL Flash for Digital SLR. Take a test - Nikon D100 | Product Manual - Page 120
button halfway to focus. In single-servo autofocus ( 63), photographs can only be taken if the in-focus (●) indicator appears in the viewfinder. In self-timer mode, a shutter speed of is equivalent to approximately 1/4 s. 8-Self-timer ( 151) Self-timer delay can be set to 2 s, 5 s, 10 s (the - Nikon D100 | Product Manual - Page 121
setting. Autofocus When autofocus is in effect, the camera focuses when the shutter-release button is pressed. Do not stand in front of the camera when activating the self-timer. Cover the Viewfinder To ensure correct exposure in exposure modes other than manual, cover the viewfinder eyepiece with - Nikon D100 | Product Manual - Page 122
camera Flash compensation Default Off Off Front-curtain sync ±0.0 The following shooting-menu options will also be reset. Only settings in the bank currently selected using the shooting menu Bank Select option will be reset ( 135). Settings in the remaining bank are unaffected. Option Image - Nikon D100 | Product Manual - Page 123
More About Playback Playback Options This section details the operations that can be performed during playback, including thumbnail playback, playback zoom, and photo information display. 111 - Nikon D100 | Product Manual - Page 124
Viewing Photographs Viewing Photographs Single-Image Playback To play photographs back, press the will be displayed in the monitor. button. The most recent photograph To end playback and return to shooting mode, press the the shutter-release button halfway. 100-1 button or press 112 - Nikon D100 | Product Manual - Page 125
takes effect when the monitor is off. 1-Image Review ( 147) When ON is selected for Image Review (Custom Setting 1), photographs are automatically displayed in the monitor as they are being recorded to the memory card. In single-frame and self-timer modes, photographs are displayed one at a time - Nikon D100 | Product Manual - Page 126
... 19 4 Folder name ......... 126 10 Image size 46 5 File name 44 Page 3 1 Voice memo icon .. 180 6 Shutter speed ... 76-83 2 Protect status ....... 119 7 Aperture .......... 81-83 3 Camera type 8 Exposure mode ...... 76 4 Camera firmware 9 Exposure version compensation ........ 86 - Nikon D100 | Product Manual - Page 127
showing the distribution of tones in the image. The horizontal axis corresponds to pixel brightness, with dark tones to the left and bright 3 2 Protect status ....... 119 12 3 Image highlights (brightest areas of image) are marked by a flashing border. This page is only displayed if - Nikon D100 | Product Manual - Page 128
: Thumbnail Playback By pressing the button and rotating the com- mand dial, you can display images in "contact sheets" of four or nine images. The following operations can be performed while thumbnails are 100-1 100-2 displayed: 100-3 100-4 To Press and/or rotate Description Change - Nikon D100 | Product Manual - Page 129
takes effect when the monitor is off. 1-Image Review ( 147) When ON is selected for Image Review (Custom Setting 1), photographs are automatically displayed in the monitor as they are being recorded to the memory card. In single-frame and self-timer modes, photographs are displayed one at a time - Nikon D100 | Product Manual - Page 130
size of the area selected. Press the button and rotate the sub-command dial to magnify the selected area to fill the monitor. View other areas of the image Use the multi selector to view areas of the image not visible in the monitor. Hold the multi selector down to scroll rapidly to - Nikon D100 | Product Manual - Page 131
menu, and have DOS "read-only" status when viewed on a Windows computer. Note that protected images will be deleted when the memory card is formatted. To protect a photograph: 1 Display the image in full-frame playback or highlight it in the thumbnail list. 2 Press the button. The photograph - Nikon D100 | Product Manual - Page 132
multi selector to the left or highlight NO and press the button. Protected and Hidden Images Images marked with a icon are protected and can not be deleted. Hidden images are not displayed in single-image or thumbnail playback and can not be selected for deletion. Delete ( 124) To delete multiple - Nikon D100 | Product Manual - Page 133
the help of menus that appear in the camera monitor. This chapter covers: Using Camera Menus This section describes basic menu operations. The Playback Menu The playback menu contains options for managing the images stored on memory cards, and for playing pictures back in automated slide shows. The - Nikon D100 | Product Manual - Page 134
Menu Guide-Using Camera Menus Using Camera Menus Basic Menu Operations Viewing Camera Menus Camera menus can be activated by pressing the MENU button at any time when the camera is on. PLAYBACK MENU Delete Folder Designate ND100 Slide Show Hide Image Print Set Display Mode Choosing a menu When - Nikon D100 | Product Manual - Page 135
and return to main menu • Some menu items are not available when images are being recorded to the memory card or when the function dial is set to QUAL, WB, or ISO. or by turning the camera off. To exit the menus and focus the camera for the next shot, press the shutter-release button halfway. 123 - Nikon D100 | Product Manual - Page 136
Guide-The Playback Menu The Playback Menu The playback menu contains the following options: Managing Images PLAYBACK MENU Delete Folder Designate Slide Show Hide Image Print Set Display Mode ND100 Option Delete Folder Designate Slide Show Hide Image thumbnail images. To choose pictures for - Nikon D100 | Product Manual - Page 137
any associ- ated voice memos. High-Capacity Memory Cards If the memory card contains a large number of files or folders and the number of pictures to be deleted is very large, deletion can sometimes take more than half an hour. Hidden and Protected Images Images marked with a icon are protected - Nikon D100 | Product Manual - Page 138
the button is pressed when the camera is turned on, a new folder will be created if no empty folders are present on the memory card. Note that if the most recent folder is numbered 999, attempting to create a new folder at start up will cause an error, and the letters will flash in the control panel - Nikon D100 | Product Manual - Page 139
D100 will be visible during playback. Images in all folders created by cameras that conform to the Design Rule for Camera File Systems (DCF)-all Nikon digital cameras and most other makes of digital camera-will be visible during playback. Only images the camera is turned on. If the memory card - Nikon D100 | Product Manual - Page 140
images back one after the other in an automated "slide show." PLAYBACK MENU Slide Show Start Frame Intvl Menu Guide-The Playback Menu Starting the Slide Show: Start To start the slide show, select Start with current image displayed in monitor. Exit to shooting Shutter Press shutter-release button - Nikon D100 | Product Manual - Page 141
Guide-The Playback Menu Managing Images When the last image Intvl Description Resume slide show. Change length of time each image is displayed. Restart OK Frame Intvl To exit the slide shown at right. To change the length of time each image is displayed, press the multi selector up or down to - Nikon D100 | Product Manual - Page 142
Set Display Mode ND100 "hidden" and "read-only" status when viewed on a Windows computer. Like protected images, hidden images will be deleted when the memory card is formatted. Choosing Hide Image from the playback menu displays the photographs in the folder or folders selected in the Folder - Nikon D100 | Product Manual - Page 143
industry-wide standard that allows pictures to be printed from print orders stored on the memory card. Before printing the images, check that the printer or print service supports DPOF. Even without access to a DPOF-compatible device, you can still print images using Nikon View 5 if your computer is - Nikon D100 | Product Manual - Page 144
MENU button. 3 PLAYBACK MENU Print Set Press button to complete operation and display menu of print options. • To print shutter speed and aperture on Done Data Imprint OK all images in order, highlight Data Im- Imprint Date print and press multi selector to right. Check will appear in box - Nikon D100 | Product Manual - Page 145
. After Creating a Print Order After creating a print order, do not delete images from the memory card using another device, such as a computer, or change the hidden status of images in the print order. Either action could cause problems when you attempt to print the images in the order. 133 - Nikon D100 | Product Manual - Page 146
to the photo-information display showing the distribution of tones in the image. A page is added to the photo-information display showing image highlights. Highlights (brighter areas of the image) are indicated by a flashing border. Two pages are added to the photo-information display, one showing - Nikon D100 | Product Manual - Page 147
Menu Guide-The Shooting Menu The Shooting Menu The shooting menu contains two pages of options: Shooting Options SHOOTING MENU Bank Select A Image Quality NORM Resolution L White Bal A ISO 200 SHOOTING MENU ISO 200 Image Sharpening A Tone Comp. A Color Mode I Hue Adjustment 0° - Nikon D100 | Product Manual - Page 148
Fine JPEG Normal OK JPEG Basic Option NEF (Raw) Description Raw 12-bit data from the CCD are saved directly to the memory card in Nikon Electronic Image Format (NEF). NEF files can only be viewed in Nikon View 5 or Nikon Capture 3 ( 169). Two NEF modes are available: • NEF (Raw) In this mode, NEF - Nikon D100 | Product Manual - Page 149
without becoming noticeably "grainy." Choose image size according to the space available on the memory card and the task at hand. image quality of NEF (Raw) or Comp. NEF (Raw). Selecting either option cancels white balance bracketing. White balance for NEF (RAW) images can be adjusted using Nikon - Nikon D100 | Product Manual - Page 150
Guide Color Temperature* Description Auto Camera measures color temperature and ad4 lens. Incandescent 3,000 K Use under incandescent lighting. Fluorescent 4,200 K Use under fluorescent lighting. Direct Sunlight 5,200 K Use with subjects lit by direct sunlight. Flash 5,400 K Use with Nikon - Nikon D100 | Product Manual - Page 151
Guide-The Shooting Menu Shooting Options Setting Sensitivity: ISO The ISO menu controls sensitivity, the digital equivalent of film speed. Options range from ISO 200 (roughly equivalent to a film speed when a fast shutter speed is required to prevent blurring. We recommend that image sharpening ( - Nikon D100 | Product Manual - Page 152
Menu Guide-The Shooting Menu The Shooting Menu Making Edges More Distinct: Image Sharpening When you take a photograph, the camera automatically processes the image to increase the distinction between light and dark areas, making the picture appear sharper. The options in the Image Sharpening - Nikon D100 | Product Manual - Page 153
own tone curve and download it to the camera. Custom is used to select this user-defined curve. If no curve has been downloaded to the camera, this option is equivalent to Normal. * This feature is not available when the D100 is used with the Macintosh version of Nikon Capture 3. Auto Even when - Nikon D100 | Product Manual - Page 154
Menu Guide-The Shooting Menu The Shooting Menu Setting Colors Based on Workflow: Color Mode Your Nikon digital camera offers a choice of color modes. How you choose a color mode depends on how the final photograph will be processed once it leaves the camera. SHOOTING MENU Color Mode (sRGB) OK - Nikon D100 | Product Manual - Page 155
Guide-The Shooting Menu Shooting Options Controlling Color: Hue Adjustment This option is used to adjust the hue of photo- graphs as they are taken. Hue can be adjusted in the range -9 ° to 9 ° in increments of 3 °. If red is taken as the starting model used in digital photographs reproduces colors - Nikon D100 | Product Manual - Page 156
Image Review 147 2 No CF Card? Disable Shutter if no CF Card 147 3 ISO Auto ISO Auto Control 148 4 Long Exp. NR Long Exposure Noise Reduction 149 5 File No. Seq. File Number Sequence 150 6 Monitor Off Monitor Off Delay 151 7 Auto Meter-Off Auto Meter-Off Delay 151 8 Self-timer - Nikon D100 | Product Manual - Page 157
Menu Guide-Custom Settings Custom Setting R: Menu Reset Image Review OFF 2 No CF Card? ON 3 ISO Auto OFF 4 Long Exp. NR OFF 5 File No. Seq. OFF 6 Monitor Off 20 s 7 Auto Meter-Off 6s 8 Self-timer 10 s 9 EV Step 1/3 Step 10 Exposure Comp. [+/-] & CMD Dial 11 BKT Set AE & Flash - Nikon D100 | Product Manual - Page 158
Menu Guide-Custom Settings Custom Settings Custom Setting 0: Bank Select Custom settings B combination of settings you use frequently, you can select Bank A and set the camera to these settings. The camera will "remember" these settings even when turned off, and restore them the next time - Nikon D100 | Product Manual - Page 159
can be used to enable the shutter release when no memory card is inserted in the camera. Note that when photographs are being captured to a computer using Nikon Capture 3 Camera Control, photographs are not recorded to the camera memory card and the shutter release will be enabled regardless of - Nikon D100 | Product Manual - Page 160
Menu Guide-Custom Settings Custom Settings Custom Setting 3: ISO Auto If ON is selected for this option, the camera will OK ON ON Option OFF (default) ON Description Sensitivity remains fixed at value selected by user, regardless of whether optimal exposure can be achieved at current - Nikon D100 | Product Manual - Page 161
Option OFF (default) ON Description Noise reduction off; camera functions normally. Noise reduction takes effect at shutter speeds of about 1/2 s or slower. Time required to process images more than doubles. During processing, blinks in shutter-speed and aperture displays. Next photo can be taken - Nikon D100 | Product Manual - Page 162
unique names, the camera assigns each image a file name containing a four digit number, starting from 0001, and adds one to the file number with each shot. Custom Setting 5 controls whether the camera "remembers" the current file number when a new memory card is inserted or the user creates a new - Nikon D100 | Product Manual - Page 163
6 s. Choose a shorter meter off delay for longer battery life. Custom Setting 8: Self-Timer This option controls length of the delay from the time the shutter release button is pressed to the time the shutter is released in self-timer mode ( 108). Shutter release can be delayed by approximately two - Nikon D100 | Product Manual - Page 164
Exposure mode Menu Guide-Custom Settings Custom Settings Custom Setting 10: Exposure Comp. This option controls whether the button is needed to set exposure compensation ( 86). CSM MENU F10 - Nikon D100 | Product Manual - Page 165
Guide-Custom Settings Fine-Tuning Camera Settings Custom Setting 11: BKT Set This option controls what settings are affected when bracketing ( 87) is in effect. CSM MENU F11 Bracketing Set AE & Flash OK AE Only Flash Only WB Bracketing Option AE & Flash (default) AE Only Flash at image - Nikon D100 | Product Manual - Page 166
controls shutter speed (shutter-priority auto and manual exposure modes), the sub-command dial aperture (aperture-priority auto and manual exposure modes). These functions can be reversed using Custom Setting 13. The setting selected also applies to the optional MB-D100 multi-function battery pack - Nikon D100 | Product Manual - Page 167
Menu Guide-Custom Settings Fine-Tuning Camera Settings Custom Setting 15: AE Lock This option controls whether exposure will lock while the shutter-release button is pressed halfway. CSM MENU F15 AE Lock Button OFF AE-L/AF-L Button OK ON + Shutter Button Option Description AE-L/AF-L Button ( - Nikon D100 | Product Manual - Page 168
Menu Guide-Custom Settings Custom Settings Custom Setting 17: Focus Area By default, the AF Area Illum This option controls whether or not the active focus area is highlighted in red in the viewfinder. CSM MENU F18 Focus Area Illumination A AUTO OK OFF OFF ON ON Option Auto (default) OFF ON - Nikon D100 | Product Manual - Page 169
Menu Guide-Custom Settings Fine-Tuning Camera Settings Custom Setting 19: Grid Display (On-Demand Grid Lines) Using this option, on-demand grid lines ( 10) can be displayed in the viewfinder for reference when composing photographs, taking landscape CSM MENU F19 Grid lines display in Viewfinder - Nikon D100 | Product Manual - Page 170
output can be adjusted using flash exposure compensation ( 102). Manual flash When built-in Speedlight is raised, flash fires at full output with every shot (GN at ISO 200 18/59, at ISO 100 12.7/42, m/ft). Flash exposure compensation indicators ( ) in control panel and viewfinder blink on and off - Nikon D100 | Product Manual - Page 171
Menu Guide-Custom Settings Fine-Tuning Camera Settings Custom Setting 24: Anti-shock Normally, the mirror is raised out of the way of the CCD immediately before the shutter opens to create an exposure. To minimize camera shake in situations in which the least camera movement can blur photographs ( - Nikon D100 | Product Manual - Page 172
Menu Guide-Custom Settings Custom Settings Custom Setting 25: Batt PK AF Btn This option controls the function performed by the AF-ON button on the optional MB-D100 multifunction battery pack ( 180), and is only available when the MB-D100 is connected. See the instruction manual provided with the - Nikon D100 | Product Manual - Page 173
menu contains the following options: SET UP Format - - LCD Brightness O Mirror Lock-up OFF Video Output NTSC Date - - Language En Image Comment OFF Option Format LCD Brightness Mirror Lock-up Video Output Date Language Image Comment Camera Setup 162 163 163 164 19 18 164 Date and - Nikon D100 | Product Manual - Page 174
Menu Guide-The Setup Menu The Setup Menu Formatting Memory Cards: Format Memory cards must be formatted before first use. Formatting memory cards is also an effective way of deleting all pictures on the card. To format a memory card: SET UP Format Warning! All images will be deleted NO YES - Nikon D100 | Product Manual - Page 175
Menu Guide-The Setup Menu Camera Setup Adjusting Monitor Brightness: LCD Brightness This Mirror Lock-up Notes: Caring for the Camera and Battery". OFF OFF OK ON CCD Cleaning Option OFF CCD Cleaning Description Mirror functions normally. Mirror will be locked in up position when shutter - Nikon D100 | Product Manual - Page 176
photographs are displayed using Nikon View 5 or Nikon Capture 3. The first twelve letters of the comment are also SET UP Image Comment Done OK Input Comment Attach Comment visible on the fourth page of the photo informa- tion display ( 114). Video Output The default video output varies with - Nikon D100 | Product Manual - Page 177
Menu Guide-The Setup Menu Camera Setup Entering a Comment: Input Comment Selecting Input Comment displays the dialog shown below, where you can enter a comment the button. When you have finished editing the comment, press the the changes and return to the image comment menu. button to save 165 - Nikon D100 | Product Manual - Page 178
Guide-The Setup Menu The Setup Menu Adding the Comment to Photographs: Attach Comment Once you have entered a comment as described above, you can choose whether or not to add the comment to subsequent photographs. To add the comment to subsequent photographs, highlight Attach Comment in the image - Nikon D100 | Product Manual - Page 179
-term storage. Television Playback Read this section for information on connecting the camera to a television or VCR and playing images back on the television screen. Connecting to a Computer This section describes the software available for the D100, how to connect the camera to a computer . 167 - Nikon D100 | Product Manual - Page 180
. 2 Open the cover protecting the camera's interface connectors. 3 Connect the camera to the video device as shown. Connect to Connect to camera video device 4 Tune the television to the video channel. 5 Turn the camera on. When the button is pressed to play pictures back or the button pressed to - Nikon D100 | Product Manual - Page 181
later RAM 64 MB (128 MB with RAW images) or more recommended Hard-disk space 25 MB required for installation, with additional free disk space of 10 MB plus an amount equal to double the capacity of camera memory card available on system disk when Nikon View 5 is running. Video 800 × 600 pixels - Nikon D100 | Product Manual - Page 182
separately), you can control the camera from your computer. Photographs can be recorded directly to the computer hard disk via a USB connection, or captured into Nikon Capture 3 and processed before being saved to disk. Nikon Capture 3 supports Nikon Electronic Image Format (NEF), allowing you to - Nikon D100 | Product Manual - Page 183
RAM (Nikon View 5) 64 MB (128 MB with RAW images) or more recommended Hard-disk space 200 MB required for installation, with additional free disk space of 10 MB plus an amount equal to double the capacity of camera memory card available on system disk when Nikon Capture 3 is running. Video 800 - Nikon D100 | Product Manual - Page 184
3 (available separately). Installation instructions for Nikon View 5 are provided in the Quick Start Guide. Once you have installed the necessary software, you can connect the camera and computer as detailed below. 1 Turn the computer on and wait for the operating system to start up. 2 Turn the - Nikon D100 | Product Manual - Page 185
than the camera memory card (Windows only; the Macintosh version of Nikon Capture does not support camera control with the D100). For details on operation, see the user's manual provided with Nikon Capture 3. 5 Before disconnecting the camera, you will need to remove it from the system as described - Nikon D100 | Product Manual - Page 186
Eject from the menu that appears. Mac OS X Drag the "Nikon_D100" camera volume into the Trash. Mac OS 9 Drag the "Nikon D100" camera volume into the Trash. Mac OS X Mac OS 9 6 Check that is no longer displayed in the control panel or viewfinder. You can now disconnect the cable or turn the - Nikon D100 | Product Manual - Page 187
the following topics: Optional Accessories ( 176-183) A list of the lenses and other accessories available for the D100. Caring for Your Camera ( 184-187) Information on storage and maintenance. Troubleshooting ( 188-191) A list of the error messages displayed by your camera and how to deal with - Nikon D100 | Product Manual - Page 188
-CPU Lenses Non-CPU lenses not listed above can be used, but only in manual exposure mode ( 82). Aperture must be adjusted manually using the lens aperture ring and the camera's exposure meter can not be used. If another exposure mode is selected when a nonCPU lens is attached, the shutter release - Nikon D100 | Product Manual - Page 189
using the image in the viewfinder as a guide. 9 With maximum aperture of f/5.6 or faster. 10 Some lenses can not be used (see previous page). 11 Camera exposure meter can not be used. 12 Can be used at shutter speeds slower than 1/180 s, but cam- era exposure meter can not be used. 13 Attach in - Nikon D100 | Product Manual - Page 190
Technical Notes-Optional Accessories Optional Accessories For the D100, Nikon recommends CPU lenses, particularly types G and D, as it is only with type G and D lenses that you can use such features as 3D-matrix metering and 3D multi sensor balanced fill flash for digital SLR. CPU lenses can be - Nikon D100 | Product Manual - Page 191
Lenses and Other Accessories Picture Angle and Focal Length A 35-mm camera has a diagonal picture angle approximately one-and-a-half times that of the D100. When calculating the focal length of the lenses for the D100 in 35-mm format, you will therefore need to multiply the focal length of the lens - Nikon D100 | Product Manual - Page 192
or single-image playback. The MB-D100 also incor- Battery packs/ porates a ten-pin remote terminal for connection to other devicAC adapters es. When attaching the MB-D100, you will need to remove the battery-chamber cover and the MB-D100 terminal cover from the camera. The camera battery-chamber - Nikon D100 | Product Manual - Page 193
are supported: slow sync, rear-curtain sync, and manual. If the built-in Speedlight is raised when the SB-50DX is set to manual in the bounce-flash position, both Speedlights will fire. PC card adapters ■ EC-AD1 PC Card Adapter The EC-AD1 PC card adapter allows Type I CompactFlash™ memory cards to - Nikon D100 | Product Manual - Page 194
-Optional Accessories ■ AR-3 Cable Release Cable release The AR-3 can be attached to the camera release terminal to reduce camera shake in situations that demand slow shutter speeds, such as night landscape, astronomical, and close-up photography. Remote The MB-D100 multi-function battery pack - Nikon D100 | Product Manual - Page 195
Accessories Your Nikon D100 digital camera is designed to the highest standards and includes complex electronic circuitry. Only Nikon brand electronic accessories (including battery chargers, batteries, and AC adapters) certified by Nikon specifically for use with your Nikon digital camera - Nikon D100 | Product Manual - Page 196
. Turn the camera on and release the shutter a few times before putting the camera away again. Servicing the Camera and Accessories Your camera is a precision device and requires regular servicing. We recommend that you have your camera inspected by your retailer or Nikon service representative once - Nikon D100 | Product Manual - Page 197
Camera body Use a blower to remove dust and lint, then wipe gently with a soft, dry cloth. After using the camera at the beach or seaside, wipe off sand or salt with a cloth lightly dampened in distilled water and dry thoroughly. These elements are made of glass and are easily damaged. Remove Lens - Nikon D100 | Product Manual - Page 198
as the camera's picture element is fitted camera to a Nikon-authorized service center. 2 Remove the lens and turn the camera on. 3 Press the MENU button and select Mirror Lock-up from the setup menu ( 163). Highlight CCD Cleaning and press the multi selector to the right. The message, "Press shutter - Nikon D100 | Product Manual - Page 199
with a blower can only be removed by Nikon-authorized service personnel. Under no circumstances should you touch or wipe the filter. 3 Turn the camera off. The mirror will return to the down position and the shutter curtain will close. Replace the lens or body cap and disconnect the AC adapter. 187 - Nikon D100 | Product Manual - Page 200
Notes-Troubleshooting Troubleshooting Understanding Error Messages and Displays This section lists the indicators and error messages that appear in the viewfinder, control panel, and monitor when there is a problem with the camera. Consult the list below before contacting your retailer or Nikon - Nikon D100 | Product Manual - Page 201
settings, or camera has run out • Delete photographs. (blinks) of file or folder numbers. • Insert new memory card. 44, 46 120, 124 22 (blinks) Camera malfunction. Release shutter. If error per- sists or appears frequently, consult with Nikon-authorized 192 service representative. 189 - Nikon D100 | Product Manual - Page 202
-Troubleshooting Troubleshooting Playback Errors During playback, error messages are displayed in the monitor. Indicators may also appear in the control panel. Message Control panel Problem Solution No card present Camera cannot detect Turn camera off and confirm 17, memory card. that card - Nikon D100 | Product Manual - Page 203
Technical Notes-Troubleshooting Understanding Error Messages and Displays A Note on Electronically-Controlled Cameras In extremely rare instances, unusual characters may appear in the control panel and the camera may stop functioning. In most cases, this phenomenon is caused by a strong - Nikon D100 | Product Manual - Page 204
writing, the following on-line resources were available for users of Nikon digital imaging equipment. For Product Information and Tips • For users in the U.S.A.: http://www.nikonusa.com • For users in Europe: http://www.nikon-euro.com/ • For users in Asia, Oceania, the Middle East, and Africa: http - Nikon D100 | Product Manual - Page 205
Nikon F mount (with AF coupling and AF contacts) Compatible lenses Type G or D AF Nikkor All functions supported PC Micro Nikkor 85 mm F2.8D All functions except autofocus supported Other AF Nikkor (IX Nikkor All functions except 3D multi-sensor balanced fill flash excluded) for digital SLR - Nikon D100 | Product Manual - Page 206
locked by pressing shutter-release button halfway (single-servo AF) or pressing AE-L/AF-L button Exposure Metering Three-mode through-the-lens (TTL) exposure metering Matrix 3D matrix metering supported with type G and D lenses; matrix metering available with other lens types Center-weighted - Nikon D100 | Product Manual - Page 207
five-seg- ment TTL multi sensor with single-component IC. Supports 3D multi-sensor balanced fill flash for digital SLR (built in Speedlight or SB-series 80DX/50DX/ 28DX with type G or D lens) and multi-sensor balanced fill flash for digital SLR (built in Speedlight or SB-series 80DX/50DX/28DX with - Nikon D100 | Product Manual - Page 208
oz) without battery or memory card Operating Environment Temperature 0 - 40 °C (32 - 104 °F) Humidity Less than 85% (no condensation) * Unless otherwise stated, all figures are for a camera with a fully-charged battery operating at an ambient temperature of 20 °C (68 °F). * Nikon reserves the - Nikon D100 | Product Manual - Page 209
can reduce battery life: • Using the monitor • Keeping the shutter-release button pressed halfway • Repeated autofocus operations • Taking NEF (raw) or TIFF-RGB photographs • Slow shutter speeds To ensure that you get the most from rechargeable Nikon EN-EL3 batteries: • Keep the battery contacts - Nikon D100 | Product Manual - Page 210
, 35, 116, 124-125. See also memory card, formatting all images, 125 playback menu, 124-125 selected images, 124-125 single-frame playback, 35 Depth-of-field preview, 76 Digital Print Order Format, 131 Dipoter, 30 DPOF. See Digital Printer Order Format D-TTL flash control, 94-95, 158 E Electronic - Nikon D100 | Product Manual - Page 211
, 75 Microdrive. See memory card Mirror shock, 159 Monitor, v, 135, 185 auto off, 151 cover, 15 Monitor pre-flashes, 95 Multi Sensor Balanced Fill-Flash for Digital SLR, 95 N NEF, 44-46 Nikon Capture 3, 170-171 Nikon View 5, 169 Noise, 83, 149 Noise reduction, 149 NORMAL. See Image Quality O On - Nikon D100 | Product Manual - Page 212
-
 1
1 -
 2
2 -
 3
3 -
 4
4 -
 5
5 -
 6
6 -
 7
7 -
8
-
9
-
10
-
11
-
12
-
13
-
14
-
15
-
16
-
17
-
18
-
19
-
20
-
21
-
22
-
23
-
24
-
25
-
26
-
27
-
28
-
29
-
30
-
31
-
32
-
33
-
34
-
35
-
36
-
37
-
38
-
39
-
40
-
41
-
42
-
43
-
44
-
45
-
46
-
47
-
48
-
49
-
50
-
51
-
52
-
53
-
54
-
55
-
56
-
57
-
58
-
59
-
60
-
61
-
62
-
63
-
64
-
65
-
66
-
67
-
68
-
69
-
70
-
71
-
72
-
73
-
74
-
75
-
76
-
77
-
78
-
79
-
80
-
81
-
82
-
83
-
84
-
85
-
86
-
87
-
88
-
89
-
90
-
91
-
92
-
93
-
94
-
95
-
96
-
97
-
98
-
99
-
100
-
101
-
102
-
103
-
104
-
105
-
106
-
107
-
108
-
109
-
110
-
111
-
112
-
113
-
114
-
115
-
116
-
117
-
118
-
119
-
120
-
121
-
122
-
123
-
124
-
125
-
126
-
127
-
128
-
129
-
130
-
131
-
132
-
133
-
134
-
135
-
136
-
137
-
138
-
139
-
140
-
141
-
142
-
143
-
144
-
145
-
146
-
147
-
148
-
149
-
150
-
151
-
152
-
153
-
154
-
155
-
156
-
157
-
158
-
159
-
160
-
161
-
162
-
163
-
164
-
165
-
166
-
167
-
168
-
169
-
170
-
171
-
172
-
173
-
174
-
175
-
176
-
177
-
178
-
179
-
180
-
181
-
182
-
183
-
184
-
185
-
186
-
187
-
188
-
189
-
190
-
191
-
192
-
193
-
194
-
195
-
196
-
197
-
198
-
199
-
200
-
201
-
202
-
203
-
204
-
205
-
206
-
207
-
208
-
209
-
210
-
211
-
212
 |
 |