Olympus C-2000 C-2000 Zoom Instruction manual (5.5 MB) - Page 208
Date Print P-300
 |
UPC - 050332128231
View all Olympus C-2000 manuals
Add to My Manuals
Save this manual to your list of manuals |
Page 208 highlights
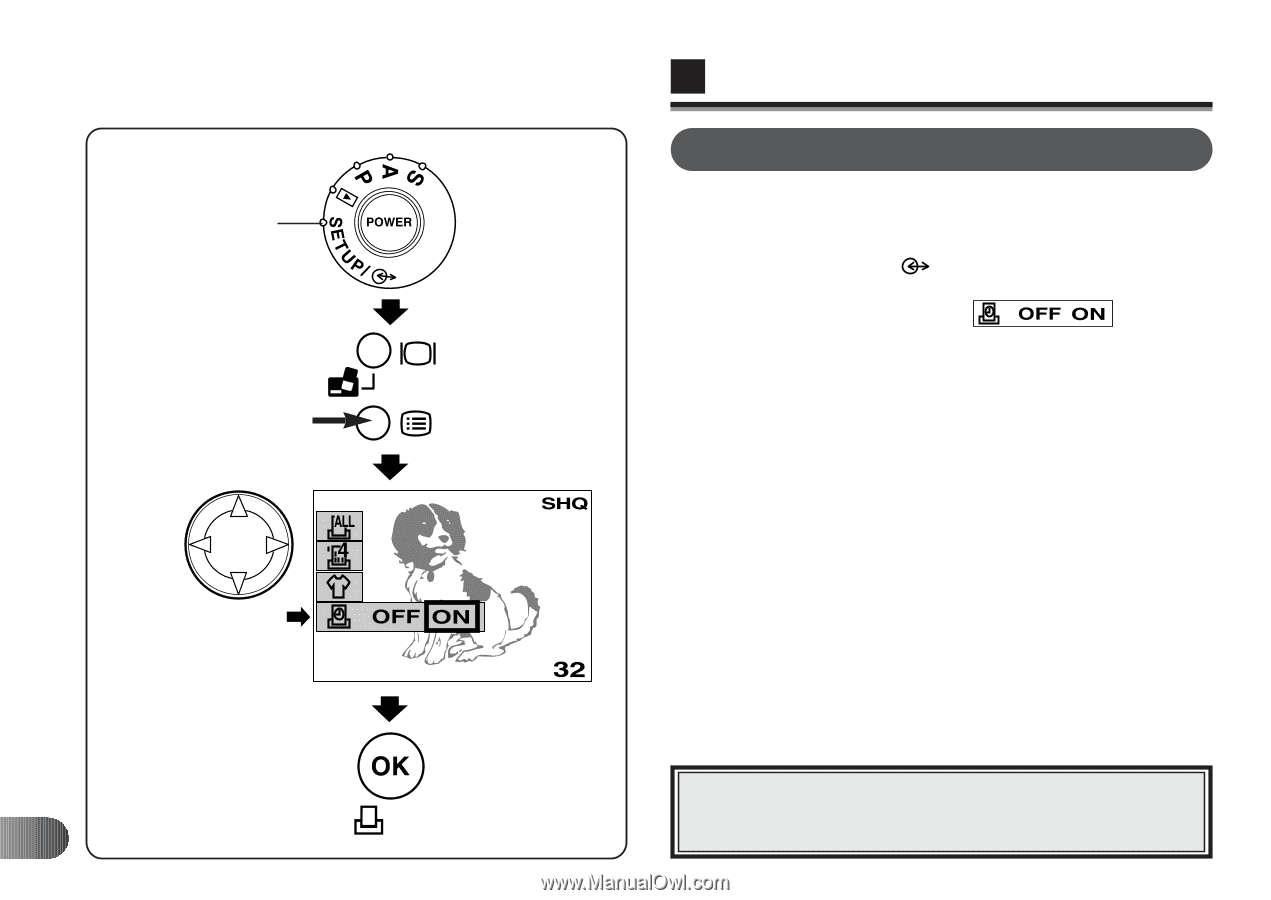
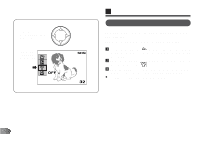
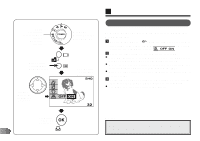
Outer connection Raccordement externe Conexión externa Menu button Touche Menu Botón de menú Jog dial Molette de défilement Disco Jog OK button Touche OK Botón OK 208 Mode dial Molette de mode Disco de modo LCD Monitor Écran ACL Monitor LCD E DATE PRINT (P-300) You can print the date with pictures using the P-300 printer. 1 Set the Mode dial to " " with the camera connected to the printer, then press the Menu button. Press the bottom arrow on the Jog dial to select . 2 Press the right arrow on the Jog dial to select ON. ● If the OK button is pressed after selection, the adjustment will be stored and the Menu mode will be canceled. ● When there are no pictures selected for printing, the currently displayed picture will be printed. (p. 198) ● When an index picture or close-up picture is displayed, it will be printed. 3 Enter the number of copies to be printed on the printer, then press the DIRECT PRINT button to start printing. ● See page 192 for connection to the printer. Note: x Date print is not available in the 4/16-cut print modes. (p. 204)
-
 1
1 -
2
-
3
-
4
-
5
-
6
-
7
-
8
-
9
-
10
-
11
-
12
-
13
-
14
-
15
-
16
-
17
-
18
-
19
-
20
-
21
-
22
-
23
-
24
-
25
-
26
-
27
-
28
-
29
-
30
-
31
-
32
-
33
-
34
-
35
-
36
-
37
-
38
-
39
-
40
-
41
-
42
-
43
-
44
-
45
-
46
-
47
-
48
-
49
-
50
-
51
-
52
-
53
-
54
-
55
-
56
-
57
-
58
-
59
-
60
-
61
-
62
-
63
-
64
-
65
-
66
-
67
-
68
-
69
-
70
-
71
-
72
-
73
-
74
-
75
-
76
-
77
-
78
-
79
-
80
-
81
-
82
-
83
-
84
-
85
-
86
-
87
-
88
-
89
-
90
-
91
-
92
-
93
-
94
-
95
-
96
-
97
-
98
-
99
-
100
-
101
-
102
-
103
-
104
-
105
-
106
-
107
-
108
-
109
-
110
-
111
-
112
-
113
-
114
-
115
-
116
-
117
-
118
-
119
-
120
-
121
-
122
-
123
-
124
-
125
-
126
-
127
-
128
-
129
-
130
-
131
-
132
-
133
-
134
-
135
-
136
-
137
-
138
-
139
-
140
-
141
-
142
-
143
-
144
-
145
-
146
-
147
-
148
-
149
-
150
-
151
-
152
-
153
-
154
-
155
-
156
-
157
-
158
-
159
-
160
-
161
-
162
-
163
-
164
-
165
-
166
-
167
-
168
-
169
-
170
-
171
-
172
-
173
-
174
-
175
-
176
-
177
-
178
-
179
-
180
-
181
-
182
-
183
-
184
-
185
-
186
-
187
-
188
-
189
-
190
-
191
-
192
-
193
-
194
-
195
-
196
-
197
-
198
-
199
-
200
-
201
-
202
-
 203
203 -
 204
204 -
 205
205 -
 206
206 -
 207
207 -
 208
208 -
 209
209 -
 210
210 -
 211
211 -
 212
212 -
 213
213 -
214
-
215
-
216
-
217
-
218
-
219
-
220
-
221
-
222
-
223
-
224
-
225
-
226
-
227
-
228
-
229
-
230
-
231
-
232
-
233
-
234
-
235
-
236
-
237
-
238
-
239
-
240
-
241
-
242
-
243
-
244
-
245
-
246
-
247
-
248
 |
 |