Ricoh 2020D Scanner Reference
Ricoh 2020D - Aficio B/W Laser Manual
 |
View all Ricoh 2020D manuals
Add to My Manuals
Save this manual to your list of manuals |
Ricoh 2020D manual content summary:
- Ricoh 2020D | Scanner Reference - Page 1
Printer/Scanner Unit Type 2018 Operating Instructions Scanner Reference Network Scanner Preparations for Use as a Network Scanner Setting Originals Sending Scan Files by E-mail Using the Network Delivery Scanner Function Using the Network TWAIN Scanner Function Appendix Read this manual carefully - Ricoh 2020D | Scanner Reference - Page 2
Introduction This manual contains detailed instructions and notes on the operation and use of this machine. For your safety and benefit, read this manual carefully before using the machine. Keep this manual in a handy place for quick reference. The scanner function is available when the Printer/ - Ricoh 2020D | Scanner Reference - Page 3
and describes System Settings (paper trays, Key Operator Tools, etc.), and troubleshooting. Refer to this manual for Address Book procedures such as registering fax numbers, e-mail addresses, and user codes. ❖ Network Guide (PDF file - CD-ROM1) Describes procedures for configuring the machine and - Ricoh 2020D | Scanner Reference - Page 4
when DeskTopBinder Lite is installed. ❖ Manuals for ScanRouter V2 Lite ScanRouter V2 Lite is a utility included on the CD-ROM labeled "Scanner Driver & Document Management Utilities". • ScanRouter V2 Lite Setup Guide (PDF file - CD-ROM2) Describes the installation of ScanRouter V2 Lite, settings - Ricoh 2020D | Scanner Reference - Page 5
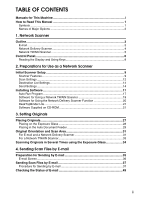
for Use as a Network Scanner Initial Scanner Setup 9 Scanner Features...9 Scan Settings ...12 Destination List Settings 14 Send Settings...14 Installing Software 17 Auto Run Program 17 Software for Using a Network TWAIN Scanner 19 Software for Using the Network Delivery Scanner Function 20 - Ricoh 2020D | Scanner Reference - Page 6
Size 69 When Using as E-mail or Network Delivery Scanner 69 When Using as a Network TWAIN Scanner 69 Max. Number of Addresses Which Can Be Specified 70 Troubleshooting 71 When Scanning Is Not Performed as Expected 71 When the Delivery Function Does Not Work 71 When an Error Message Appears on - Ricoh 2020D | Scanner Reference - Page 7
How to Read This Manual Symbols In this manual, the following symbols are used: Important If this instruction is not followed, paper might be misfed, originals might be damaged, or files might be lost. Be sure to read this. Preparation This symbol indicates - Ricoh 2020D | Scanner Reference - Page 8
Glass Cover • Auto Document Feeder → ADF • Auto Document Feeder capable of scanning both sides of a sheet → ARDF • Printer/Scanner Unit Type 2018 → printer/scanner controller The following software products are referred to using a general name: • DeskTopBinder Lite and DeskTopBinder Professional - Ricoh 2020D | Scanner Reference - Page 9
1. Network Scanner Outline By installing the printer/scanner controller, the machine can be used as a network scanner. As a network scanner, the machine can send scan files by e-mail, operate as a network delivery scanner, and operate as a network TWAIN scanner. E-mail Scan files that are attached - Ricoh 2020D | Scanner Reference - Page 10
Network Scanner Network Delivery Scanner The machine is used as a delivery scanner with the ScanRouter delivery soft- 1 ware. Scan files are stored in the delivery server and delivered to the folders of client computers on the same network. Reference p.51 "Using the Network Delivery Scanner - Ricoh 2020D | Scanner Reference - Page 11
about ScanRouter V2 Lite, DeskTopBinder Lite, or Auto Document Link, see p.i "Manuals for This Machine". Network TWAIN Scanner 1 The scanning function of this machine can be used from a client computer via a network (Ethernet, IEEE 1394 (IP over 1394) [optional], or IEEE 802.11b (Wireless - Ricoh 2020D | Scanner Reference - Page 12
Network Scanner Control Panel This illustration shows the control panel when options are installed. 1 1 23 4 56 7 8 9 1011 12 13 Communicating Start Manual Reception Receive File Immediate Trans. Memory Trans. Switch RX Mode Transmission Stamp Standard Detail Fine Search Check Job - Ricoh 2020D | Scanner Reference - Page 13
and symbols. Reference For more information, see General Settings Guide. Note ❒ You can register up to 32 destinations using type registered with [Type 1(Text):] or [ Type 2(Photo):]. When the original type is selected, the corresponding indicator lights scanning or sending. Control Panel 1 7 - Ricoh 2020D | Scanner Reference - Page 14
default screen when the machine is turned on. You can change the settings in [ System Settings ]. See General Setting Guide. 4 OK 1 1. Selection keys Correspond to items at the bottom line on the display. Example: The E-mail screen • When the instruction "press [ ]" is given in this manual - Ricoh 2020D | Scanner Reference - Page 15
Features The settings for using the network scanner functions of the machine are listed below. Make the necessary settings. Note ❒ Make settings for the items marked with ❍ if necessary. ❖ Scan Settings For explanations of settings, see p.12 "Scan Settings". Settings Default Scan Set- Default - Ricoh 2020D | Scanner Reference - Page 16
Preparations for Use as a Network Scanner ❖ Destination List Settings For explanations of settings, see p.14 "Destination List Settings". Settings Default E-mail Deliv- TWAIN ery Destina- Destination List Pri- Delivery Server ❍ ❍ tion List ority 2 Settings Update Server Dest. List - ❍ - Ricoh 2020D | Scanner Reference - Page 17
Initial Scanner Setup B Select [Scanner Features] using {U} or {T}, and then press the {OK} key. C Select a menu using {U} or {T}, and then press the {OK} key. 2 D Select a setting using {U} or {T}, and then press the {OK} key. Example: TWAIN Standby Time setting E Change the settings. • Select - Ricoh 2020D | Scanner Reference - Page 18
and tional ADF capable of scanning both sides of a sheet (ARDF). defaults, see p.9 "Scanner Features". Set the default for whether origi- ❖ Default Scan Settings nals are one-sided or two-sided Resolution and scan size can be set. and if two-sided, the relationship • Resolution Select the - Ricoh 2020D | Scanner Reference - Page 19
Initial Scanner Setup ❖ Orig. Orientation Priority Select the default for original placement orientation. When originals are always positioned the same way, select that orientation as the default to make operation easier. Reference p.31 "Original Orientation and Scan Area" ❖ Original Type Setting - Ricoh 2020D | Scanner Reference - Page 20
about settings and defaults, see p.9 "Scanner Features". ❖ TWAIN Standby Time When the machine is being used to send e-mail or functioning as a network delivery scanner, a scanning request to the machine as a TWAIN scanner will switch the machine to the network TWAIN scanner function. This setting - Ricoh 2020D | Scanner Reference - Page 21
(per max. size)] is se- er each time. lected, some received files may not be able to be restored, depending on the type of e-mail software. • Select [Key Op's E-mail Address] to specify an administrator as the sender. 15 - Ricoh 2020D | Scanner Reference - Page 22
Preparations for Use as a Network Scanner Important ❒ It is recommended that a sender's password be set to prevent the sender's when [Sender's Name Default] in [Send Settings] of [Scanner Fea- tures] is selected. For more infor- mation about System Settings, see General Settings Guide. 16 - Ricoh 2020D | Scanner Reference - Page 23
machine as a network scanner. Auto Run Program When the CD-ROM is inserted into a client computer in Windows 95/98/Me/2000/XP, or Windows NT 4.0, the installer starts automatically (Auto Run) to install the TWAIN driver and various software. Note ❒ Auto Run might not automatically work with certain - Ricoh 2020D | Scanner Reference - Page 24
for Use as a Network Scanner The installing sequence using Auto Run is as follows. Installation Sequence Insert the CD-ROM. 2 TWAIN Driver Ver.3 The installer starts up. TWAIN Driver ScanRouter V2 Lite Select the software. ScanRouter V2 Lite ScanRouter V2 Administration Utility The - Ricoh 2020D | Scanner Reference - Page 25
Software Software for Using a Network TWAIN Scanner To use the machine as a network TWAIN scanner, it is essential to install the TWAIN driver. If you do not have applications that work with TWAIN, it is necessary to also install DeskTopBinder Lite. For information about the installation - Ricoh 2020D | Scanner Reference - Page 26
and then the DeskTopBinder Lite Setup screen appears. C Click [ScanRouter V2 Lite] or [DeskTopBinder Lite]. The installer of the software starts. Follow the instructions on the screen. Reference For information about the subsequent installation procedure, see Setup Guide that can be displayed from - Ricoh 2020D | Scanner Reference - Page 27
/XP, Windows NT 4.0 Utility RouterV2 ScanRouter V2 Lite , ScanRouter V2 Administration Utility DeskV2 DeskTopBinder Lite Acroread Acrobat Reader Type2018 TWAIN Driver This driver is required to scan an original on the machine. To use the machine as a network TWAIN scanner, this driver must - Ricoh 2020D | Scanner Reference - Page 28
Preparations for Use as a Network Scanner ❖ System requirements Limitation ❒ Under Windows NT with RISC-based processors (MIPS R series, Alpha AXP, or PowerPC), this driver is not available. • Hardware PC/AT compatible 2 • CPU Pentium or faster (Pentium 150 MHz or faster recommended) • - Ricoh 2020D | Scanner Reference - Page 29
or later) Microsoft Windows NT Server 4.0 (Service Pack 5 or later) • Memory 48 MB or more (128 MB or more recommended) • Hard disk space 50 MB or more (200 MB or more recommended) • Display resolution 800 × 600 pixels, 64K colours or higher • Network protocol TCP/IP ❖ Software installed with - Ricoh 2020D | Scanner Reference - Page 30
network. Reference 2 See ScanRouter V2 Lite Help or the manuals for ScanRouter V2 Lite. ❖ File storage folder The files are stored in the following folder on the CD-ROM provided with this machine: \UTILITY\ROUTERV2 ❖ System requirements Limitation ❒ When installing the software in Windows - Ricoh 2020D | Scanner Reference - Page 31
files in the delivery server. In addition, you can perform maintenance for free disk space monitoring, error log recording, and other features of the delivery server. 2 Note ❒ ScanRouter V2 Administration Utility can be installed not only on the delivery server but also on client computers. To - Ricoh 2020D | Scanner Reference - Page 32
Preparations for Use as a Network Scanner 2 26 - Ricoh 2020D | Scanner Reference - Page 33
to the placement method. To correctly display the top/bottom orientation of the scanned original on a client computer, the placement of the original and the settings made on the control panel and scanner driver must match. Placing Originals There are two orientations for placing the original. See - Ricoh 2020D | Scanner Reference - Page 34
scanning using the e-mail function or the delivery scanner function (Specified on the control panel screen) When scanning using the TWAIN scanner function (Specified in the Scan Place the original on the exposure glass with the side to be scanned facing down. Align the original with the back left - Ricoh 2020D | Scanner Reference - Page 35
the machine as a network TWAIN scanner, this orientation is the standard setting for the TWAIN driver. Normally, use this orientation for placing originals. The ADF allows you to place multiple originals at one time. Originals placed in the ADF can be scanned on one side or both sides. Note ❒ The - Ricoh 2020D | Scanner Reference - Page 36
a network TWAIN scanner, this orientation is the standard setting for the TWAIN driver. Normally , use this orientation for placing originals. 2. Height Reference p.32 "Mixed size selection" ❒ Originals are scanned - Ricoh 2020D | Scanner Reference - Page 37
TWAIN scanner, settings are made with the TWAIN driver. TWAIN Scanner E-mail/Network Delivery Scanner Auto detection is used to determine the size of each original. 3 Note ❒ The difference between scanning with the TWAIN scanner function and the e-mail function or the network delivery scanner - Ricoh 2020D | Scanner Reference - Page 38
using {U} or {T}, and then press the 3 {OK} key. B When scanning one-sided originals, select [1 Sided Original] using {U} or {T}, and then press the {OK} key. When scanning two-sided originals, select [2 Sided Orig.(T to T )] or [2 Sided Orig.(To to B )] using {U} or {T} according to the binding - Ricoh 2020D | Scanner Reference - Page 39
the {OK} key. For a Network TWAIN Scanner A Open the scanner properties dia- log box. Reference p.66 "Scanning Originals" B Select the position from the size of the largest plex] in the [Side:] list. original placed is detected and set as the scan size. For Note originals smaller than this ❒ - Ricoh 2020D | Scanner Reference - Page 40
originals. Reference p.27 "Placing Originals" F After all originals are scanned, press the {#} key. Sending will start. Note 3 ❒ Originals are scanned in order. Place them from the first page. B Make settings for scanning area and original orientation. Reference p.31 "Original Orientation and - Ricoh 2020D | Scanner Reference - Page 41
the instruction manuals of the e-mail server to be used and the software to be installed. 1 Connect to Network Connect the machine to the network with an Ethernet cable or IEEE 1394 (optional) cable, or use Wireless LAN (optional). See Network Guide. 2 Make System Settings 3 Make Scanner Settings - Ricoh 2020D | Scanner Reference - Page 42
the e-mail function and the network delivery scanner function. 36 4. [Manual] When specifying a destination that is not registered, press [Manual], and then enter the e-mail address of the destination using the Quick Dial keys. 5. [Options] Press to make the scan settings such as resolution or - Ricoh 2020D | Scanner Reference - Page 43
For information about user codes, see General Settings Guide. C If the Network Delivery Scanner screen appears, press [ ] to switch to the E-mail screen. The E-mail screen appears. Scan settings can be made in the same way as default scan settings. See p.12 "Scan Settings". C Press the - Ricoh 2020D | Scanner Reference - Page 44
Sending Scan Files by E-mail Using a Quick Dial key to select a destination A Shift Space Symbols AAH013S Reference For more information about how to register the destination, see General Settings Guide. B To select more destinations, repeat step A . Searching to select a destination by name - Ricoh 2020D | Scanner Reference - Page 45
D Select the destination using {U} or {T}, and then press the {OK} key. Sending Scan Files by E-mail C Select the destination using {U} or {T}, and then press the {OK} key. E To select more destinations, repeat steps A to D. Note ❒ To deselect a destination, - Ricoh 2020D | Scanner Reference - Page 46
Scan Files by E-mail C Enter a 3-digit registration number that has been assigned to a destination using the number keys, and then press the {OK} key. B Select [Search by E-mail Address] using {U} or {T}, and then press the {OK} key. D Press the {OK} key. 4 C Enter the beginning of the email Guide - Ricoh 2020D | Scanner Reference - Page 47
Sending Scan Files by E-mail Manual entry of an e-mail address A Press [Manual]. B Enter the e-mail address. Note ❒ Letters, number, and periods can be used. The symbols ()\,;:" cannot be used. Reference For information about how to enter characters, see General Settings Guide. C Press the {OK} key - Ricoh 2020D | Scanner Reference - Page 48
Scan Hcan be omitted if [Key Op's E-mail Address] is specified for [Sender's Name Default] in [Send Settings] of [Scanner Features]. ❒ When a sender is selected, the sender Guide. Note ❒ When a sender's password is set, a screen for entering the sender's password appears. Enter the sender's password - Ricoh 2020D | Scanner Reference - Page 49
and then press the {OK} key. Sending Scan Files by E-mail B Select [Search by Name] email notifying that the e-mail has been read by the recipient is sent to the sender selected here. However, if the mailing software used by the recipient does not support Guide. D Select the sender using {U} or {T}, and - Ricoh 2020D | Scanner Reference - Page 50
Scan Files by E-mail Note ❒ When a sender's password is set, a screen for entering the sender's password appears. Enter the sender's password using the number keys, and then press the {OK} or {#} key. If the password if the mailing software used by the recipient does not support MDN (Message - Ricoh 2020D | Scanner Reference - Page 51
the recipient is sent to the sender selected here. However, if the mailing software used by the recipient does not support MDN (Message Disposition Notification), the e-mail may not be sent. Sending Scan Files by E-mail Searching to select a sender using a registration number A Press the {Search - Ricoh 2020D | Scanner Reference - Page 52
the sender selected here. However, if the mailing software used by the recipient does not support MDN (Message Disposition Notification), the e-mail may not be sent. F Press the {Cancel} key. 46 Searching to select a sender by e-mail address A Press the {Search Destination} key. Search Check Job - Ricoh 2020D | Scanner Reference - Page 53
] is selected, an email notifying that the e-mail has been read by the recipi- ent is sent to the sender se- lected here. However, if the mailing software used by the recipient does not support MDN (Message Disposition Note Notification), the e-mail may ❒ When a sender's password is not be - Ricoh 2020D | Scanner Reference - Page 54
Sending Scan Files by E-mail Manual entry of a subject A Select [Manual Input] using {U} or {T}, and then press the {OK} tions screen returns. the {OK} key. J Press the {Cancel} key. 4 The initial scanner screen appears. K Press the {Start} key. The "Accepted" message appears, and then the - Ricoh 2020D | Scanner Reference - Page 55
switch is turned off, all records are deleted. Note ❒ When [Print&Del. Scanner Journal] is set to [On], the whole scanner journal is be checked • Date/Time The date and time the e-mail was sent or the date "Error" was confirmed is displayed. • Page The number of pages of a scan file is displayed - Ricoh 2020D | Scanner Reference - Page 56
Sending Scan Files by E-mail 4 50 - Ricoh 2020D | Scanner Reference - Page 57
in System Settings, and change if required. See Network Guide. 3 Make Scanner Settings Make settings for the network delivery scanner function, such as Destination List Settings. See p.9 "Initial Scanner Setup". 4 Install Delivery Software 5 Set Destination Information, Sender Information, and - Ricoh 2020D | Scanner Reference - Page 58
to switch between the network delivery scanner function and the email function. 4. [Manual] When specifying a destination that is not registered, press [Manual], and then enter the e-mail address of the destination using the Quick Dial keys. 5. [Options] Press to make the scan settings such as - Ricoh 2020D | Scanner Reference - Page 59
multiple destinations after a manual entry of a e-mail address, press [Add Dest], and then enter the e-mail address of the destination. 7. [EditDest] When changing the e-mail address that has been entered, press [EditDest], and then re-enter the e-mail address. Preparation for Delivering 5 53 - Ricoh 2020D | Scanner Reference - Page 60
about user codes, see General Settings Guide. C If the E-mail screen appears, press [ ] to switch to the Network Delivery Scanner screen. The Network Delivery Scanner screen appears. 54 D Make sure that no previous set- tings remain. Note ❒ If a previous setting remains, press the {Clear Modes - Ricoh 2020D | Scanner Reference - Page 61
Note ❒ When using the ScanRouter delivery software , the Destination List is updated automatically. Using a Quick Dial key how to register the destination, see General Settings Guide. B To select more destinations, repeat step A . Delivering Scan Files Searching to select a destination by name A - Ricoh 2020D | Scanner Reference - Page 62
Using the Network Delivery Scanner Function D Select the destination using {U} or {T}, and then press the {OK} key. C Select the destination using {U} or {T}, and then press the {OK} key. E To select - Ricoh 2020D | Scanner Reference - Page 63
a destination using the number keys, and then press the {OK} key. Delivering Scan Files B Select [Search by Comment] using {U} or {T}, and then press the Reference For information about how to enter characters, see General Settings Guide. D Select the destination using {U} or {T}, and then press - Ricoh 2020D | Scanner Reference - Page 64
the Network Delivery Scanner Function Manual entry of a destination Note ❒ When using ScanRouter EX Professional, it is possible to enter the e-mail address of the destination directly. However, settings for sending e-mail must be made in advance. A Press [Manual]. B Enter the e-mail address. Note - Ricoh 2020D | Scanner Reference - Page 65
to register the destination, see General Settings Guide. B Press the {OK} key. Delivering Scan Files C For receiving a return receipt confirmation se- 5 lected here. However, if the mailing software used by the recipient does not support MDN (Message Disposition Notification), the e-mail may - Ricoh 2020D | Scanner Reference - Page 66
Network Delivery Scanner about how to enter characters, see General Settings Guide. D Select the sender using {U} or {T}, email notifying that the e-mail has been read by the recipient is sent to the sender selected here. However, if the mailing software used by the recipient does not support - Ricoh 2020D | Scanner Reference - Page 67
press the {OK} key. Delivering Scan Files Note ❒ When [On] is selected, an email notifying that the e-mail has been read by the recipient is sent to the sender selected here. However, if the mailing software used by the recipient does not support MDN (Message Disposition Notification), the e-mail - Ricoh 2020D | Scanner Reference - Page 68
the sender selected here. However, if the mailing software used by the recipient does not support MDN (Message Disposition Notification), the e-mail may in advance. See Network Guide. ❒ A subject can be entered using up to 64 characters. Manual entry of a subject A Select [Manual Input] using {U} or - Ricoh 2020D | Scanner Reference - Page 69
key. The "Accepted" message appears, and then the Send Options screen returns. Delivering Scan Files B Select a subject using {U} or {T}, and then press the {OK} key . The initial scanner screen appears. J Press the {Start} key. Note 5 ❒ The originals is scanned and the "Scanning..." message ap - Ricoh 2020D | Scanner Reference - Page 70
is turned off, all records are deleted. Note ❒ When [Print&Del. Scanner Journal] date "Er- ror" was confirmed is dis- played. • Page The number of pages of a scan file is displayed. • Status One of the following is displayed: "Done" or "Error". • Destination The function that was used (email - Ricoh 2020D | Scanner Reference - Page 71
if required. See Network Guide. 3 Install Software On the client computers, install the software required for using the network TWAIN scanner functions, such as a TWAIN driver and DeskTopBinder Lite. See p.19 "Software for Using a Network TWAIN Scanner". Network TWAIN Scanner Screen When using - Ricoh 2020D | Scanner Reference - Page 72
B Place the original in the scanner. Reference p.27 "Setting Originals" C Make the scan settings. A On the [File] menu, point to [Add Document], and then click [Scan]. The TWAIN driver starts. After a short while, the dialog box of the TWAIN driver that operates the scanner appears. This dialog box - Ricoh 2020D | Scanner Reference - Page 73
the other setting of the [Document] group. Reference p.33 "For a Network TWAIN Scanner" For information about making settings for the [Document] group, see TWAIN driver Help. ❒ Depending on the scanning resolution, the area to be scanned may be subject to restrictions. C Click [Close]. Note ❒ When - Ricoh 2020D | Scanner Reference - Page 74
Using the Network TWAIN Scanner Function Functions of the TWAIN Driver The following is an introduction to the various functions of the TWAIN driver: ❖ Automatic Tilt Correction This function automatically corrects character strings that were scanned slanted. ❖ Printing to the Image This - Ricoh 2020D | Scanner Reference - Page 75
/11.6 × 17.0 inches (A3, 11 × 17 inches) and 600 dpi are possible. Reference To specify the scanning area or resolution when using the machine as a network TWAIN scanner, see TWAIN driver Help. Note ❒ When the originals cannot be scanned, select [No compression] in Select Device Data Compression. 69 - Ricoh 2020D | Scanner Reference - Page 76
. *2 The maximum number of addresses which can be specified varies depending on the software you use, ScanRouter V2 Lite or ScanRouter EX Professional. For more information, see the manuals for the ScanRouter Delivery software. 7 Note ❒ Sometimes the machine cannot scan files to the maximum number - Ricoh 2020D | Scanner Reference - Page 77
the Delivery Function Does Not Work Problems The delivery scanner function screen is not displayed. Causes and solutions • If the network TWAIN scanner screen appears when the machine is switched to scanner mode, press [Exit] to switch to the network delivery scanner screen. • If the display does - Ricoh 2020D | Scanner Reference - Page 78
and the error number (if listed in the table), and contact your service representative. For information about how to turn off the main power switch, see General Settings Guide. Message Causes and solutions Cannot detect original size Select scan size • Place the original correctly. • Specify the - Ricoh 2020D | Scanner Reference - Page 79
is still shown, the network may be crowded. Consult the network administrator. Use the Job Information screen to check for the file where the problem occurred. See p.49 "Checking the Status of E-mail" or p.64 "Checking the Status of Delivery". If there is not enough free hard disk space in the - Ricoh 2020D | Scanner Reference - Page 80
and solutions [Cannot add any more scanning mode.] The maximum number of modes that can be stored is 99. Delete unneeded modes. [Cannot connect to the scanner. Check the network Ac- The access mask is set. Consult the network cess Mask settings in User Tools.] or scanner administrator. [Cannot - Ricoh 2020D | Scanner Reference - Page 81
range of the machine. [Error has occurred in the scanner driver.] • Check whether the network cable is connected correctly to the client computer. • Check whether the Ethernet board of the client computer is recognized correctly by Windows. • Check whether the client computer can use the TCP - Ricoh 2020D | Scanner Reference - Page 82
of the machine other than the scanner function is being used such as the copier function. Wait for a while and reconnect. • Check whether the main power switch of the machine is turned off. • Check whether the machine is connected to the network correctly. • Deselect the personal firewall function - Ricoh 2020D | Scanner Reference - Page 83
Specifications Specifications Scan method Scan speed *1 Flatbed scanning • E-mail/Network Delivery Scanner Approx.43 pages/minute [Scan size:A4R, Original type: Text(Print), Resolution: 200dpi, Compression: On (MH), Document feeder: ADF, ITU-T No.1 Chart] • TWAIN Scanner Approx.25 pages/minute [ - Ricoh 2020D | Scanner Reference - Page 84
of the TWAIN Driver, 68 I Initial scanner setup, 9 Installing software, 17 M Max. E-mail Size, 15 Max. Number of Addresses Which Can Be Specified and Files Which Can Be Stored, 70 Mixed Orig. Sizes Priority, 12 Mode, 66 N Network delivery scanner, 51 Network Delivery Scanner Screen, 52 Network TWAIN - Ricoh 2020D | Scanner Reference - Page 85
a custom size, 13 Sender's Name Default, 15 Sending Scan Files by E-mail, 37 Send Settings, 10, 14 Setting Originals, 27 SMTP server, 3 Software for Using the Network Delivery Scanner Function, 20 Software supplied on CD-ROM, 21 Specifications, 77 T Troubleshooting, 71 When an Error Message Appears - Ricoh 2020D | Scanner Reference - Page 86
80 GB GB B263-8581 - Ricoh 2020D | Scanner Reference - Page 87
• The product names of Windows® 2000 are as follows: Microsoft® Windows® 2000 Professional Microsoft® Windows® 2000 Server Microsoft® Windows® 2000 Advanced Server • The product names of Windows® XP are as follows: Microsoft® Windows® XP Home Edition Microsoft® Windows® XP Professional • The product - Ricoh 2020D | Scanner Reference - Page 88
Printer/Scanner Unit Type 2018 Operating Instructions Scanner Reference GB GB B263-8581
-
 1
1 -
 2
2 -
 3
3 -
 4
4 -
 5
5 -
 6
6 -
 7
7 -
8
-
9
-
10
-
11
-
12
-
13
-
14
-
15
-
16
-
17
-
18
-
19
-
20
-
21
-
22
-
23
-
24
-
25
-
26
-
27
-
28
-
29
-
30
-
31
-
32
-
33
-
34
-
35
-
36
-
37
-
38
-
39
-
40
-
41
-
42
-
43
-
44
-
45
-
46
-
47
-
48
-
49
-
50
-
51
-
52
-
53
-
54
-
55
-
56
-
57
-
58
-
59
-
60
-
61
-
62
-
63
-
64
-
65
-
66
-
67
-
68
-
69
-
70
-
71
-
72
-
73
-
74
-
75
-
76
-
77
-
78
-
79
-
80
-
81
-
82
-
83
-
84
-
85
-
86
-
87
-
88
 |
 |

Printer/Scanner Unit
Type 2018
Operating Instructions
Scanner Reference
Read this manual carefully before you use this machine and keep it handy for future reference. For safe and correct use, be sure to read the Safety
Information in the "Copy Reference" before using the machine.
Network Scanner
Preparations for Use as a Network Scanner
Setting Originals
Sending Scan Files by E-mail
Using the Network Delivery Scanner Function
Using the Network TWAIN Scanner Function
Appendix