Ricoh 2020D Scanner Reference - Page 68
Options, Attach Subject, System Settings, Manual Input
 |
View all Ricoh 2020D manuals
Add to My Manuals
Save this manual to your list of manuals |
Page 68 highlights
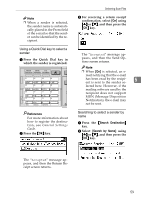
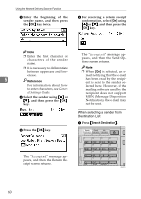
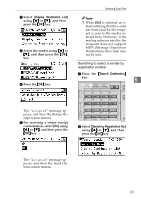
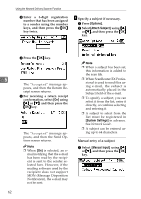
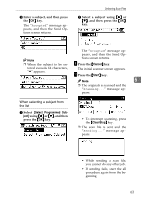
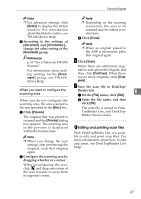
Using the Network Delivery Scanner Function C Enter a 3-digit registration number that has been assigned to a sender using the number keys, and then press the {OK} key twice. H Specify a subject if necessary. A Press [Options]. B Select[Attach Subject] using {U} or {T}, and then press the {OK} key. D Press the {OK} key. 5 The "Accepted" message appears, and then the Return Receipt screen returns. E For receiving a return receipt conformation, select [On] using {U} or {T}, and then press the {OK} key. The "Accepted" message appears, and then the Send Options screen returns. Note ❒ When [On] is selected, an e- mail notifying that the e-mail has been read by the recipient is sent to the sender selected here. However, if the mailing software used by the recipient does not support MDN (Message Disposition Notification), the e-mail may not be sent. 62 Note ❒ When a subject has been set, this information is added to the scan file. ❒ When ScanRouter EX Professional is used to send files using e-mail, the subject is automatically placed in the Subject field of the e-mail. ❒ To specify a subject, you can select it from the list, enter it directly, or combine selecting and entering it. ❒ A subject to select from the list must be registered in [System Settings] in advance. See Network Guide. ❒ A subject can be entered using up to 64 characters. Manual entry of a subject A Select [Manual Input] using {U} or {T}, and then press the {OK} key.
-
 1
1 -
2
-
3
-
4
-
5
-
6
-
7
-
8
-
9
-
10
-
11
-
12
-
13
-
14
-
15
-
16
-
17
-
18
-
19
-
20
-
21
-
22
-
23
-
24
-
25
-
26
-
27
-
28
-
29
-
30
-
31
-
32
-
33
-
34
-
35
-
36
-
37
-
38
-
39
-
40
-
41
-
42
-
43
-
44
-
45
-
46
-
47
-
48
-
49
-
50
-
51
-
52
-
53
-
54
-
55
-
56
-
57
-
58
-
59
-
60
-
61
-
62
-
 63
63 -
 64
64 -
 65
65 -
 66
66 -
 67
67 -
 68
68 -
 69
69 -
 70
70 -
 71
71 -
 72
72 -
 73
73 -
74
-
75
-
76
-
77
-
78
-
79
-
80
-
81
-
82
-
83
-
84
-
85
-
86
-
87
-
88
 |
 |
