Ricoh 2020D Scanner Reference - Page 72
Scanning Originals, Start, Program, DeskTop, Binder, Scanner Settings, Tools
 |
View all Ricoh 2020D manuals
Add to My Manuals
Save this manual to your list of manuals |
Page 72 highlights
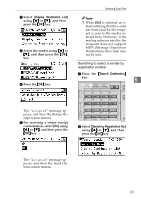
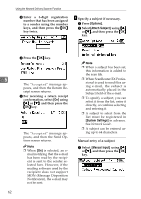
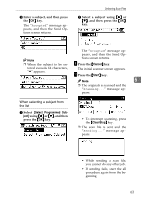
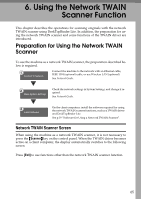
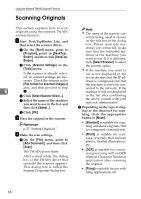
Using the Network TWAIN Scanner Function Scanning Originals This section explains how to scan originals using the network TWAIN scanner function. A Start DeskTopBinder Lite, and then select the scanner driver. A On the [Start] menu, point to [Program], point to [DeskTopBinder], and then click [DeskTopBinder]. B Click [Scanner Settings] on the [Tools] menu. If the scanner is already select- ed, no scanner settings are nec- essary. Check the settings in the [File format for scanned image(s)] area, and then proceed to step 6 E. C Click [Select Scanner Driver...]. D Select the name of the machine you want to use in the list, and then click [Select...]. E Click [OK]. B Place the original in the scanner. Reference p.27 "Setting Originals" C Make the scan settings. A On the [File] menu, point to [Add Document], and then click [Scan]. The TWAIN driver starts. After a short while, the dialog box of the TWAIN driver that operates the scanner appears. This dialog box is called the Scanner Properties dialog box. Note ❒ The name of the scanner currently being used is shown on the title bar of the dialog box. When multiple machines are connected, make sure that the indicated machine is the machine you want to use. If it is different, click [Select Scanner] to select the scanner again. ❒ If the machine you want to use is not displayed in the list, make sure that the IP address is configured and that the machine is correctly connected to the network. If the machine is still not displayed in the list after confirming the above, consult with your network administrator. B Depending on the type of original or the objective for scanning, click the appropriate button in [Mode]. • [Standard] is suitable for scanning standard originals that are comprised of mainly text. • [Photo] is suitable for scanning originals that include photos, shaded illustrations, etc. • [OCR] is suitable for conversion processing with an OCR (Optical Character Reading) application after scanning the original. • [Filing] is suitable for use with filing applications, etc. 66
-
 1
1 -
2
-
3
-
4
-
5
-
6
-
7
-
8
-
9
-
10
-
11
-
12
-
13
-
14
-
15
-
16
-
17
-
18
-
19
-
20
-
21
-
22
-
23
-
24
-
25
-
26
-
27
-
28
-
29
-
30
-
31
-
32
-
33
-
34
-
35
-
36
-
37
-
38
-
39
-
40
-
41
-
42
-
43
-
44
-
45
-
46
-
47
-
48
-
49
-
50
-
51
-
52
-
53
-
54
-
55
-
56
-
57
-
58
-
59
-
60
-
61
-
62
-
63
-
64
-
65
-
66
-
 67
67 -
 68
68 -
 69
69 -
 70
70 -
 71
71 -
 72
72 -
 73
73 -
 74
74 -
 75
75 -
 76
76 -
 77
77 -
78
-
79
-
80
-
81
-
82
-
83
-
84
-
85
-
86
-
87
-
88
 |
 |
