Sony DCR-SC100 Operating Instructions
Sony DCR-SC100 - Digital Video Camera Recorder Manual
 |
View all Sony DCR-SC100 manuals
Add to My Manuals
Save this manual to your list of manuals |
Sony DCR-SC100 manual content summary:
- Sony DCR-SC100 | Operating Instructions - Page 1
Sony Corporation Printed in Japan - Sony DCR-SC100 | Operating Instructions - Page 2
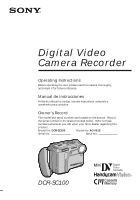
-322-13 (1) Digital Video Camera Recorder Operating Instructions Before operating the unit, please read this manual thoroughly, and retain it for future reference. Manual de instrucciones Antes de utilizar la unidad, lea este manual por completo y consérvelo para consultar. Owner's Record The - Sony DCR-SC100 | Operating Instructions - Page 3
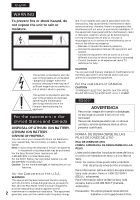
the SONY Factory Service Center nearest you call 416-499-SONY (Canada only). Caution: Do not handle damaged or leaking lithium ion batteries. For the Customers in the U.S.A. WARNING This equipment has been tested and found to comply with the limits for a Class B digital device, pursuant to Part 15 - Sony DCR-SC100 | Operating Instructions - Page 4
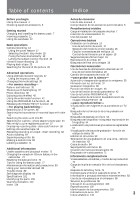
74 Resetting the date and time 75 Tips for using the battery pack 77 Maintenance information and precautions 83 Using your camcorder abroad 88 Trouble check 89 Self-diagnosis display 94 Specifications 101 Identifying the parts 103 Warning indicators 112 Index 114 Antes de comenzar Uso de este - Sony DCR-SC100 | Operating Instructions - Page 5
Antes de comenzar Uso de este manual Welcome! ¡Bienvenido! Congratulations on your purchase of this Sony Handycam Vision' camcorder. With your Handycam Vision you can capture life's precious moments with superior picture and sound quality. Your Handycam Vision is loaded with advanced features - Sony DCR-SC100 | Operating Instructions - Page 6
are operational for effective use. •Do not let the camcorder get wet. Keep the camcorder away from rain and sea water. Letting the camcorder get unit to malfunction, and sometimes this malfunction cannot be repaired [a]. •Never leave the camcorder exposed to temperatures above 140°F (60°C ), such - Sony DCR-SC100 | Operating Instructions - Page 7
accessories are supplied with your camcorder. Compruebe que ha recibido los siguientes accesorios junto con la videocámara: 1 2 3 4 5 6 7 8 9 !º !¡ 1 Wireless Remote Commander (1) (p. 107) 2 AC-V615 AC power adaptor (1) (p. 7, 28) 3 A/V connecting cable (1) (p. 48, 60) 4 NP-F530 battery - Sony DCR-SC100 | Operating Instructions - Page 8
to charge and install the battery pack. To charge the battery pack, use the supplied AC power adaptor. This camcorder operates with the "InfoLITHIUM" battery pack. If you use any other battery pack to operate your camcorder, the camcorder may not operate or the battery life may be shorten. Antes - Sony DCR-SC100 | Operating Instructions - Page 9
time with LCD 90 (80) Numbers in parentheses indicate the time when you use a normally charged battery. Battery life will be shorter if you use the camcorder in a cold environment. ∗∗ Approximate continuous recording time indoors. ∗∗∗ Approximate minutes when recording while you repeat recording - Sony DCR-SC100 | Operating Instructions - Page 10
light, disconnect the power cord. After about one minute, reconnect the power cord again. •You cannot operate the camcorder using the AC power adaptor while charging the battery pack. •When a fully charged battery pack is installed, the CHARGE lamp will light once, then go out. Notas sobre la carga - Sony DCR-SC100 | Operating Instructions - Page 11
de pilas. A continuación, libere la palanca BATT y extraiga el paquete de pilas. BATT When removing battery pack Always keep the lid of the battery compartment at the bottom of the camcorder upright so that the battery pack does not fall out when you open the lid. You can look at the demonstration - Sony DCR-SC100 | Operating Instructions - Page 12
iniciales Inserting a cassette Inserción de videocassettes You can use mini DV cassette with logo* only. Make sure that the power source is installed. (1) Set the POWER switch to OFF. (2) Slide OPEN/EJECT on the bottom of the camcorder in the direction of the arrow 1. Pull the lid in - Sony DCR-SC100 | Operating Instructions - Page 13
the sunshade, then detach the sunshade by pulling it out toward left. Uso del parasol [b] Presione hacia abajo el mando de ajuste situado en la parte inferior del parasol. Este se abrirá. Nota sobre el uso del parasol El parasol dispone de un imán; por tanto, mantenga alejado de él tarjetas magn - Sony DCR-SC100 | Operating Instructions - Page 14
operations Camera recording Make sure that the power source is installed and a cassette is inserted and that the START/STOP MODE switch is set to . When you use the camcorder pantalla LCD. El indicador de grabación con la cámara de la parte frontal de la videocámara también se ilumina. También es - Sony DCR-SC100 | Operating Instructions - Page 15
while the cassette is inserted, the camcorder turns off automatically. This prevents wearing down the battery and wearing out the tape. To resume Standby mode, while pressing the small green button on the POWER switch, set it to OFF once, and then to CAMERA. To start recording, press START/STOP - Sony DCR-SC100 | Operating Instructions - Page 16
Camera recording Grabación con la cámara Basic operations / Operaciones básicas Notes on LP mode •If you use this camcorder under high LP mode, we recommend you to use a Sony Excellence/Master mini DV cassette so that you can get the most out of your camcorder. •You cannot make audio dubbing on a - Sony DCR-SC100 | Operating Instructions - Page 17
Camera recording Grabación con la cámara To adjust the LCD panel angle [a] Adjust the panel marked with the raised dots [b]. •When moving the LCD panel, do not move it sideways; otherwise, the camcorder body may be damaged or the LCD panel may not be stored properly [c]. •Do not push nor touch the - Sony DCR-SC100 | Operating Instructions - Page 18
Basic operations / Operaciones básicas Camera recording Grabación con la cámara Using the zoom feature la posición de telefoto, o de 1 cm en la posición de gran angular. Notas sobre el zoom digital •El zoom de más de 10x se realiza digitalmente, y la calidad de imagen se deteriora al avanzar hacia - Sony DCR-SC100 | Operating Instructions - Page 19
Camera recording Grabación con la cámara Selecting the start/stop mode Your camcorder has two modes besides normal rate of one per second. When five seconds elapse and all the dots disappear, the camcorder switches to Standby mode automatically. Selección del modo de inicio/ parada La videocámara - Sony DCR-SC100 | Operating Instructions - Page 20
Basic operations / Operaciones básicas Camera recording Grabación con la cámara Fixing the focus momentarily Use this function when the focus on the object you want to record is unstable. Press FOCUS LOCK with the desired object in focus while the camcorder is in Standby or recording mode. The - Sony DCR-SC100 | Operating Instructions - Page 21
Camera recording Grabación con la cámara To cancel mirror mode Turn the LCD panel down toward the camcorder body. Notes on mirror mode •When you turn the LCD panel 180 degrees, the camcorder mode. •While recording in mirror mode, you cannot operate the following functions: MENU, TITLE and ZERO SET - Sony DCR-SC100 | Operating Instructions - Page 22
operations / Operaciones básicas Hints for better shooting Sugerencias para filmar mejor For hand-held shots, you will get better results by holding the camcorder according to the following suggestions: •Hold the camcorder Place your left hand under the camcorder to support it. •Adjust the LCD - Sony DCR-SC100 | Operating Instructions - Page 23
on a table top or any other flat surface of suitable height. If you have a tripod for a still camera, you can also use it with the camcorder. When attaching a non-Sony tripod, make sure that the length of the tripod screw is less than 9/32 inches (6.5 mm). Otherwise, you cannot attach the tripod - Sony DCR-SC100 | Operating Instructions - Page 24
the POWER switch, set it to VTR. The display for operation buttons appears. (3) Press 0 to rewind the tape. monitor the picture on a TV screen, after connecting the camcorder to a TV or VCR. Es posible controlar la imagen , insert the size AA (R6) batteries . Para detener la reproducción, presione - Sony DCR-SC100 | Operating Instructions - Page 25
•The screen indicator disappears when the title is displayed. •When you play back a tape using a "InfoLITHIUM" battery, B indicates the remaining battery capacity. The remaining battery time in minutes is not displayed. Using headphones Connect headphones (not supplied) to the 2 jack (p. 105). You - Sony DCR-SC100 | Operating Instructions - Page 26
Basic operations / Operaciones básicas Playing back a tape Reproducción de cintas To view on slow playback The slow playback can be performed smoothly on this camcorder; however, this function does not work for an output signal from the DV IN/ OUT jack. Para ver la imagen a doble velocidad Para - Sony DCR-SC100 | Operating Instructions - Page 27
Search). Press END SEARCH during recording standby. This function works when the POWER switch is set to CAMERA, VTR or PHOTO. Es posible ir al final de la parte grabada después de grabar y reproducir la cinta. Esta comienza a rebobinarse o a avanzar rápidamente y se reproducen aproximadamente los - Sony DCR-SC100 | Operating Instructions - Page 28
on where you want to use your camcorder. Place Power Accessory to be used source Indoors House Supplied AC power adaptor current Outdoors Battery Battery pack NP-F530 pack (supplied) In the car 12 V or Sony car battery charger 24 V car DC-V515A battery Note on power sources Disconnecting the - Sony DCR-SC100 | Operating Instructions - Page 29
Using the house current To use the supplied AC power adaptor: (1)Insert the connecting plate in the camcorder. (2)Connect the battery pack. WARNING The power cord lead must only be changed at a qualified service shop. PRECAUTION The set is not disconnected from the AC power source (house - Sony DCR-SC100 | Operating Instructions - Page 30
12 V or 24 V). Connect the car battery charger and the camcorder using the supplied DK-415 connecting cord. This mark indicates that this product is a genuine accessory for Sony video product. When purchasing Sony video products, Sony recommends that you purchase accessories with this "GENUINE VIDEO - Sony DCR-SC100 | Operating Instructions - Page 31
Cambio de los ajuste de modo You can change the mode settings in the menu system to further enjoy the features and functions of the camcorder. (1)Press MENU to display the menu on the LCD screen. (2)Turn the CONTROL dial to select the desired item, then press the CONTROL dial. Only - Sony DCR-SC100 | Operating Instructions - Page 32
CAMERA/PHOTO and VTR modes LCD BRIGHT Select this item to adjust the brightness of the LCD screen. The LCD screen becomes brighter when you turn the CONTROL dial up (+), and darker when you turn it down (-). COMMANDER* •Select ON when using the supplied Remote Commander for the camcorder - Sony DCR-SC100 | Operating Instructions - Page 33
the digital zoom. The camcorder goes back to 10x optical zoom. STEADYSHOT •Normally select ON. •Select OFF when you do not have to worry about camera-shake , their settings return to the default 5 minutes or more after the battery is removed. ** P EFFECT setting returns to "OFF" when the - Sony DCR-SC100 | Operating Instructions - Page 34
camera recording/battery lamp at the front of the unit to light up. CLOCK SET Select this item to reset the date or time. DEMO MODE •Select STBY&ON to glance over the function of camcorder de pilas/grabación con la cámara de la parte frontal de la unidad. CLOCK SET Seleccione este - Sony DCR-SC100 | Operating Instructions - Page 35
ON> You can use this feature only with Sony TVs. •Select ON to turn on the TV battery is removed. When recording a close subject When REC LAMP is set to ON, the red camera recording lamp on the front of the camcorder rojo de grabación con la cámara de la parte frontal de la videocámara se refleje en - Sony DCR-SC100 | Operating Instructions - Page 36
Advanced operations / Operaciones avanzadas Fade-in and fade-out You can fade in or out out, the picture gradually fades to black while the sound decreases. When fading in [a] (1)While the camcorder is in Standby mode, press FADER. The fade indicator starts flashing. (2)Press START/STOP to start - Sony DCR-SC100 | Operating Instructions - Page 37
Fade-in and fade-out Aparición y desaparición gradual de imágenes To cancel the fade-in/fade-out function Before pressing START/STOP, press FADER until the fade indicator disappears. When the POWER switch is set to PHOTO, or the START/STOP MODE switch is set to or 5SEC You cannot use the fade-in/ - Sony DCR-SC100 | Operating Instructions - Page 38
Advanced operations / Operaciones avanzadas Shooting with backlighting Filmación con luz de fondo When you shoot a subject with the light source behind the subject or a subject with a light - Sony DCR-SC100 | Operating Instructions - Page 39
Photo recording Grabación fotográfica You can record a still picture like a photograph for about seven seconds. This mode is useful when you want to enjoy a picture such as a photograph or when you print a picture using a video printer (not supplied). You can record about 510 pictures on a 60- - Sony DCR-SC100 | Operating Instructions - Page 40
operations / Operaciones avanzadas Photo recording Grabación fotográfica Note on using the Remote Commander If you press the PHOTO button on the Remote Commander when a still picture appears on the LCD screen, the camcorder not supplied). Refer to the instruction manual of the video printer as - Sony DCR-SC100 | Operating Instructions - Page 41
Enjoying picture effect Selecting picture effect You can make pictures like those of television with the picture effect function. [a] [b] Función de efecto de imagen Selección del efecto de imagen Es posible obtener imágenes como las de televisión con la función de efecto de imagen. [c] [d] - Sony DCR-SC100 | Operating Instructions - Page 42
Advanced operations / Operaciones avanzadas Enjoying picture effect Función de efecto de 3, then press the CONTROL dial. Note on the picture effect When you turn the power off, the camcorder returns automatically to normal mode (OFF). Para recuperar el modo normal Seleccione OFF en el paso 3 y, - Sony DCR-SC100 | Operating Instructions - Page 43
ámicas de 16:9 para visualizarlas en un TV de pantalla panorámica de 16:9 (16:9 WIDE). La imagen que aparece con bandas negras en las partes superior e inferior de la pantalla LCD [a] es normal. La imagen mostrada en un TV normal [b] se comprime horizontalmente. Es posible ver las imágenes normales - Sony DCR-SC100 | Operating Instructions - Page 44
OFF LCD B.L. LCD COLOR MENU OFF 16:9WIDE OFF ON Advanced operations / Operaciones avanzadas 3 MENU OFF 16:9WIDE OFF ON MENU D in wide mode, set it to full mode. For details, refer to the instruction manual of your TV. Note that the picture recorded in wide mode looks compressed on - Sony DCR-SC100 | Operating Instructions - Page 45
and Beach & Ski modes, you cannot take close-ups because the camcorder is set to focus only on subjects in the middle to far distance. •In the Sunset & Moon and Landscape modes, the camcorder is set to focus only on distant subjects. 44 : Modo de foco Grabaci - Sony DCR-SC100 | Operating Instructions - Page 46
Advanced operations / Operaciones avanzadas Using the PROGRAM AE function Uso de la función PROGRAM AE Using the PROGRAM AE function (1)Press MENU to display the menu on - Sony DCR-SC100 | Operating Instructions - Page 47
de imagen STEADYSHOT When you shoot, the indicator appears on the LCD screen. This indicates that the SteadyShot function is working and the camcorder compensates for camera-shake. You can release the SteadyShot function when you do not need to use the SteadyShot function. Do not use the SteadyShot - Sony DCR-SC100 | Operating Instructions - Page 48
imagen STEADYSHOT Notes on the SteadyShot function •The SteadyShot function will not correct excessive camera-shake. •When you switch the SteadyShot function on or off, the exposure may (no suministrado), es posible que esta función no se active. Advanced operations / Operaciones avanzadas 47 - Sony DCR-SC100 | Operating Instructions - Page 49
When monitoring the playback picture by connecting the camcorder to your TV, we recommend you to use house current for the power source. Connecting directly to volumen de la videocámara. Para obtener imágenes de mayor calidad en formato DV, conecte la videocámara al TV con un cable de conexión de S - Sony DCR-SC100 | Operating Instructions - Page 50
operations TV. For details, refer to the instruction manual of the AV cordless IR receiver. LASER LINK is a system which transmits and receives a picture and sound between video equipment having the mark by using infrared rays. LASER LINK is a trademark of Sony - Sony DCR-SC100 | Operating Instructions - Page 51
Note When LASER LINK is activated (the LASER LINK button is lit), the camcorder consumes power. Press and turn off the LASER LINK button when it is mbrico. Puede hacerlo ajustando el ángulo del panel LCD. Si utiliza un TV Sony •El TV se enciende automáticamente al presionar LASER LINK o la tecla ·. - Sony DCR-SC100 | Operating Instructions - Page 52
Date Search function. To Search the beginning of the specific date and play back from the point, there are two ways: •Using cassette memory, you can select the date displayed on the LCD screen. •Without using cassette memory. You can only operate with the Remote Commander. Searching for the date by - Sony DCR-SC100 | Operating Instructions - Page 53
interval of the boundaries between the dates needs more than two minutes. The camcorder may not search if the beginning of the recorded date is too close en el momento anterior. •Si existe un espacio en blanco en la parte grabada, es posible que la función de búsqueda de fechas no funcione - Sony DCR-SC100 | Operating Instructions - Page 54
select the title displayed on the LCD screen. You can only operate with the Remote Commander. Es posible buscar escenas con título ( cassette memory. •To superimpose a title, see page 66. •The camcorder may not search, if there is a blank portion between the recorded partes grabadas en la cinta. 53 - Sony DCR-SC100 | Operating Instructions - Page 55
five seconds automatically - Photo Scan function. Even if your tape has no cassette memory, you can use the Photo Scan function. You can only operate with the Remote Commander. Searching for a photo by using cassette memory You can use this function only when playing back a tape with cassette memory - Sony DCR-SC100 | Operating Instructions - Page 56
Advanced operations / Operaciones avanzadas select the photo. Each time you press = or +, the camcorder searches for the previous or next scene. The selected photo appears Si reproduce una cinta que tenga un espacio en blanco entre las partes grabadas, la función de búsqueda de fotografías no se - Sony DCR-SC100 | Operating Instructions - Page 57
Searching for a photo - photo search/photo scan Búsqueda de fotografías búsqueda/exploración de fotografías Scanning photo You can use this function whether the tape has cassette memory or not. (1)Set the POWER switch to VTR. (2)Press SEARCH MODE on the Remote Commander repeatedly until the photo - Sony DCR-SC100 | Operating Instructions - Page 58
Advanced operations / Operaciones avanzadas Returning to a preregistered position Localización de posiciones previamente registradas Using the Remote Commander, you can easily go back to the desired point on a - Sony DCR-SC100 | Operating Instructions - Page 59
is selected: date n no indicator. When bars (--:--:--) appear •A blank portion of the tape is being played back. •The tape was recorded by a camcorder without having date and time set. •The tape is unreadable due to tape damage or noise. Para seleccionar los elementos y visualizarlos Ajuste DATA - Sony DCR-SC100 | Operating Instructions - Page 60
not supplied) or the supplied A/V connecting cable. Use this camcorder as a player. Using the DV connecting cable Simply connect the VMC-2DV DV connecting cable (not supplied) to DV IN/OUT and to DV IN of the DV products. With digital-to-digital connection, video and audio signals are transmitted in - Sony DCR-SC100 | Operating Instructions - Page 61
la reproduce con otros equipos de vídeo, es posible que sea inestable. •Si graba imágenes de pausa de reproducción mediante la toma DV, no será posible añadir sonido en esa parte de la cinta. Uso del cable de conexión de A/V [b] o de S vídeo (no suministrado) [a] Ajuste el selector de entrada de la - Sony DCR-SC100 | Operating Instructions - Page 62
Advanced operations / Operaciones avanzadas Editing onto another tape Edición en otra cinta Ncoontnees start editing. To edit more scenes Repeat steps 2 to 4. To stop editing Press p on both the camcorder and the VCR. Notas sobre la edición al utilizar el cable de conexión de A/V • Presione DATA - Sony DCR-SC100 | Operating Instructions - Page 63
recording and recording pause mode, DV IN/OUT jack automatically works as input jack. (1)While pressing the small green button on the POWER switch, set it to VTR. (2)On the VCR, locate the start point to be inserted and set it to playback pause mode. (3)On the camcorder, press · to set it - Sony DCR-SC100 | Operating Instructions - Page 64
Replacing camcorder (including another DCR-SC100 parte donde inserte una nueva escena se borrarán al insertar ésta. •Si inserta una nueva escena (imagen y sonido) en una cinta grabada con otra videocámara (incluida la DCR-SC100), puede empeorar la calidad de la imagen y el sonido. Advanced operations - Sony DCR-SC100 | Operating Instructions - Page 65
kHz, 44.1 kHz or 48 kHz). •When an external microphone is not connected, the recording will be made through the built-in microphone of the camcorder. • A new sound cannot be recorded on a tape already recorded in the LP mode. •If you add a new sound on a tape recorded with another - Sony DCR-SC100 | Operating Instructions - Page 66
Advanced operations / Operaciones avanzadas Audio dubbing Copia de audio Adding an audio sound on a recorded tape (1)Insert your recorded tape into the camcorder. (2)While pressing the small green button on the POWER switch, set it to VTR. (3)On the camcorder, press · to set it to playback mode, - Sony DCR-SC100 | Operating Instructions - Page 67
Superposición de Superimposing a title títulos If you use a tape with cassette memory, you can superimpose the titles while recording or after recording. When you playback the tape, the title is displayed for 5 seconds from the point where you superimposed it. You can select from eight preset - Sony DCR-SC100 | Operating Instructions - Page 68
de títulos Advanced operations / Operaciones avanzadas The titles you superimposed are displayed by only using the DV format video equipment with index titler function. • The because the memory is full. Los títulos aparecen desde la parte superior de la pantalla de la siguiente forma: HELLO! ˜ - Sony DCR-SC100 | Operating Instructions - Page 69
Superimposing a title Superposición de títulos Erasing a title (1)Press MENU to display the menu. (2)Turn the CONTROL dial to select TITLE ERASE, then press the CONTROL dial. (3)Turn the CONTROL dial to select the title you want to erase, then press the CONTROL dial. (4)Make sure the title is the - Sony DCR-SC100 | Operating Instructions - Page 70
Advanced operations / Operaciones avanzadas Making a custom title Creación de títulos personalizados If you use a tape with cassette memory, you can make one title of up to 20 - Sony DCR-SC100 | Operating Instructions - Page 71
will be turned off automatically. If the power is turned off while you are making a title, set the POWER switch to OFF once, then to CAMERA. The title you have made remains stored in memory. Para borrar un carácter En el paso 3, gire el dial CONTROL para seleccionar M y, a continuación, presi - Sony DCR-SC100 | Operating Instructions - Page 72
last character is erased. To change the label you have made Insert the cassette to change the label, and operate in the same way to make a new label. If the mark appears in step 4 The cassette memory is etiquetarlos. Deslice la lengüeta de protección de forma que la parte roja no sea visible. 71 - Sony DCR-SC100 | Operating Instructions - Page 73
type of Mini DV cassette. This camcorder can read Sony recommends that you use a tape having mark to enjoy this camcorder fully. When you play back Copyright signal Using this camcorder, you cannot play back a tape that has recorded a copyright control signals for copyright protection of software - Sony DCR-SC100 | Operating Instructions - Page 74
Mini DV cassette Be sure to affix a label on only the location as illustrated below so as not to cause malfunction of the camcorder. [b] After using the Mini DV parte roja sea visible. [a] Al adherir etiquetas en los videocassettes Mini DV Mini DV cassettes is dirty or dusty, you may not operate the - Sony DCR-SC100 | Operating Instructions - Page 75
discharged in about half year if you do not use the camcorder at all. Even if the vanadium-lithium battery is not charged, it will not affect the camcorder operation. To retain the date and time, etc., charge the battery if the battery is discharged. The following are charging methods: •Connect the - Sony DCR-SC100 | Operating Instructions - Page 76
installed in the camcorder will have been discharged. In this case, first charge the vanadium-lithium battery, then reset the date and time. (1)While pressing the small green button on the POWER switch, set it to CAMERA. (2)Press MENU to display the menu on the LCD screen. (3)Select CLOCK SET - Sony DCR-SC100 | Operating Instructions - Page 77
setting Repeat steps 2 to 5. The year indicators changes as follows: 1997 1998 ... 2000 ... 2029 Note on the time indicator The internal clock of this camcorder operates on a 12-hour cycle. •12:00 AM stands for midnight •12:00 PM stands for noon Para corregir el ajuste de fecha y hora Repita los - Sony DCR-SC100 | Operating Instructions - Page 78
will be used up more quickly, if you are recording in a cold environment. To save battery power Do not leave the camcorder in Standby mode when not recording to save the battery power. A smooth transition between scenes can be made even if recording is stopped and started again. While you are - Sony DCR-SC100 | Operating Instructions - Page 79
flashing while you are recording, set the POWER switch to OFF on the camcorder and replace the battery pack. Leave the tape in the camcorder to obtain a smooth transition between scenes after the battery pack has been replaced. Cuando el indicador de capacidad restante de las pilas alcanza el punto - Sony DCR-SC100 | Operating Instructions - Page 80
áticamente a la posición de la "marca verde"). [a] The life of the battery pack If the battery indicator flashes rapidly just after turning on the camcorder with a fully charged battery pack, the battery pack should be replaced with a new fully charged one. Charging temperature You should charge - Sony DCR-SC100 | Operating Instructions - Page 81
equipment is used under. How the battery consumption is displayed The power consumption of the camcorder changes depending on its use, such intercambiar datos con equipos de vídeo compatibles sobre el consumo de energía. Sony recomienda el uso del paquete de pilas "InfoLITHIUM" con equipos de ví - Sony DCR-SC100 | Operating Instructions - Page 82
in 77 °F (25 °C). As the environmental temperature and condition are different when you actually use the camcorder, the remaining battery time is not same as the continuous recording time in the operation manual. 1) Full charge: Charging for about 1 hour after the charge lamp of the AC power adaptor - Sony DCR-SC100 | Operating Instructions - Page 83
a long time, it becomes discharged. Then recharge the battery pack before use. Notes on the terminals If the terminals (metal parts on the back) are not clean, the battery charge duration will be shortened. When the terminals are not clean or when the battery pack has not been used for a long time - Sony DCR-SC100 | Operating Instructions - Page 84
surface of the tape, or on the lens. In this condition, the tape may stick to the head drum and be damaged or the camcorder may not operate correctly. To prevent possible damage under these circumstances, the camcorder is furnished with moisture sensors. Take the following precautions. Inside the - Sony DCR-SC100 | Operating Instructions - Page 85
v parpadea en la pantalla LCD [a] [b] / or o If [a] or [b] happens, clean the video heads with the Sony DVM12CL cleaning cassette (not supplied). Check the picture and if the above problem persists, repeat cleaning. (Do not repeat cleaning more than 5 times in one session.) Note If the DVM12CL - Sony DCR-SC100 | Operating Instructions - Page 86
/ Información complementaria Precautions Camcorder operation •Operate the camcorder on 7.2 V (battery pack) or 8.4 V (AC power adaptor). •Should any solid object or liquid get inside the casing, unplug the camcorder and have it checked by Sony dealer before operating it any further. •Avoid - Sony DCR-SC100 | Operating Instructions - Page 87
battery pack will get hot during charging. This is normal. Others •Unplug the unit from the wall outlet when not in use for a long time. To disconnect the power cord, pull it out by the plug. Never pull the cord itself. •Do not operate into contact with the metal parts of the connecting plate. If - Sony DCR-SC100 | Operating Instructions - Page 88
in the battery case carefully before replacing the batteries. •If you touch the liquid, wash it off with water. •If the liquid get into your eyes, wash your eyes with a lot of water and then consult a doctor. If any difficulty should arise, unplug the unit and contact your nearest Sony dealer. Nota - Sony DCR-SC100 | Operating Instructions - Page 89
[a] [b] Difference in color systems This camcorder is an NTSC system-based camcorder. If you want to view the playback picture on a TV, it Singapore, Slovak Republic, Spain, Sweden, Switzerland, Thailand, etc. PAL-M system Brazil PAL-N system Argentina, Paraguay, Uruguay SECAM system Bulgaria, France, - Sony DCR-SC100 | Operating Instructions - Page 90
complementaria English Trouble check If you run into any problem using the camcorder, use the following table to troubleshoot the problem. Should the difficulty persist, disconnect the power source and contact your Sony dealer or local authorized Sony service facility. Camcorder Power Symptom - Sony DCR-SC100 | Operating Instructions - Page 91
Trouble check Operation Symptom The tape does not move when a tape transport button is the recorded date, date search function does not work. Cause and/or corrective actions • The POWER switch is set to CAMERA or OFF. m Set it to VTR. (p. 23) • The tape has run out. m Rewind the tape or use - Sony DCR-SC100 | Operating Instructions - Page 92
Additional information / Información complementaria Trouble check Operation Symptom The title search function Please contact your nearest Sony dealer. • If 10 minutes elapse after you set the POWER switch to CAMERA without inserting a cassette, the camcorder automatically starts the demonstration - Sony DCR-SC100 | Operating Instructions - Page 93
using the DV connecting cable, recording picture cannot be monitored. The camcorder becomes warm. The supplied Remote Commander does not work. No function works though the power is on. The numbers or letters of 5 characters is displayed as a counter. AC power adaptor Symptom The VTR/CAMERA or CHARGE - Sony DCR-SC100 | Operating Instructions - Page 94
again If the CHARGE lamp lights up and goes out after a while, the problem is with the battery pack installed first. Please contact your nearest Sony dealer in connection with the product with the problem. * If you use a battery pack which you have just bought or which has been left unused for - Sony DCR-SC100 | Operating Instructions - Page 95
power adaptor or remove the battery pack. After reconnecting the power source, operate the camcorder. • A camcorder malfunction which you cannot service has occurred. m Contact your Sony dealer or local authorized Sony service facility and inform them of the five digits. (example: E:61:10) If you - Sony DCR-SC100 | Operating Instructions - Page 96
y póngase en contacto con un proveedor Sony o con un centro de servicio técnico Sony autorizado. Videocámara Alimentación Problema La nueva. (p. 23) • El interruptor POWER está ajustado en VTR. m Ajústelo en CAMERA. (p. 13) • La lengüeta del videocassette está deslizada hacia afuera (roja). m - Sony DCR-SC100 | Operating Instructions - Page 97
ON. (p. 46) • El interruptor POWER está ajustado en PHOTO. m Ajústelo en CAMERA. • El interruptor START/STOP MODE está ajustado en 5SEC o en . m Ajústelo borrados accidentales. m Deslice la lengüeta de protección de forma que la parte roja no sea visible. (p. 11) • La cinta no dispone de memoria - Sony DCR-SC100 | Operating Instructions - Page 98
correctamente. • El tubo fluorescente incorporado está agotado. m Póngase en contacto con el proveedor Sony más próximo. • Si transcurren 10 minutos después de ajustar el interruptor POWER en CAMERA sin insertar un videocassette, la videocámara iniciará automáticamente la demostración o DEMO MODE - Sony DCR-SC100 | Operating Instructions - Page 99
y/o acciones correctivas • Desconecte el cable de conexión DV y vuelva a conectarlo. • Si la alimentación de , presione la tecla RESET, situado en la parte inferior izquierda de la pantalla LCD, con un de alimentación de CA Problema El indicador VTR/CAMERA o CHARGE no se ilumina. El indicador CHARGE - Sony DCR-SC100 | Operating Instructions - Page 100
se ilumina y se apaga tras unos instantes, el problema está en el paquete de pilas instalado en primer lugar. Póngase en contacto con el proveedor Sony más próximo en relación con el producto que presenta el problema. * Si emplea un paquete de pilas recién adquirido o que no ha utilizado durante - Sony DCR-SC100 | Operating Instructions - Page 101
alimentación. • Se ha producido un fallo de funcionamiento que no puede resolver personalmente. m Póngase en contacto con un proveedor Sony o con un centro de servicio técnico Sony autorizado y proporciónele el número de cinco dígitos (ejemplo: E:61:10). Si no puede resolver el problema, póngase en - Sony DCR-SC100 | Operating Instructions - Page 102
English Specifications Video camera recorder System Video recording system Two rotary heads, Helical scanning system Audio recording system Rotary heads, PCM system Quantization: 12bits (Fs 32kHz, stereo 1, stereo 2) Video signal NTSC color, EIA standards Usable cassette Mini DV cassette - Sony DCR-SC100 | Operating Instructions - Page 103
al de vídeo Color NTSC, normas EIA Videocassettes utilizables Mini DV con logotipo impreso Velocidad Objetivo Combinado con alimentación de zoom, 120x (Digital), 10x (Optico) Distancia focal f = 0,165 en modo de carga Aplicación Paquete de pilas Sony NP-F530 de ion de litio Temperatura de - Sony DCR-SC100 | Operating Instructions - Page 104
parts componentes 123 4 [a] [b] Additional information / Información complementaria 5 67 8 1 START/STOP MODE switch (p. 18) 2 POWER switch (p. 13, 23, 38) 3 START/STOP button (p. 13) 4 Display window for operation interruptor POWER está ajustado en CAMERA Tecla FADER (p. 35) Tecla BACKLIGHT - Sony DCR-SC100 | Operating Instructions - Page 105
Identifying the parts 9 !º !¡ !™ !£ !¢ Identificación de los componentes 9 DISPLAY button (p. 24) !º END SEARCH 13) !∞ Hook for shoulder strap (p. 109) !§ Speaker !¶ S VIDEO OUT jack (p. 48, 60) !• DV IN/OUT jack (p. 59) 9 Tecla DISPLAY (p. 24) !º Tecla END SEARCH (p. 26) !¡ Tecla LASER LINK - Sony DCR-SC100 | Operating Instructions - Page 106
Identifying the parts !ª Identificación de los componentes @ª Additional information / Información complementaria !ª Hook for shoulder strap (p. 109) @º A/V OUT jack (p. 48, 60) @¡ LANC l control jack l stands for Local Application Control - Sony DCR-SC100 | Operating Instructions - Page 107
Identifying the parts #º #¡ Identificación de los componentes #™ #£ #¢ #º OPEN (BATT) release lever 9/32 inch (6.5 mm). Otherwise, you cannot attach the tripod securely and the screw may damage the camcorder. #£ Cassette compartment (p. 11) #¢ OPEN/EJECT lever (p. 11) #º Palanca de liberación OPEN - Sony DCR-SC100 | Operating Instructions - Page 108
Additional information / Información complementaria Identifying the parts Remote Commander The buttons that have the same name on the Remote Commander as on the camcorder function identically. 1 2 3 4 5 6 7 8 9 Identificación de los componentes Control remoto Las teclas del control remoto y de la - Sony DCR-SC100 | Operating Instructions - Page 109
the batteries when you will not use the Remote Commander for a long time. Remote control direction Aim the Remote Commander to the remote sensor. The operative range of the Remote Commander is about 16.4 feet (5 m) indoors. Depending on the angle, Remote Commander may not activate the camcorder - Sony DCR-SC100 | Operating Instructions - Page 110
are used to distinguish this camcorder from other Sony VCRs to avoid remote control misoperation. If you use another Sony VCR in commander mode VTR 2 3 Attaching the cap string Hold this part of the cap to remove it from the lens. Sujete esta parte de la tapa para retirarla del objetivo. Sujeci - Sony DCR-SC100 | Operating Instructions - Page 111
Identifying the parts Operation indicators 1 2 3 4 5 W T M.FADER 6 16:9WI DE SOLAR I Z E 7 8 9 VOL !º Identificación de los componentes Indicadores de funcionamiento !¡ !™ !£ STBY !¢ 0 : 12 :3 4 40 mi n !∞ ZERO SET MEMORY !§ END !¶ SE ARCH !• 4 0 min !ª 1 - Sony DCR-SC100 | Operating Instructions - Page 112
the parts Identificación battery indicator (p. 78) To watch the demonstration You can watch the demonstration by setting the POWER switch to CAMERA before installing a cassette. About ten minutes after, the demonstration starts. You can also start the demonstration by the following operation - Sony DCR-SC100 | Operating Instructions - Page 113
oír los pitidos al ajustar BEEP en ON en el sistema de menús. 1 2 3 5min 0min 4 5 6 7 8 9 !º !¡ 1 The battery is weak or dead. Slow flashing: The battery is weak. Fast flashing: The battery is dead. Depending on conditions, the i indicator may flash, even if there are 5 to 10 minutes - Sony DCR-SC100 | Operating Instructions - Page 114
clock is not set when you set the POWER switch to CAMERA, the message appears for 5 seconds. 9 Some other trouble has occurred. Disconnect the power source and contact your Sony dealer or local authorized facility. !º The battery is not the "InfoLITHIUM" type. !¡ The cassette memory is full. 4 No - Sony DCR-SC100 | Operating Instructions - Page 115
, 31 C Camera recording 13 Car battery 29 Cassette memory 4 Charging battery pack 7 Charging vanadium-lithium battery 74 Cleaning video heads 84 Clock set 75 Color TV system 4, 88 Connection 48, 59 COPY INHIBIT 72 D, E Data Code 58 Demo mode 33 DISPLAY 24 Digital zoom 17 DV connecting - Sony DCR-SC100 | Operating Instructions - Page 116
vil 29 BEEP 15, 31 Búsqueda/exploración de fotografías 54 C Cable de conexión DV 59 Carga completa 7 Carga del paquete de pilas ......... 7 Carga de la pila de vanadio ón 66 VOLUME 23 Z ZERO SET MEMORY 57 Zoom 17 Zoom digital 17 Additional information / Información complementaria 115
-
 1
1 -
 2
2 -
 3
3 -
 4
4 -
 5
5 -
 6
6 -
 7
7 -
8
-
9
-
10
-
11
-
12
-
13
-
14
-
15
-
16
-
17
-
18
-
19
-
20
-
21
-
22
-
23
-
24
-
25
-
26
-
27
-
28
-
29
-
30
-
31
-
32
-
33
-
34
-
35
-
36
-
37
-
38
-
39
-
40
-
41
-
42
-
43
-
44
-
45
-
46
-
47
-
48
-
49
-
50
-
51
-
52
-
53
-
54
-
55
-
56
-
57
-
58
-
59
-
60
-
61
-
62
-
63
-
64
-
65
-
66
-
67
-
68
-
69
-
70
-
71
-
72
-
73
-
74
-
75
-
76
-
77
-
78
-
79
-
80
-
81
-
82
-
83
-
84
-
85
-
86
-
87
-
88
-
89
-
90
-
91
-
92
-
93
-
94
-
95
-
96
-
97
-
98
-
99
-
100
-
101
-
102
-
103
-
104
-
105
-
106
-
107
-
108
-
109
-
110
-
111
-
112
-
113
-
114
-
115
-
116
 |
 |

Sony Corporation
Printed in Japan