Sony DPP-FP90 Instruction Manual - Page 17
Printing an edited image, Press PRINT. - instructions
 |
View all Sony DPP-FP90 manuals
Add to My Manuals
Save this manual to your list of manuals |
Page 17 highlights
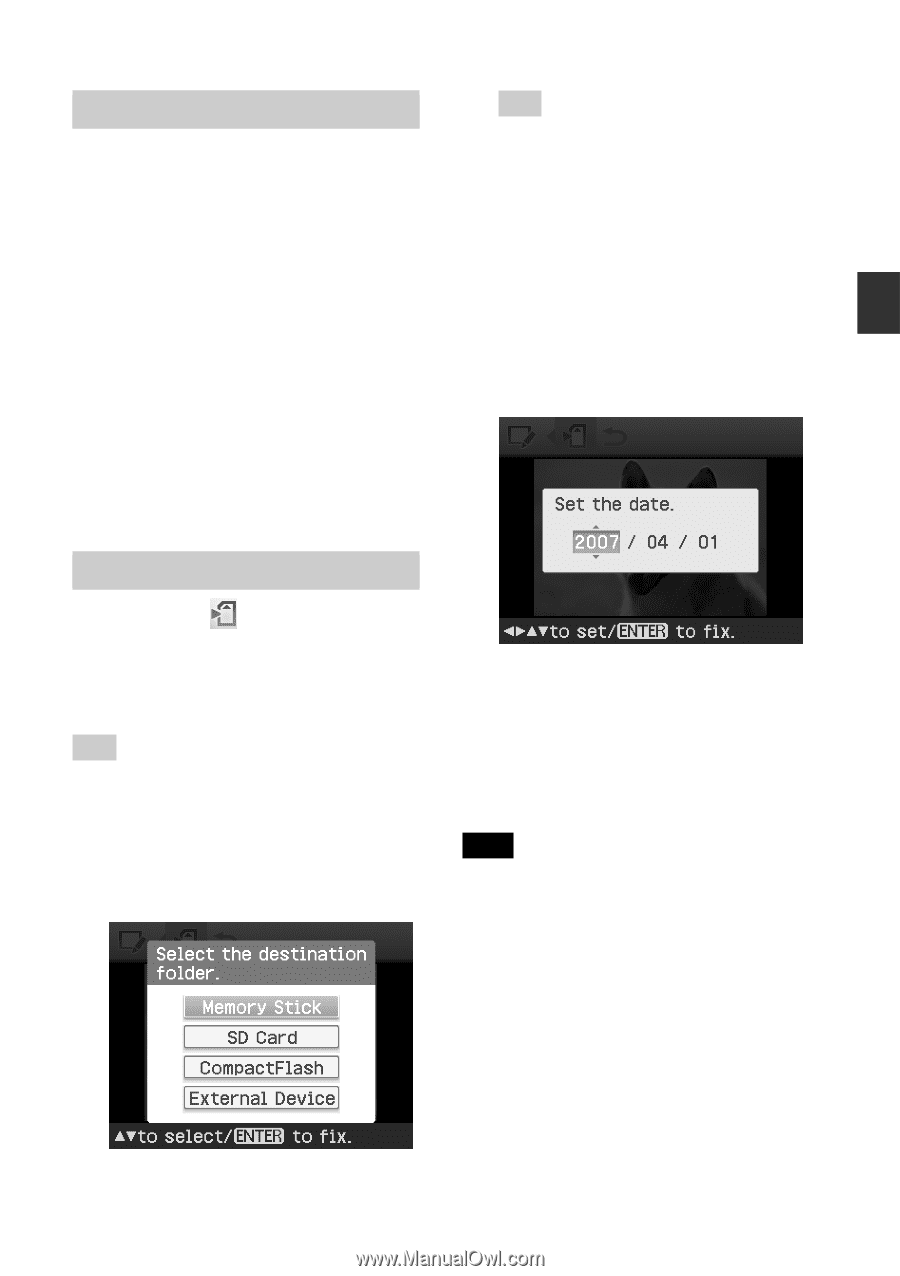
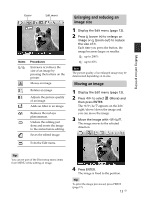
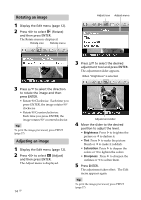
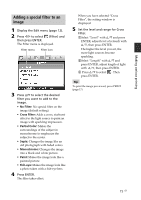
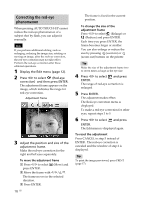
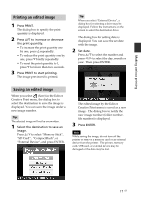
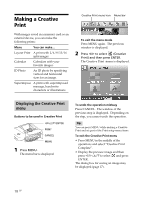
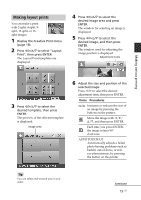
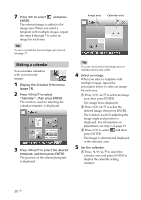
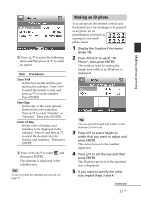
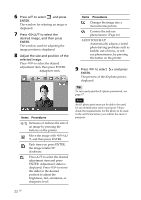
Making various printing Printing an edited image 1 Press PRINT. The dialog box to specify the print quantity is displayed. 2 Press f/F to increase or decrease the print quantity. • To increase the print quantity one by one, press f repeatedly. • To reduce the print quantity one by one, press F briefly repeatedly. • To reset the print quantity to 1, press F for more than two seconds. 3 Press PRINT to start printing. The image previewed is printed. Tip When you select "External Device", a dialog box for selecting a drive may be displayed. Follow the instructions on the screen to select the destination drive. The dialog box for setting date is displayed. You can save the set date with the image. 2 Set date. Press f/F to select the number and press g/G to select the day, month or year. Then press ENTER. Saving an edited image When you select (Save) in the Edit or Creative Print menu, the dialog box to select the destination to save the image is displayed. You can save the image under a new image number. Tip The selected image will not be overwritten. 1 Select the destination to save an image. Press f/F to select "Memory Stick", "SD Card", "CompactFlash", or "External Device", and press ENTER. The edited image by the Edit or Creative Print menu is saved as a new image. The dialog box to notify the new image number (folder numberfile number) is displayed. 3 Press ENTER. Note While saving the image, do not turn off the printer or remove a memory card or an external device from the printer. The printer, memory card, USB card, or external device may be damaged or the data may be lost. 17 GB
-
 1
1 -
2
-
3
-
4
-
5
-
6
-
7
-
8
-
9
-
10
-
11
-
 12
12 -
 13
13 -
 14
14 -
 15
15 -
 16
16 -
 17
17 -
 18
18 -
 19
19 -
 20
20 -
 21
21 -
 22
22 -
23
-
24
-
25
-
26
-
27
-
28
-
29
-
30
-
31
-
32
-
33
-
34
-
35
-
36
-
37
-
38
-
39
-
40
-
41
-
42
-
43
-
44
-
45
-
46
-
47
-
48
-
49
-
50
-
51
-
52
-
53
-
54
-
55
-
56
-
57
-
58
-
59
-
60
-
61
-
62
-
63
-
64
-
65
-
66
-
67
-
68
-
69
-
70
-
71
-
72
-
73
-
74
-
75
-
76
-
77
-
78
-
79
-
80
-
81
-
82
-
83
-
84
 |
 |