Sony DPP-FP90 Instruction Manual - Page 20
Making a calendar, Display the Creative Print menu
 |
View all Sony DPP-FP90 manuals
Add to My Manuals
Save this manual to your list of manuals |
Page 20 highlights
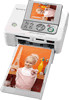
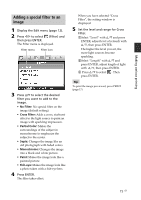
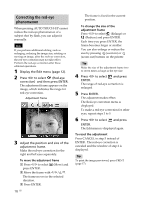
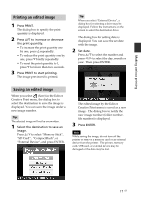
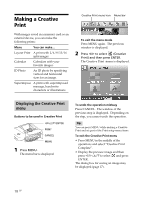
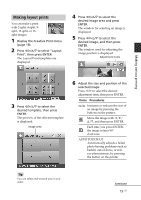
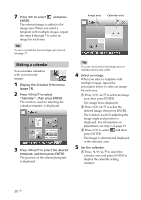
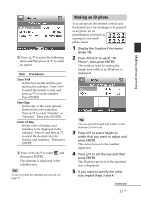
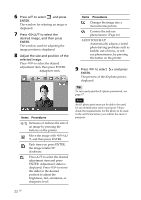
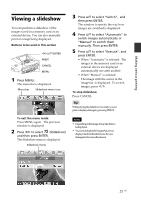
7 Press g/G to select and press ENTER. The selected image is added to the image area. When you select a template with multiple images, repeat the steps 4 through 7 to select an image for each area. Tip To save or print the layout images previewed, see page 17. Image area Calendar area Making a calendar You can make calendars with your favorite images. 1 Display the Creative Print menu (page 18). 2 Press g/G/f/F to select "Calendar", then press ENTER. The window used for selecting the calendar template, is displayed. 3 Press g/G/f/F to select the desired template, and then press ENTER. The preview of the selected template is displayed. Tip You can select and set an image area or calendar area in any order. 4 Select an image. When you select a template with multiple images, repeat the procedures below to select an image for each area. 1 Press g/G/f/F to select an image area, then press ENTER. The image list is displayed. 2 Press g/G/f/F to select the desired image, then press ENTER. The window used for adjusting the image angle and position is displayed. For information on adjustment, see step 6 on page 19. 3 Press g/G to select press ENTER. and then The image is selected and displayed in the relevant area. 5 Set the calendar. 1 Press g/G/f/F to select the calendar area and press ENTER to display the calendar setting window. 20 GB
-
 1
1 -
2
-
3
-
4
-
5
-
6
-
7
-
8
-
9
-
10
-
11
-
12
-
13
-
14
-
 15
15 -
 16
16 -
 17
17 -
 18
18 -
 19
19 -
 20
20 -
 21
21 -
 22
22 -
 23
23 -
 24
24 -
 25
25 -
26
-
27
-
28
-
29
-
30
-
31
-
32
-
33
-
34
-
35
-
36
-
37
-
38
-
39
-
40
-
41
-
42
-
43
-
44
-
45
-
46
-
47
-
48
-
49
-
50
-
51
-
52
-
53
-
54
-
55
-
56
-
57
-
58
-
59
-
60
-
61
-
62
-
63
-
64
-
65
-
66
-
67
-
68
-
69
-
70
-
71
-
72
-
73
-
74
-
75
-
76
-
77
-
78
-
79
-
80
-
81
-
82
-
83
-
84
 |
 |