Sony DPP-FP90 Instruction Manual - Page 27
Filing images
 |
View all Sony DPP-FP90 manuals
Add to My Manuals
Save this manual to your list of manuals |
Page 27 highlights
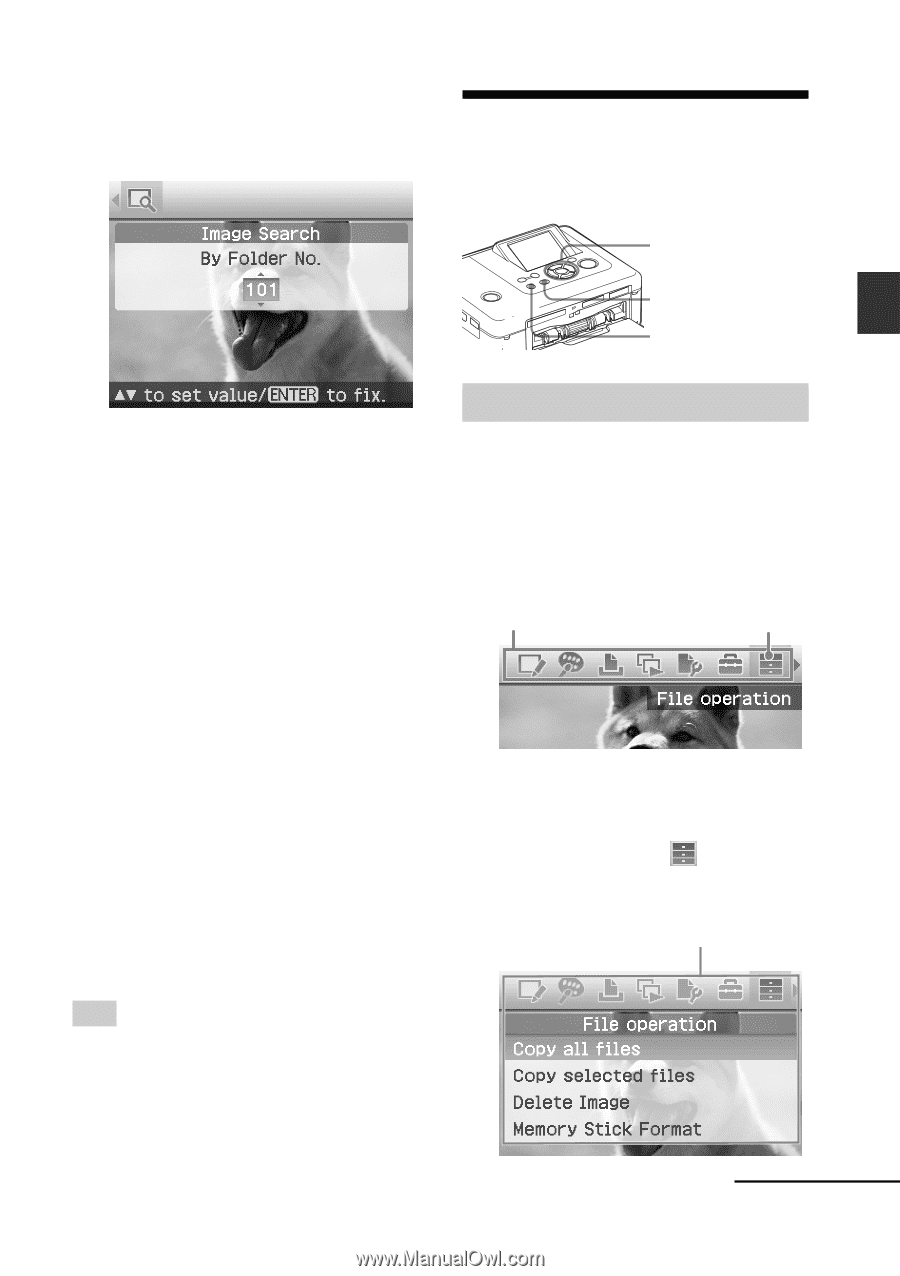
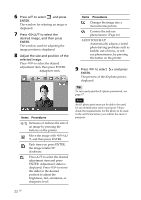
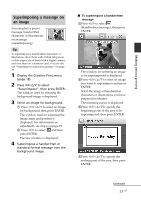
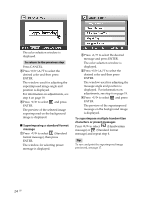
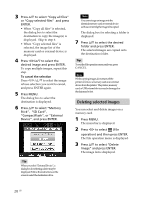
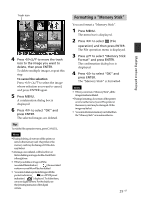
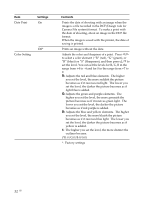
• When you select "By Folder No.": Specify the folder number of the images you want to search for: Filing images Buttons to be used in this section g/G/f/F/ENTER CANCEL MENU Making various printing 5 Press ENTER. Searching starts. When the search is complete, the search results will be displayed. If no images have been found "No images were found" will be displayed. 6 Press ENTER. The searched image is displayed. The searched results are displayed as the status before you entered the menu. When you searched from the image list, "01" will be displayed with the relevant images in the image list. • If you selected "By File No." and "By Date", "01" is displayed on the images found to indicate their print quantity. You can easily check the images you selected on the image list. • If you selected "By Folder No.", the first or last image in the selected folder is displayed. Tip To print a searched image, p ress g/G/f/F to select the desired image and then press ENTER to display it in the image preview. Press f/F to set the print quantity and then press PRINT to start printing. Copying images You can copy images between memory cards inserted in the memory card slot or an external device connected to the PictBridge/EXT INTERFACE connector. 1 Press MENU. The menu bar is displayed. Menu bar File operation menu icon To exit the menu mode Press MENU again. The previous window is displayed. 2 Press g/G to select (File operation) and then press ENTER. The File operation menu is displayed. File operation menu Continued 27 GB
-
 1
1 -
2
-
3
-
4
-
5
-
6
-
7
-
8
-
9
-
10
-
11
-
12
-
13
-
14
-
15
-
16
-
17
-
18
-
19
-
20
-
21
-
 22
22 -
 23
23 -
 24
24 -
 25
25 -
 26
26 -
 27
27 -
 28
28 -
 29
29 -
 30
30 -
 31
31 -
 32
32 -
33
-
34
-
35
-
36
-
37
-
38
-
39
-
40
-
41
-
42
-
43
-
44
-
45
-
46
-
47
-
48
-
49
-
50
-
51
-
52
-
53
-
54
-
55
-
56
-
57
-
58
-
59
-
60
-
61
-
62
-
63
-
64
-
65
-
66
-
67
-
68
-
69
-
70
-
71
-
72
-
73
-
74
-
75
-
76
-
77
-
78
-
79
-
80
-
81
-
82
-
83
-
84
 |
 |