Sony DPP-FP90 Instruction Manual - Page 19
Making layout prints - problems
 |
View all Sony DPP-FP90 manuals
Add to My Manuals
Save this manual to your list of manuals |
Page 19 highlights
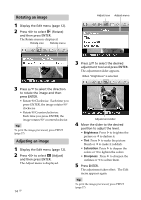
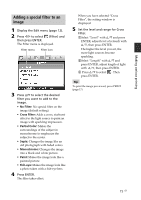
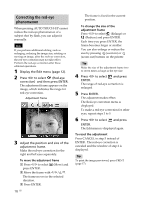
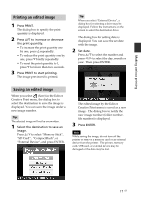
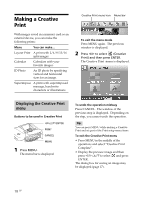
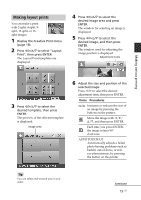
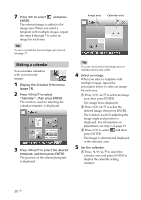
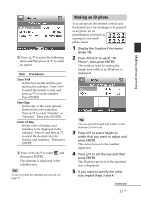
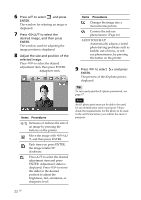
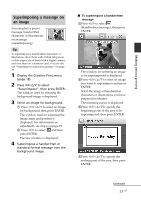
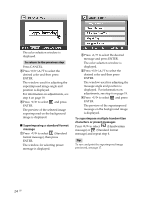
Making layout prints You can make a print with 2-split, 4-split, 9split, 13-split, or 16split images. 1 Display the Creative Print menu (page 18). 2 Press g/G/f/F to select "Layout Print", then press ENTER. The Layout Print templates are displayed. 4 Press g/G/f/F to select the desired image area and press ENTER. The window for selecting an image is displayed. 5 Press g/G/f/F to select the desired image, and then press ENTER. The window used for adjusting the image position is displayed. Adjustment tools Making various printing 3 Press g/G/f/F to select the desired template, then press ENTER. The preview of the selected template is displayed. Image area 6 Adjust the size and position of the selected image. Press g/G to select the desired adjustment item, then press ENTER. Items Procedures / Increases or reduces the size of an image by pressing the buttons on the printer. Move the image with g/G/ f/F, and then press ENTER. Each time you press ENTER, the image rotates 90° clockwise. AUTO TOUCH-UP Automatically adjusts a failed photo having problems such as backlit, out-of-focus, or redeye phenomenon, by pressing the button on the printer. Tip You can select and set each area in any order. Continued 19 GB
-
 1
1 -
2
-
3
-
4
-
5
-
6
-
7
-
8
-
9
-
10
-
11
-
12
-
13
-
 14
14 -
 15
15 -
 16
16 -
 17
17 -
 18
18 -
 19
19 -
 20
20 -
 21
21 -
 22
22 -
 23
23 -
 24
24 -
25
-
26
-
27
-
28
-
29
-
30
-
31
-
32
-
33
-
34
-
35
-
36
-
37
-
38
-
39
-
40
-
41
-
42
-
43
-
44
-
45
-
46
-
47
-
48
-
49
-
50
-
51
-
52
-
53
-
54
-
55
-
56
-
57
-
58
-
59
-
60
-
61
-
62
-
63
-
64
-
65
-
66
-
67
-
68
-
69
-
70
-
71
-
72
-
73
-
74
-
75
-
76
-
77
-
78
-
79
-
80
-
81
-
82
-
83
-
84
 |
 |
