Sony DPP-FP90 Instruction Manual - Page 22
Items, Procedures, Press, to select, and press, ENTER., to select the, desired image, and then press
 |
View all Sony DPP-FP90 manuals
Add to My Manuals
Save this manual to your list of manuals |
Page 22 highlights
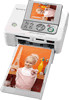
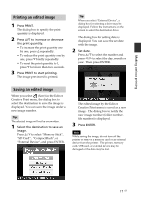
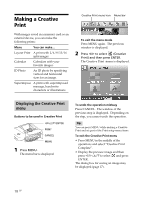
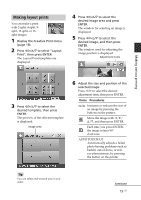
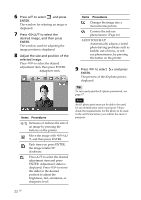
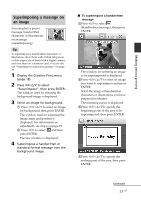
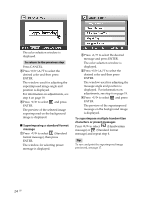
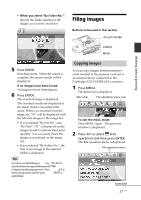
6 Press f/F to select and press ENTER. The window for selecting an image is displayed. 7 Press g/G/f/F to select the desired image, and then press ENTER. The window used for adjusting the image position is displayed. 8 Adjust the size and position of the selected image. Press g/G to select the desired adjustment item, then press ENTER. Adjustment tools Items Procedures / Increases or reduces the size of an image by pressing the buttons on the printer. Move the image with g/G/f/ F, and then press ENTER. Each time you press ENTER, the image rotates 90° clockwise. Press f/F to select the desired adjustment item and press ENTER. Adjustment slider is displayed. Press g/G to move the slider to the desired position to adjust the brightness, tint, saturation, or sharpness level. Items Procedures Changes the image into a monochrome picture. Corrects the red-eye phenomenon. (Page 16) AUTO TOUCH-UP Automatically adjusts a failed photo having problems such as backlit, out-of-focus, or redeye phenomenon, by pressing the button on the printer. 9 Press g/G to select and press ENTER. The preview of the ID photo print is displayed. Tip To save and print the ID photo previewed, see page 17. Note An ID photo print may not be able to be used for an identification card or passport. Please check the requirements for the photo to be used in the certificate before you submit the card or passport. 22 GB
-
 1
1 -
2
-
3
-
4
-
5
-
6
-
7
-
8
-
9
-
10
-
11
-
12
-
13
-
14
-
15
-
16
-
 17
17 -
 18
18 -
 19
19 -
 20
20 -
 21
21 -
 22
22 -
 23
23 -
 24
24 -
 25
25 -
 26
26 -
 27
27 -
28
-
29
-
30
-
31
-
32
-
33
-
34
-
35
-
36
-
37
-
38
-
39
-
40
-
41
-
42
-
43
-
44
-
45
-
46
-
47
-
48
-
49
-
50
-
51
-
52
-
53
-
54
-
55
-
56
-
57
-
58
-
59
-
60
-
61
-
62
-
63
-
64
-
65
-
66
-
67
-
68
-
69
-
70
-
71
-
72
-
73
-
74
-
75
-
76
-
77
-
78
-
79
-
80
-
81
-
82
-
83
-
84
 |
 |