Sony SNC-RZ50N User Guide - Page 59
Downloading the client certificate, Download CA certificate - software download
 |
UPC - 027242240377
View all Sony SNC-RZ50N manuals
Add to My Manuals
Save this manual to your list of manuals |
Page 59 highlights
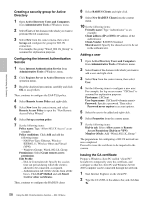
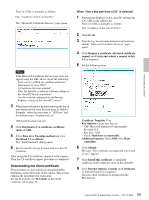
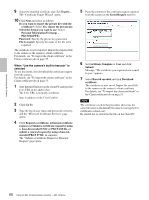
Administrating the Camera The CA's URL is normally as follows: The "Microsoft Certificate Services" page opens. When "Use a key pair from a CA" is selected 1 Start Internet Explorer on the client PC and type the CA's URL in the address bar. The CA's URL is normally as follows: Note If the Microsoft Certificate Service page does not appear using the URL above, check the following: - Is the service of Web site enabled on Internet Information Service (IIS)? - Is Certificate Services enabled? - Does the firewall or antivirus software setting on the client PC block connection? - Are the network configuration and Internet Explorer setting on the client PC correct? 3 When Internet Explorer prompts entering the log-in user and password, type the user name as follows. Example: when the user name is "1XClient" and the domain name "localnetwork.net" [email protected] 4 Click Download a CA certificate, certificate chain, or CRL. 5 Select Base 64 in Encoding method and click Download CA certificate. The "File Download" dialog opens. 6 Specify the file storage location and save the CA certificate. After saving the CA certificate, import it to the camera. Then the CA certificate import procedure is completed. Downloading the client certificate The procedure of client certificate download differs depending on the TLS mode of the camera. This section explains the procedures for each mode. For the TLS mode, see TLS mode in the Client certificate tab on page 55. 2 Click Go To. 3 Type the log-in user name and password correctly, and the "Microsoft Certificate Services" page opens. 4 Click Request a certificate, advanced certificate request and Create and submit a request to this CA in sequence. 5 Set the following items. Certificate Template: User Key Options: Create new key set - CSP: Microsoft Enhanced Cryptographic Provider v1.0 - Key Size: 1024 - Check Mark keys as exportable. Additional Options: Select SHA-1 for Hash Algorithm. 6 Click Submit. Message "The certificate you requested was issued to you." appears. 7 Click Install this certificate. to install the certificate in the certificate store on the client PC. 8 Click Internet Options, Content and Certificates of Internet Explorer in sequence. The new client certificate is displayed in the Personal tab. 59 Using the 802.1X Authentication Function - 802.1X Menu
-
 1
1 -
2
-
3
-
4
-
5
-
6
-
7
-
8
-
9
-
10
-
11
-
12
-
13
-
14
-
15
-
16
-
17
-
18
-
19
-
20
-
21
-
22
-
23
-
24
-
25
-
26
-
27
-
28
-
29
-
30
-
31
-
32
-
33
-
34
-
35
-
36
-
37
-
38
-
39
-
40
-
41
-
42
-
43
-
44
-
45
-
46
-
47
-
48
-
49
-
50
-
51
-
52
-
53
-
 54
54 -
 55
55 -
 56
56 -
 57
57 -
 58
58 -
 59
59 -
 60
60 -
 61
61 -
 62
62 -
 63
63 -
 64
64 -
65
-
66
-
67
-
68
-
69
-
70
-
71
-
72
-
73
-
74
-
75
-
76
-
77
-
78
-
79
-
80
-
81
-
82
-
83
-
84
-
85
-
86
-
87
-
88
-
89
-
90
-
91
-
92
-
93
-
94
-
95
-
96
-
97
-
98
-
99
-
100
-
101
-
102
-
103
-
104
-
105
-
106
-
107
-
108
-
109
-
110
-
111
-
112
-
113
-
114
-
115
-
116
-
117
-
118
-
119
-
120
 |
 |
