Sony SNC-RZ50N User Guide - Page 64
Tour Tab - Setting a tour, Preset position table, OK/Cancel, Resume time on inactivity
 |
UPC - 027242240377
View all Sony SNC-RZ50N manuals
Add to My Manuals
Save this manual to your list of manuals |
Page 64 highlights
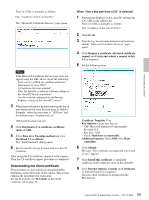
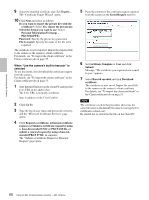
Administrating the Camera Sensor input 1 (S1) Select a preset position to synchronize with the alarm from Sensor input 1. Sensor input 2 (S2) Select a preset position to synchronize with the alarm from Sensor input 2. Object detection (OD) Select a preset position to synchronize with the alarm from the object detection. Click Detection, and the Object detection menu is displayed to allow you to set the object detection function (page 82). Note In the case where the synchronized preset position is specified, the alarm event that happens when the camera moves to the preset position will be invalid. Preset position table Lists the preset positions and alarms assigned for each position currently saved in the camera. You can move the camera to the preset position by clicking Preset call, or delete the preset position data by clicking Clear. No. Shows the preset number. Name Shows the name of the preset position assigned to each preset number. Alarm Shows the alarm(s) synchronized with each preset position. S1, S2 and OD represent Sensor input 1, Sensor input 2 and Object detection respectively. Preset call Click to move the camera to the preset position. Clear Click to delete the preset position data. OK/Cancel See "Buttons common to every menu" on page 31. Note The OK/Cancel can be effective in the operation of Position at alarm with this tab. Tour Tab - Setting a tour Up to 16 positions can be programmed, and the camera moves to the programmed positions sequentially (Tour). Up to five programs can be set as Tours A to E. Tour Select On to enable the tour function. Resume time on inactivity This item becomes active when Tour is set to On. With this item, you can select whether you restart or stop the tour after it has stopped by manual pan, tilt or zoom operation or by camera movement to the preset position triggered by an alarm. On: Specify the wait time before the tour restarts, between 5 and 600 seconds. The tour restarts automatically after the specified time has elapsed. Off: The tour does not restart. Tour A to Tour E Configure Tour A to Tour E respectively. Each tour setting consists of 5 items: On/Off, Effective period, Stay time, Speed and Sequence. On: The tour operates. Off: The tour does not operate. Effective period Select the period during which the tour in activated. Always: The tour can be activated any time. Schedule: The tour is activated according to the schedule you have set. Click Schedule, and the menu for the effective period is displayed. ("Setting the Schedule - Schedule Menu" on page 80.) 64 Saving the Camera Position and Action - Preset position Menu
-
 1
1 -
2
-
3
-
4
-
5
-
6
-
7
-
8
-
9
-
10
-
11
-
12
-
13
-
14
-
15
-
16
-
17
-
18
-
19
-
20
-
21
-
22
-
23
-
24
-
25
-
26
-
27
-
28
-
29
-
30
-
31
-
32
-
33
-
34
-
35
-
36
-
37
-
38
-
39
-
40
-
41
-
42
-
43
-
44
-
45
-
46
-
47
-
48
-
49
-
50
-
51
-
52
-
53
-
54
-
55
-
56
-
57
-
58
-
 59
59 -
 60
60 -
 61
61 -
 62
62 -
 63
63 -
 64
64 -
 65
65 -
 66
66 -
 67
67 -
 68
68 -
 69
69 -
70
-
71
-
72
-
73
-
74
-
75
-
76
-
77
-
78
-
79
-
80
-
81
-
82
-
83
-
84
-
85
-
86
-
87
-
88
-
89
-
90
-
91
-
92
-
93
-
94
-
95
-
96
-
97
-
98
-
99
-
100
-
101
-
102
-
103
-
104
-
105
-
106
-
107
-
108
-
109
-
110
-
111
-
112
-
113
-
114
-
115
-
116
-
117
-
118
-
119
-
120
 |
 |
