Toshiba Portege 2010 User Guide 2 - Page 48
Connecting other external devices, Using the main battery
 |
View all Toshiba Portege 2010 manuals
Add to My Manuals
Save this manual to your list of manuals |
Page 48 highlights
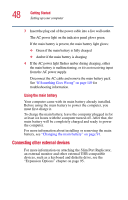
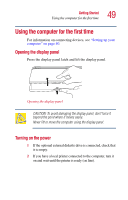
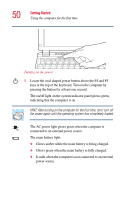
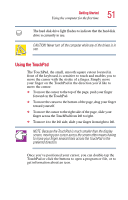
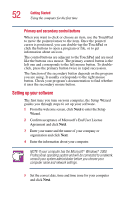
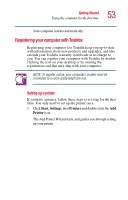
48 Getting Started Setting up your computer 3 Insert the plug end of the power cable into a live wall outlet. The AC power light on the indicator panel glows green. If the main battery is present, the main battery light glows: ❖ Green if the main battery is fully charged ❖ Amber if the main battery is charging 4 If the AC power light flashes amber during charging, either the main battery is malfunctioning, or it is not receiving input from the AC power supply. Disconnect the AC cable and remove the main battery pack. See "If Something Goes Wrong" on page 149 for troubleshooting information. Using the main battery Your computer came with its main battery already installed. Before using the main battery to power the computer, you must first charge it. To charge the main battery, leave the computer plugged in for at least six hours with the computer turned off. After that, the main battery will be completely charged and ready to power the computer. For more information about installing or removing the main battery, see "Changing the main battery" on page 91. Connecting other external devices For more information on attaching the Slim Port Replicator, an external monitor and other external USB-compatible devices, such as a keyboard and diskette drive, see the "Expansion Options" chapter on page 95.
-
 1
1 -
2
-
3
-
4
-
5
-
6
-
7
-
8
-
9
-
10
-
11
-
12
-
13
-
14
-
15
-
16
-
17
-
18
-
19
-
20
-
21
-
22
-
23
-
24
-
25
-
26
-
27
-
28
-
29
-
30
-
31
-
32
-
33
-
34
-
35
-
36
-
37
-
38
-
39
-
40
-
41
-
42
-
 43
43 -
 44
44 -
 45
45 -
 46
46 -
 47
47 -
 48
48 -
 49
49 -
 50
50 -
 51
51 -
 52
52 -
 53
53 -
54
-
55
-
56
-
57
-
58
-
59
-
60
-
61
-
62
-
63
-
64
-
65
-
66
-
67
-
68
-
69
-
70
-
71
-
72
-
73
-
74
-
75
-
76
-
77
-
78
-
79
-
80
-
81
-
82
-
83
-
84
-
85
-
86
-
87
-
88
-
89
-
90
-
91
-
92
-
93
-
94
-
95
-
96
-
97
-
98
-
99
-
100
-
101
-
102
-
103
-
104
-
105
-
106
-
107
-
108
-
109
-
110
-
111
-
112
-
113
-
114
-
115
-
116
-
117
-
118
-
119
-
120
-
121
-
122
-
123
-
124
-
125
-
126
-
127
-
128
-
129
-
130
-
131
-
132
-
133
-
134
-
135
-
136
-
137
-
138
-
139
-
140
-
141
-
142
-
143
-
144
-
145
-
146
-
147
-
148
-
149
-
150
-
151
-
152
-
153
-
154
-
155
-
156
-
157
-
158
-
159
-
160
-
161
-
162
-
163
-
164
-
165
-
166
-
167
-
168
-
169
-
170
-
171
-
172
-
173
-
174
-
175
-
176
-
177
-
178
-
179
-
180
-
181
-
182
-
183
-
184
-
185
-
186
-
187
-
188
-
189
-
190
-
191
-
192
-
193
-
194
-
195
-
196
-
197
-
198
-
199
-
200
-
201
-
202
-
203
-
204
-
205
-
206
-
207
-
208
-
209
-
210
-
211
-
212
 |
 |
