AIWA NSX-999 Operating Instructions - Page 58
Programmed, Edit Recording
 |
View all AIWA NSX-999 manuals
Add to My Manuals
Save this manual to your list of manuals |
Page 58 highlights
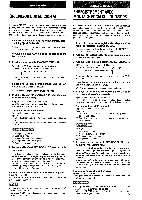
4 K DOWN UP PM n 5 -DISC DIRECT PLAY - b 6 8 58 PROGRAMMED EDIT RECORDING This function lets you program tracks to be recorded from all of the discs in the CD compartment, in any order. The remaining time on each side of the tape is displayed as you program the tracks. 1 Insert thetapeto be recorded on into deck2 and set the Dolby NR. See steps 1 and 2 on page 52 "RECORDING FROM A CD. 2 Press the CD button and load discs onto the trays. 3 Press the CD EDIT/REMAIN button twice. EDIT lights up and PRGM flashes in "the display. Each time it is pressed, the display changes. Al EDIT - PRGM EDIT When using the remote control, press the EDIT/REMAIN button. 4 Press the 4 DOWN or* the tape length. UP button to designate Enter a length from 10 to 99 minutes. When using the remote control Press the numeric buttons. Example: @ When using a 46-minute tape, press the 4 and 6 buttons. @ When using a 60-minute tape, press the 6 and O buttons. @) Recording time of side A @ Tape side A: Front side /B: Back side 5 Select a disc by pressing one of the DISC DIRECT PLAY buttons. 6 Press the numeric buttons and +10 button to program a track to be recorded on side A. (1) Program number @ Selected track This is displayed on a few seconds after a track is selected. @ Remaining time of side A @ Total number of selected tracks @ Programmed tracks 7 Repeat steps 5 and 6 to program the rest of the tracks on side A. A track whose playing time is longer than the remaining time cannot be programmed. 8 Press the CD EDIT/REMAIN button to select side B. To be continued.
-
 1
1 -
2
-
3
-
4
-
5
-
6
-
7
-
8
-
9
-
10
-
11
-
12
-
13
-
14
-
15
-
16
-
17
-
18
-
19
-
20
-
21
-
22
-
23
-
24
-
25
-
26
-
27
-
28
-
29
-
30
-
31
-
32
-
33
-
34
-
35
-
36
-
37
-
38
-
39
-
40
-
41
-
42
-
43
-
44
-
45
-
46
-
47
-
48
-
49
-
50
-
51
-
52
-
 53
53 -
 54
54 -
 55
55 -
 56
56 -
 57
57 -
 58
58 -
 59
59 -
 60
60 -
 61
61 -
 62
62 -
 63
63 -
64
-
65
-
66
-
67
-
68
-
69
-
70
-
71
-
72
-
73
-
74
-
75
-
76
-
77
-
78
-
79
-
80
 |
 |
