AIWA NSX-999 Operating Instructions - Page 60
the tracks to be recorded
 |
View all AIWA NSX-999 manuals
Add to My Manuals
Save this manual to your list of manuals |
Page 60 highlights
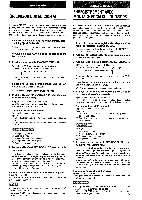
10 REC/REC MUTE q o ?!? 60 PROGRAMMED EDIT RECORDING 9 Program the tracks to be recorded on side B. After confirming 3 in the display, repeat steps 5 and 6 for side B. 10 Press the q REC/REC MUTE button to start recording. The tape is rewound to the beginning of the front side, plays through the leader for 10 seconds, and then recording starts. When you use the remote control to start recording, first press the q/0 REC/REC MUTE button and then press the 4 ® button within 2 seconds. To stop recording in the middle Press the s button. Recording and CD play stop simultaneously, To clear the edit program Before recording, press the s CLEAR button twice so that EDIT in the display goes out. The first press of the button clears the program on side A and the second press clears the program on side B. To clear the program on both sides at the same time, press the A OPEN/CLOSE button. To check the edit program Before recording, press the CD EDIT/REMAIN button. The program for one side of the tape is displayed each time the button is pressed. + u o Time remaining on the tape @ Tape side @ Total number of programmed tracks @ Program tracks To check the order of the programmed tracks Before recording, press the CD EDIT/REMAIN button to select side A or B, and press the - DOWN or > UP button repeatedly. Each time the button is pressed, the next track (FF button) or previous track (* button) in the program is shown in the display. +El @ Program number @ Track number To change the program After clearing the program on each side, carry out on the steps again. m Recording is inhibited if the erasure prevention tab on either side of the tape is broken off.
-
 1
1 -
2
-
3
-
4
-
5
-
6
-
7
-
8
-
9
-
10
-
11
-
12
-
13
-
14
-
15
-
16
-
17
-
18
-
19
-
20
-
21
-
22
-
23
-
24
-
25
-
26
-
27
-
28
-
29
-
30
-
31
-
32
-
33
-
34
-
35
-
36
-
37
-
38
-
39
-
40
-
41
-
42
-
43
-
44
-
45
-
46
-
47
-
48
-
49
-
50
-
51
-
52
-
53
-
54
-
 55
55 -
 56
56 -
 57
57 -
 58
58 -
 59
59 -
 60
60 -
 61
61 -
 62
62 -
 63
63 -
 64
64 -
 65
65 -
66
-
67
-
68
-
69
-
70
-
71
-
72
-
73
-
74
-
75
-
76
-
77
-
78
-
79
-
80
 |
 |
