Brother International MFC-820CW Network Users Manual - English - Page 131
Driver Install Only, Brother DeviceSelector, Network, Register your, computer with the Scan
 |
View all Brother International MFC-820CW manuals
Add to My Manuals
Save this manual to your list of manuals |
Page 131 highlights
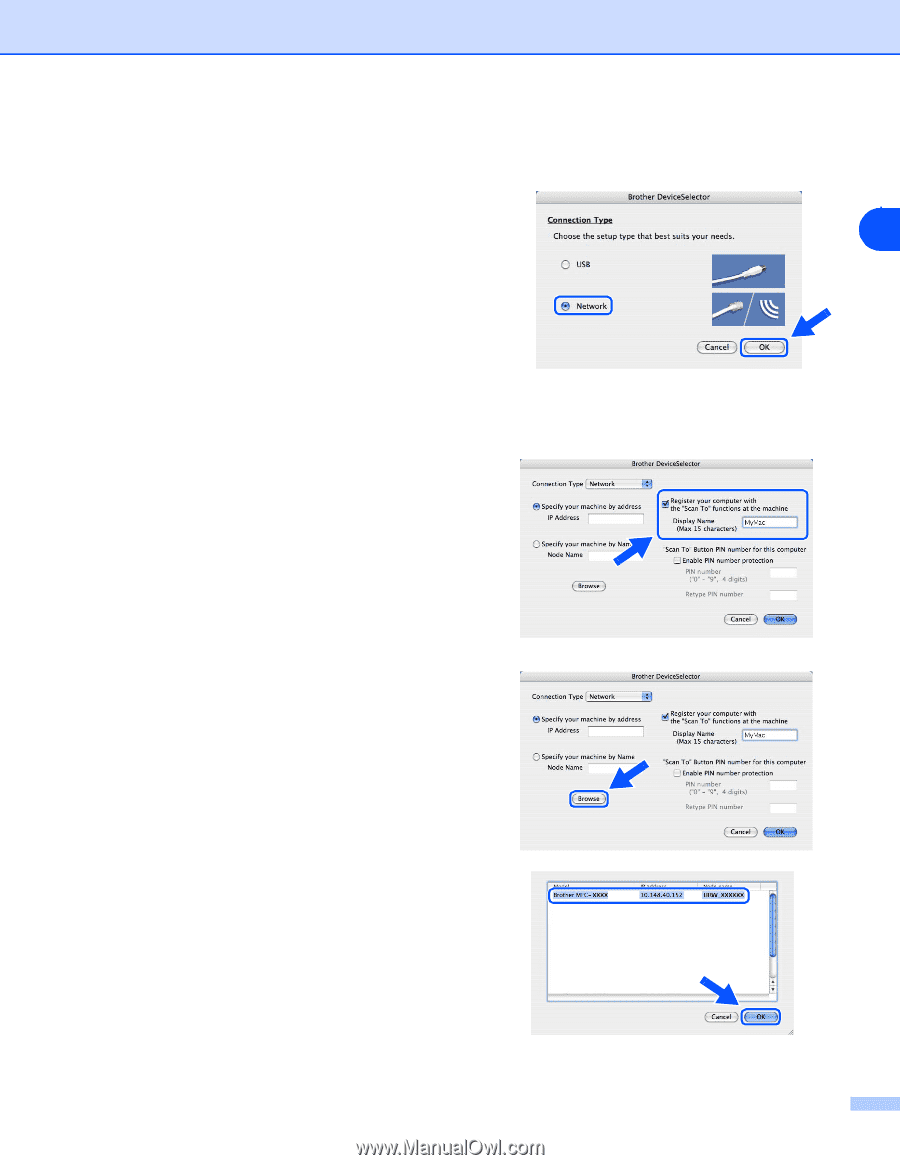
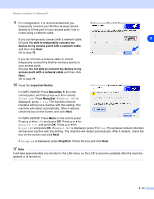
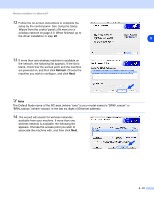
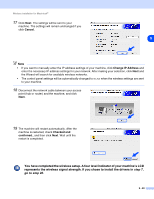
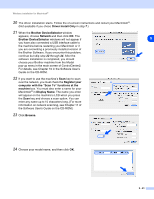
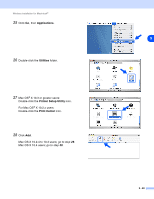
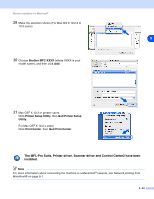
Wireless installation for Macintosh® 20 The driver installation starts. Follow the on-screen instructions and restart your Macintosh®. (Not available if you chose Driver Install Only in step 7.) 21 When the Brother DeviceSelector window appears, choose Network and then click OK. The Brother DeviceSelector windows will not appear if 9 you have also connected a USB interface cable to the machine before restarting your Macintosh or if you are overwriting a previously installed version of the Brother Software. If you encounter this problem, continue but skip step 22 through 24. After the software installation is completed, you should choose your Brother machine from the Model pop-up menu in the main screen of ControlCenter2. For details, see Chapter 10 in the Software User's Guide on the CD-ROM. 22 If you want to use the machine's Scan key to scan over the network, you must check the Register your computer with the "Scan To" functions at the machine box. You must also enter a name for your Macintosh® in Display Name. The name you enter will appear on the machine's LCD when you press the Scan key and choose a scan option. You can enter any name up to 15 characters long. (For more information on network scanning, see Chapter 11 of the Software User's Guide on the CD-ROM.) 23 Click Browse. 24 Choose your model name, and then click OK. 9 - 21
-
 1
1 -
2
-
3
-
4
-
5
-
6
-
7
-
8
-
9
-
10
-
11
-
12
-
13
-
14
-
15
-
16
-
17
-
18
-
19
-
20
-
21
-
22
-
23
-
24
-
25
-
26
-
27
-
28
-
29
-
30
-
31
-
32
-
33
-
34
-
35
-
36
-
37
-
38
-
39
-
40
-
41
-
42
-
43
-
44
-
45
-
46
-
47
-
48
-
49
-
50
-
51
-
52
-
53
-
54
-
55
-
56
-
57
-
58
-
59
-
60
-
61
-
62
-
63
-
64
-
65
-
66
-
67
-
68
-
69
-
70
-
71
-
72
-
73
-
74
-
75
-
76
-
77
-
78
-
79
-
80
-
81
-
82
-
83
-
84
-
85
-
86
-
87
-
88
-
89
-
90
-
91
-
92
-
93
-
94
-
95
-
96
-
97
-
98
-
99
-
100
-
101
-
102
-
103
-
104
-
105
-
106
-
107
-
108
-
109
-
110
-
111
-
112
-
113
-
114
-
115
-
116
-
117
-
118
-
119
-
120
-
121
-
122
-
123
-
124
-
125
-
 126
126 -
 127
127 -
 128
128 -
 129
129 -
 130
130 -
 131
131 -
 132
132 -
 133
133 -
 134
134 -
 135
135 -
 136
136 -
137
-
138
-
139
-
140
-
141
-
142
-
143
-
144
-
145
-
146
-
147
-
148
-
149
-
150
-
151
-
152
-
153
-
154
-
155
-
156
-
157
-
158
-
159
-
160
-
161
-
162
-
163
-
164
 |
 |