Brother International MFC-820CW Network Users Manual - English - Page 17
How the IP address is assigned to your print server:, Subnet mask - network
 |
View all Brother International MFC-820CW manuals
Add to My Manuals
Save this manual to your list of manuals |
Page 17 highlights
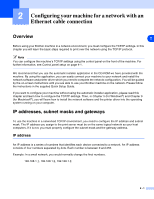
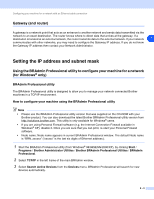
Configuring your machine for a network with an Ethernet cable connection How the IP address is assigned to your print server: If you have a DHCP/BOOTP/RARP server in your network (typically a UNIX®/Linux or Windows® 2000/XP network) the print server will automatically obtain its IP address from the DHCP server. 2 Note On smaller networks, the DHCP server may be the router. For more information on DHCP, BOOTP and RARP, see Using DHCP to configure the IP address on page A-1, Using BOOTP to configure the IP address on page A-1 and Using RARP to configure the IP address on page A-2. If you do not have a DHCP/BOOTP/RARP server, the Automatic Private IP Addressing (APIPA) protocol will automatically assign an IP address from the range 169.254.1.0 to 169.254.254.255. For more information on APIPA, see Using APIPA to configure the IP address on page A-3. If the APIPA protocol is disabled, the default IP address of a Brother print server is 192.0.0.192. However, you can easily change this IP address number to match with the IP address details of your network. For information on how to change the IP address, see Setting the IP address and subnet mask on page 2-3. Subnet mask Subnet masks restrict network communication. Example: PC1 can talk to PC2 PC1 IP Address:192.168.1.2 Subnet Mask: 255.255.255.0 PC2 IP Address:192.168.1.3 Subnet Mask: 255.255.255.0 Note 0 denotes that there is no limit to communication at this part of the address. In the above example, we can communicate with anything that has an IP address that begins with 192.168.1.X 2 - 2
-
 1
1 -
2
-
3
-
4
-
5
-
6
-
7
-
8
-
9
-
10
-
11
-
 12
12 -
 13
13 -
 14
14 -
 15
15 -
 16
16 -
 17
17 -
 18
18 -
 19
19 -
 20
20 -
 21
21 -
 22
22 -
23
-
24
-
25
-
26
-
27
-
28
-
29
-
30
-
31
-
32
-
33
-
34
-
35
-
36
-
37
-
38
-
39
-
40
-
41
-
42
-
43
-
44
-
45
-
46
-
47
-
48
-
49
-
50
-
51
-
52
-
53
-
54
-
55
-
56
-
57
-
58
-
59
-
60
-
61
-
62
-
63
-
64
-
65
-
66
-
67
-
68
-
69
-
70
-
71
-
72
-
73
-
74
-
75
-
76
-
77
-
78
-
79
-
80
-
81
-
82
-
83
-
84
-
85
-
86
-
87
-
88
-
89
-
90
-
91
-
92
-
93
-
94
-
95
-
96
-
97
-
98
-
99
-
100
-
101
-
102
-
103
-
104
-
105
-
106
-
107
-
108
-
109
-
110
-
111
-
112
-
113
-
114
-
115
-
116
-
117
-
118
-
119
-
120
-
121
-
122
-
123
-
124
-
125
-
126
-
127
-
128
-
129
-
130
-
131
-
132
-
133
-
134
-
135
-
136
-
137
-
138
-
139
-
140
-
141
-
142
-
143
-
144
-
145
-
146
-
147
-
148
-
149
-
150
-
151
-
152
-
153
-
154
-
155
-
156
-
157
-
158
-
159
-
160
-
161
-
162
-
163
-
164
 |
 |