Brother International MFC-820CW Network Users Manual - English - Page 20
Changing the print server settings - brothers
 |
View all Brother International MFC-820CW manuals
Add to My Manuals
Save this manual to your list of manuals |
Page 20 highlights
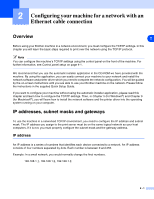
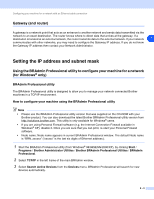
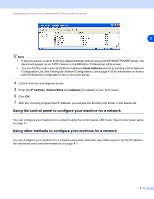
Configuring your machine for a network with an Ethernet cable connection Changing the print server settings Using the BRAdmin Professional utility to change the print server settings (for Windows® only) 2 1 Start the BRAdmin Professional utility (from Windows® 98/98SE/Me/2000/XP), by clicking Start / Programs / Brother Administrator Utilities / Brother BRAdmin Professional Utilities / BRAdmin Professional. 2 Select TCP/IP in the left frame of the main BRAdmin window. 3 Select the print server which you want to configure, in the right frame of the main BRAdmin window. 4 Select Configure Print Server from the Control menu. 5 Enter a password if you have set it. Note By default, no password is required to change the print server settings. You can set a password to change the print server settings. Double click the device you want to set a password. Click Control tab, and then click Change Password. Enter the new password. 6 You can now change the print server settings. Using the control panel to change the print server settings You can configure and change the print server settings using the control panel LAN menu. See Control panel setup on page 4-1. 2 - 5
-
 1
1 -
2
-
3
-
4
-
5
-
6
-
7
-
8
-
9
-
10
-
11
-
12
-
13
-
14
-
 15
15 -
 16
16 -
 17
17 -
 18
18 -
 19
19 -
 20
20 -
 21
21 -
 22
22 -
 23
23 -
 24
24 -
 25
25 -
26
-
27
-
28
-
29
-
30
-
31
-
32
-
33
-
34
-
35
-
36
-
37
-
38
-
39
-
40
-
41
-
42
-
43
-
44
-
45
-
46
-
47
-
48
-
49
-
50
-
51
-
52
-
53
-
54
-
55
-
56
-
57
-
58
-
59
-
60
-
61
-
62
-
63
-
64
-
65
-
66
-
67
-
68
-
69
-
70
-
71
-
72
-
73
-
74
-
75
-
76
-
77
-
78
-
79
-
80
-
81
-
82
-
83
-
84
-
85
-
86
-
87
-
88
-
89
-
90
-
91
-
92
-
93
-
94
-
95
-
96
-
97
-
98
-
99
-
100
-
101
-
102
-
103
-
104
-
105
-
106
-
107
-
108
-
109
-
110
-
111
-
112
-
113
-
114
-
115
-
116
-
117
-
118
-
119
-
120
-
121
-
122
-
123
-
124
-
125
-
126
-
127
-
128
-
129
-
130
-
131
-
132
-
133
-
134
-
135
-
136
-
137
-
138
-
139
-
140
-
141
-
142
-
143
-
144
-
145
-
146
-
147
-
148
-
149
-
150
-
151
-
152
-
153
-
154
-
155
-
156
-
157
-
158
-
159
-
160
-
161
-
162
-
163
-
164
 |
 |