Canon S830D S830D Quick Start Guide - Page 35
Adjusting Photos, Advanced Photo Adjusting
 |
View all Canon S830D manuals
Add to My Manuals
Save this manual to your list of manuals |
Page 35 highlights
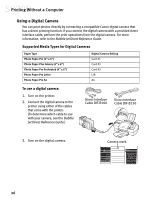
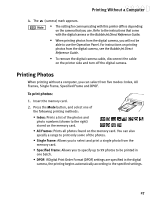
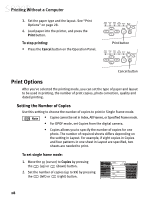
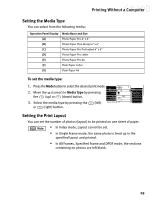
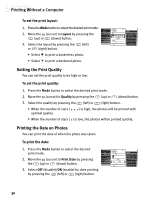
Printing Without a Computer Adjusting Photos This function automatically corrects photos before printing them. • If you're printing images that support the Exif 2.2 standard, the images will be corrected automatically. • When image correction is performed, printing may take longer. • Results may vary depending on the photo. To adjust photos: 1. Press the Mode button to select the desired print mode. 2. Move the (cursor) to Optimize Image by pressing the (up) or (down) button. 3. Select OFF (disable)/ON (enable) for image correction by pressing the (left) or (right) button. Advanced Photo Adjusting For more detailed photo correction, two functions are performed: • A correction for color fogginess and exposure (Photo Optimizer PRO). • A correction for reproducing vivid colors (Vivid Photo). To set only one correction function, follow the procedure below. To do more detailed photo adjusting: 1. Repeatedly press the (right) button until you see ON next to Optimize Image. 2. Do one of the following: • To use only the Photo Optimizer PRO function, repeatedly press the (right) button until you see POP[ON] next to Optimize Image. • To use only the Vivid Photo function, repeatedly press the (right) button until you see VP[ON] next to Optimize Image. 31
-
 1
1 -
2
-
3
-
4
-
5
-
6
-
7
-
8
-
9
-
10
-
11
-
12
-
13
-
14
-
15
-
16
-
17
-
18
-
19
-
20
-
21
-
22
-
23
-
24
-
25
-
26
-
27
-
28
-
29
-
 30
30 -
 31
31 -
 32
32 -
 33
33 -
 34
34 -
 35
35 -
 36
36 -
 37
37 -
 38
38 -
 39
39 -
 40
40 -
41
-
42
-
43
-
44
-
45
-
46
-
47
-
48
-
49
-
50
-
51
-
52
-
53
-
54
-
55
-
56
-
57
-
58
-
59
-
60
-
61
-
62
-
63
-
64
-
65
-
66
-
67
-
68
-
69
-
70
-
71
-
72
-
73
-
74
-
75
-
76
-
77
-
78
-
79
-
80
-
81
-
82
-
83
-
84
-
85
-
86
-
87
-
88
 |
 |
