Casio EX-Z850 Owners Manual - Page 109
OTHER RECORDING FUNCTIONS, IMPORTANT, Using the Menu Screen
 |
UPC - 079767684556
View all Casio EX-Z850 manuals
Add to My Manuals
Save this manual to your list of manuals |
Page 109 highlights
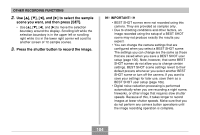
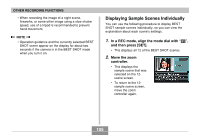
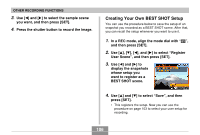
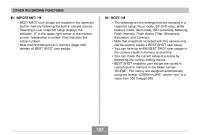
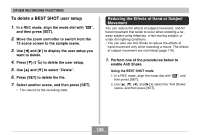
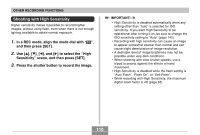
OTHER RECORDING FUNCTIONS Using the Menu Screen 1. In a REC mode, press [MENU]. 2. Select the "REC" tab, select "Anti Shake", and then press [̈]. 3. Use [̆] and [̄] to select "Auto", and then press [SET]. • (Anti Shake indicator) is displayed on the monitor screen while Anti Shake is turned on. 2. Press the shutter button to record the image. IMPORTANT! • Anti Shake is disabled automatically when any setting other than "Auto" is selected for ISO sensitivity. If you want Anti Shake to be operational after turning it on, be sure to change the ISO sensitivity setting to "Auto" (page 142). • Recording with Anti Shake can cause an image to appear somewhat coarser than normal and can cause slight deterioration of image resolution. • The Anti Shake feature may not be able to eliminate the effects of hand or subject movement when shaking is severe. • The Anti Shake feature may not work when using a very low shutter speed. If this happens, use a tripod to stabilize the camera. • Though " " (Anti Shake) is displayed on the monitor screen while the flash setting is "Auto Flash", "Flash On", or "Soft Flash", Anti Shake is disabled. • While recording with Anti Shake, the maximum digital zoom factor is 4X (page 65). 109
-
 1
1 -
2
-
3
-
4
-
5
-
6
-
7
-
8
-
9
-
10
-
11
-
12
-
13
-
14
-
15
-
16
-
17
-
18
-
19
-
20
-
21
-
22
-
23
-
24
-
25
-
26
-
27
-
28
-
29
-
30
-
31
-
32
-
33
-
34
-
35
-
36
-
37
-
38
-
39
-
40
-
41
-
42
-
43
-
44
-
45
-
46
-
47
-
48
-
49
-
50
-
51
-
52
-
53
-
54
-
55
-
56
-
57
-
58
-
59
-
60
-
61
-
62
-
63
-
64
-
65
-
66
-
67
-
68
-
69
-
70
-
71
-
72
-
73
-
74
-
75
-
76
-
77
-
78
-
79
-
80
-
81
-
82
-
83
-
84
-
85
-
86
-
87
-
88
-
89
-
90
-
91
-
92
-
93
-
94
-
95
-
96
-
97
-
98
-
99
-
100
-
101
-
102
-
103
-
 104
104 -
 105
105 -
 106
106 -
 107
107 -
 108
108 -
 109
109 -
 110
110 -
 111
111 -
 112
112 -
 113
113 -
 114
114 -
115
-
116
-
117
-
118
-
119
-
120
-
121
-
122
-
123
-
124
-
125
-
126
-
127
-
128
-
129
-
130
-
131
-
132
-
133
-
134
-
135
-
136
-
137
-
138
-
139
-
140
-
141
-
142
-
143
-
144
-
145
-
146
-
147
-
148
-
149
-
150
-
151
-
152
-
153
-
154
-
155
-
156
-
157
-
158
-
159
-
160
-
161
-
162
-
163
-
164
-
165
-
166
-
167
-
168
-
169
-
170
-
171
-
172
-
173
-
174
-
175
-
176
-
177
-
178
-
179
-
180
-
181
-
182
-
183
-
184
-
185
-
186
-
187
-
188
-
189
-
190
-
191
-
192
-
193
-
194
-
195
-
196
-
197
-
198
-
199
-
200
-
201
-
202
-
203
-
204
-
205
-
206
-
207
-
208
-
209
-
210
-
211
-
212
-
213
-
214
-
215
-
216
-
217
-
218
-
219
-
220
-
221
-
222
-
223
-
224
-
225
-
226
-
227
-
228
-
229
-
230
-
231
-
232
-
233
-
234
-
235
-
236
-
237
-
238
-
239
-
240
-
241
-
242
-
243
-
244
-
245
-
246
-
247
-
248
-
249
-
250
-
251
-
252
-
253
-
254
-
255
-
256
-
257
-
258
-
259
-
260
-
261
-
262
-
263
-
264
-
265
-
266
-
267
-
268
-
269
-
270
-
271
-
272
-
273
-
274
-
275
-
276
-
277
-
278
-
279
 |
 |