Casio EX-Z850 Owners Manual - Page 216
Press the USB, Paper Size
 |
UPC - 079767684556
View all Casio EX-Z850 manuals
Add to My Manuals
Save this manual to your list of manuals |
Page 216 highlights
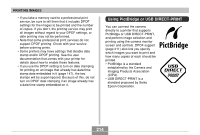
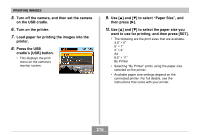
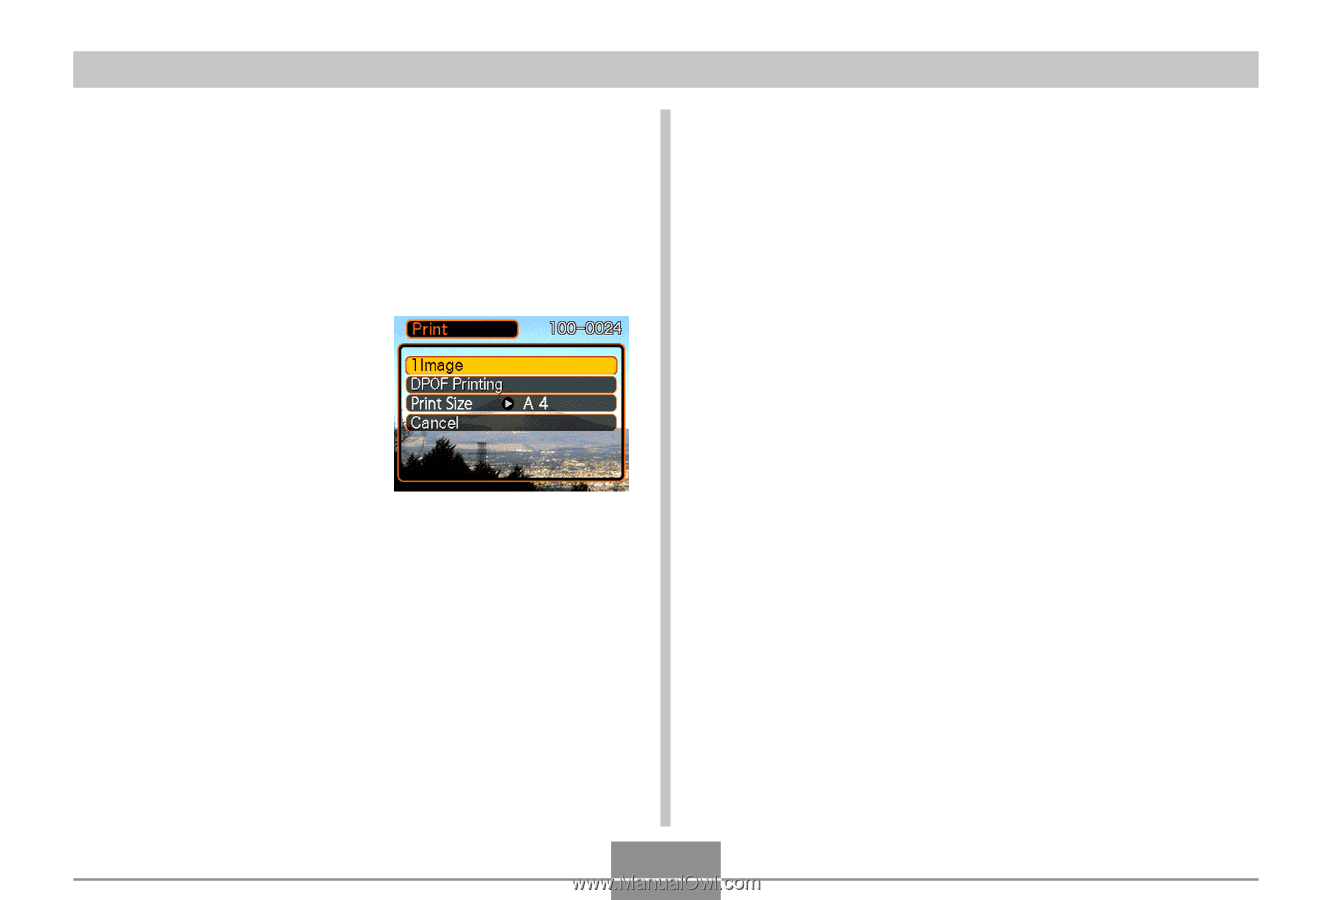
PRINTING IMAGES 5. Turn off the camera, and then set the camera on the USB cradle. 6. Turn on the printer. 7. Load paper for printing the images into the printer. 8. Press the USB cradle's [USB] button. • This displays the print menu on the camera's monitor screen. 9. Use [̆] and [̄] to select "Paper Size", and then press [̈]. 10. Use [̆] and [̄] to select the paper size you want to use for printing, and then press [SET]. • The following are the print sizes that are available. 3.5˝ × 5˝ 5˝ × 7˝ 4˝ × 6˝ A4 8.5˝ × 11˝ By Printer • Selecting "By Printer" prints using the paper size selected on the printer. • Available paper size settings depend on the connected printer. For full details, see the instructions that come with your printer. 216
-
 1
1 -
2
-
3
-
4
-
5
-
6
-
7
-
8
-
9
-
10
-
11
-
12
-
13
-
14
-
15
-
16
-
17
-
18
-
19
-
20
-
21
-
22
-
23
-
24
-
25
-
26
-
27
-
28
-
29
-
30
-
31
-
32
-
33
-
34
-
35
-
36
-
37
-
38
-
39
-
40
-
41
-
42
-
43
-
44
-
45
-
46
-
47
-
48
-
49
-
50
-
51
-
52
-
53
-
54
-
55
-
56
-
57
-
58
-
59
-
60
-
61
-
62
-
63
-
64
-
65
-
66
-
67
-
68
-
69
-
70
-
71
-
72
-
73
-
74
-
75
-
76
-
77
-
78
-
79
-
80
-
81
-
82
-
83
-
84
-
85
-
86
-
87
-
88
-
89
-
90
-
91
-
92
-
93
-
94
-
95
-
96
-
97
-
98
-
99
-
100
-
101
-
102
-
103
-
104
-
105
-
106
-
107
-
108
-
109
-
110
-
111
-
112
-
113
-
114
-
115
-
116
-
117
-
118
-
119
-
120
-
121
-
122
-
123
-
124
-
125
-
126
-
127
-
128
-
129
-
130
-
131
-
132
-
133
-
134
-
135
-
136
-
137
-
138
-
139
-
140
-
141
-
142
-
143
-
144
-
145
-
146
-
147
-
148
-
149
-
150
-
151
-
152
-
153
-
154
-
155
-
156
-
157
-
158
-
159
-
160
-
161
-
162
-
163
-
164
-
165
-
166
-
167
-
168
-
169
-
170
-
171
-
172
-
173
-
174
-
175
-
176
-
177
-
178
-
179
-
180
-
181
-
182
-
183
-
184
-
185
-
186
-
187
-
188
-
189
-
190
-
191
-
192
-
193
-
194
-
195
-
196
-
197
-
198
-
199
-
200
-
201
-
202
-
203
-
204
-
205
-
206
-
207
-
208
-
209
-
210
-
 211
211 -
 212
212 -
 213
213 -
 214
214 -
 215
215 -
 216
216 -
 217
217 -
 218
218 -
 219
219 -
 220
220 -
 221
221 -
222
-
223
-
224
-
225
-
226
-
227
-
228
-
229
-
230
-
231
-
232
-
233
-
234
-
235
-
236
-
237
-
238
-
239
-
240
-
241
-
242
-
243
-
244
-
245
-
246
-
247
-
248
-
249
-
250
-
251
-
252
-
253
-
254
-
255
-
256
-
257
-
258
-
259
-
260
-
261
-
262
-
263
-
264
-
265
-
266
-
267
-
268
-
269
-
270
-
271
-
272
-
273
-
274
-
275
-
276
-
277
-
278
-
279
 |
 |
PRINTING IMAGES
216
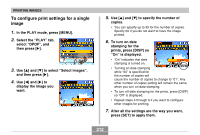
9.
Use [
´
] and [
±
] to select
“
Paper Size
”
, and
then press [
³
].
10
.
Use [
´
] and [
±
] to select the paper size you
want to use for printing, and then press [SET].
•
The following are the print sizes that are available.
3.5
˝
×
5
˝
5
˝
×
7
˝
4
˝
×
6
˝
A4
8.5
˝
×
11
˝
By Printer
•
Selecting
“
By Printer
”
prints using the paper size
selected on the printer.
•
Available paper size settings depend on the
connected printer. For full details, see the
instructions that come with your printer.
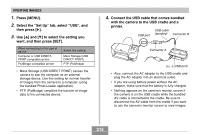
5.
Turn off the camera, and then set the camera
on the USB cradle.
6.
Turn on the printer.
7.
Load paper for printing the images into the
printer.
8.
Press the USB
cradle
’
s [USB] button.
•
This displays the print
menu on the camera
’
s
monitor screen.