Casio EX-Z850 Owners Manual - Page 170
Displaying the 9-image View, column scrolls to
 |
UPC - 079767684556
View all Casio EX-Z850 manuals
Add to My Manuals
Save this manual to your list of manuals |
Page 170 highlights
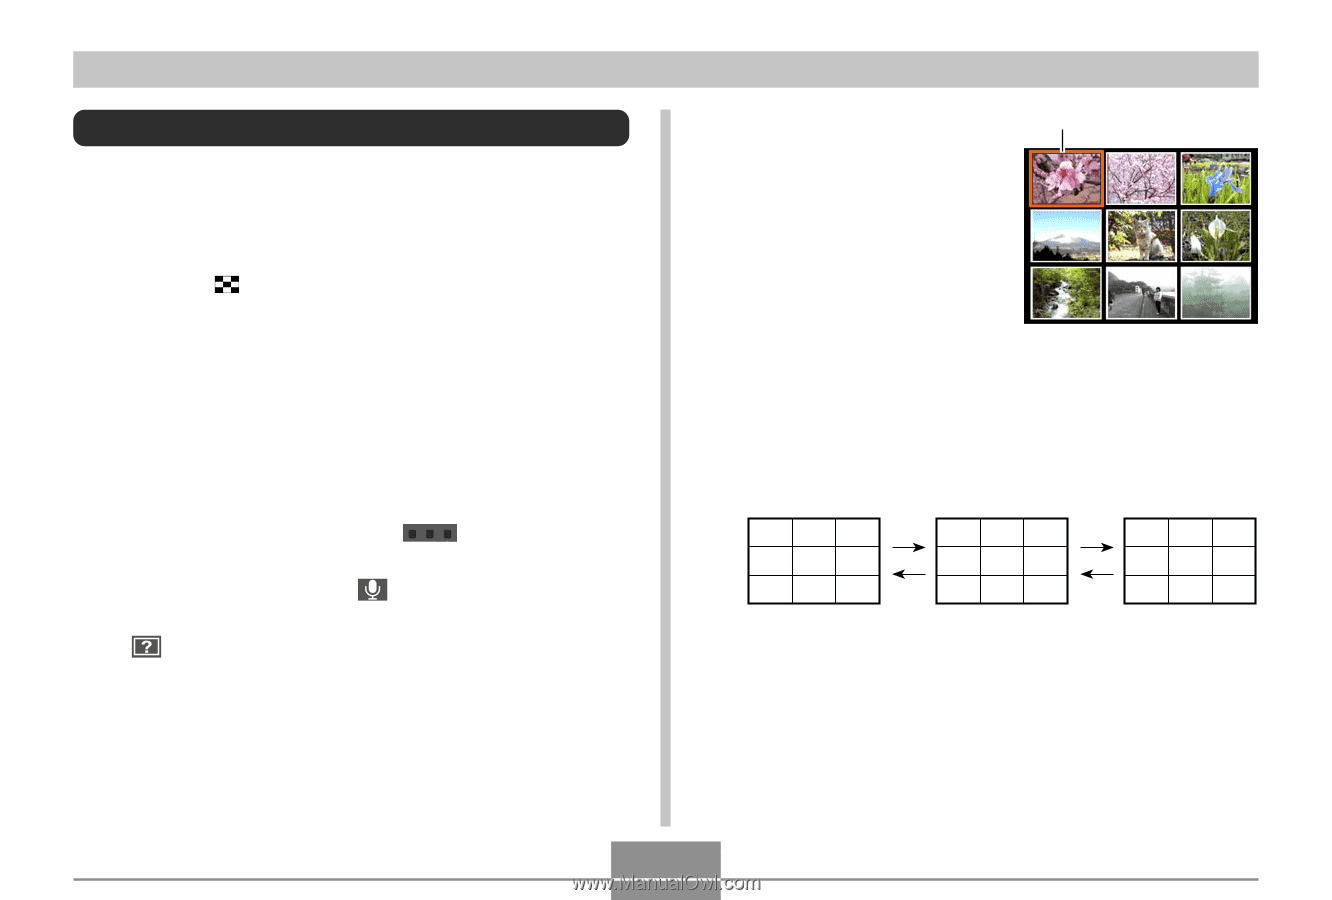
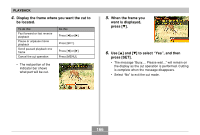
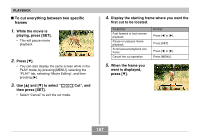
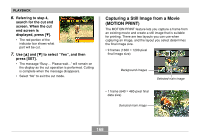
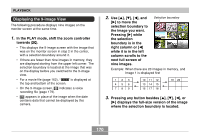
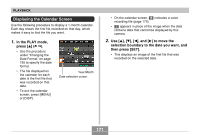
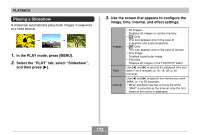
PLAYBACK Displaying the 9-image View The following procedure displays nine images on the monitor screen at the same time. 1. In the PLAY mode, shift the zoom controller towards ( ). • This displays the 9-image screen with the image that was on the monitor screen in step 2 in the center, with a selection boundary around it. • If there are fewer than nine images in memory, they are displayed starting from the upper left corner. The selection boundary is located at the image that was on the display before you switched to the 9-image view. • For a movie file (page 162), " " is displayed at the top and bottom of the screen. • On the 9-image screen, indicates a voice recording file (page 179). • appears in place of the image when the date contains data that cannot be displayed by this camera. 2. Use and [̈] to move the selection boundary to the image you want. Pressing [̈] while the selection boundary is in the right column or [̇] while it is in the left column scrolls to the next full screen of nine images. Selection boundary Example: When there are 20 images in memory, and Image 1 is displayed first 123 456 789 10 11 12 13 14 15 16 17 18 19 20 3. Pressing any button besides or [̈] displays the full-size version of the image where the selection boundary is located. 170
-
 1
1 -
2
-
3
-
4
-
5
-
6
-
7
-
8
-
9
-
10
-
11
-
12
-
13
-
14
-
15
-
16
-
17
-
18
-
19
-
20
-
21
-
22
-
23
-
24
-
25
-
26
-
27
-
28
-
29
-
30
-
31
-
32
-
33
-
34
-
35
-
36
-
37
-
38
-
39
-
40
-
41
-
42
-
43
-
44
-
45
-
46
-
47
-
48
-
49
-
50
-
51
-
52
-
53
-
54
-
55
-
56
-
57
-
58
-
59
-
60
-
61
-
62
-
63
-
64
-
65
-
66
-
67
-
68
-
69
-
70
-
71
-
72
-
73
-
74
-
75
-
76
-
77
-
78
-
79
-
80
-
81
-
82
-
83
-
84
-
85
-
86
-
87
-
88
-
89
-
90
-
91
-
92
-
93
-
94
-
95
-
96
-
97
-
98
-
99
-
100
-
101
-
102
-
103
-
104
-
105
-
106
-
107
-
108
-
109
-
110
-
111
-
112
-
113
-
114
-
115
-
116
-
117
-
118
-
119
-
120
-
121
-
122
-
123
-
124
-
125
-
126
-
127
-
128
-
129
-
130
-
131
-
132
-
133
-
134
-
135
-
136
-
137
-
138
-
139
-
140
-
141
-
142
-
143
-
144
-
145
-
146
-
147
-
148
-
149
-
150
-
151
-
152
-
153
-
154
-
155
-
156
-
157
-
158
-
159
-
160
-
161
-
162
-
163
-
164
-
 165
165 -
 166
166 -
 167
167 -
 168
168 -
 169
169 -
 170
170 -
 171
171 -
 172
172 -
 173
173 -
 174
174 -
 175
175 -
176
-
177
-
178
-
179
-
180
-
181
-
182
-
183
-
184
-
185
-
186
-
187
-
188
-
189
-
190
-
191
-
192
-
193
-
194
-
195
-
196
-
197
-
198
-
199
-
200
-
201
-
202
-
203
-
204
-
205
-
206
-
207
-
208
-
209
-
210
-
211
-
212
-
213
-
214
-
215
-
216
-
217
-
218
-
219
-
220
-
221
-
222
-
223
-
224
-
225
-
226
-
227
-
228
-
229
-
230
-
231
-
232
-
233
-
234
-
235
-
236
-
237
-
238
-
239
-
240
-
241
-
242
-
243
-
244
-
245
-
246
-
247
-
248
-
249
-
250
-
251
-
252
-
253
-
254
-
255
-
256
-
257
-
258
-
259
-
260
-
261
-
262
-
263
-
264
-
265
-
266
-
267
-
268
-
269
-
270
-
271
-
272
-
273
-
274
-
275
-
276
-
277
-
278
-
279
 |
 |