Compaq nx9010 Maintenance and Service Guide - Page 40
Removing the Hard Disk Drive Tray
 |
View all Compaq nx9010 manuals
Add to My Manuals
Save this manual to your list of manuals |
Page 40 highlights
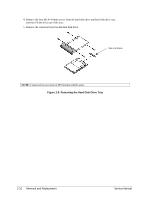
4. Remove the four M3.0×4.0mm screws from the hard disk drive and hard disk drive tray, and then lift the drive out of the tray. 5. Remove the connector bar from the hard disk drive. See note below NOTE: Connector bar not used on HP Pavilion ze5x00 series Figure 2-8. Removing the Hard Disk Drive Tray 2-10 Removal and Replacement Service Manual
-
 1
1 -
2
-
3
-
4
-
5
-
6
-
7
-
8
-
9
-
10
-
11
-
12
-
13
-
14
-
15
-
16
-
17
-
18
-
19
-
20
-
21
-
22
-
23
-
24
-
25
-
26
-
27
-
28
-
29
-
30
-
31
-
32
-
33
-
34
-
 35
35 -
 36
36 -
 37
37 -
 38
38 -
 39
39 -
 40
40 -
 41
41 -
 42
42 -
 43
43 -
 44
44 -
 45
45 -
46
-
47
-
48
-
49
-
50
-
51
-
52
-
53
-
54
-
55
-
56
-
57
-
58
-
59
-
60
-
61
-
62
-
63
-
64
-
65
-
66
-
67
-
68
-
69
-
70
-
71
-
72
-
73
-
74
-
75
-
76
-
77
-
78
-
79
-
80
-
81
-
82
-
83
-
84
-
85
-
86
-
87
-
88
-
89
-
90
-
91
-
92
-
93
-
94
-
95
-
96
-
97
-
98
-
99
-
100
-
101
-
102
-
103
-
104
-
105
-
106
-
107
-
108
-
109
-
110
-
111
-
112
-
113
-
114
-
115
-
116
-
117
-
118
-
119
-
120
-
121
-
122
-
123
-
124
-
125
-
126
-
127
-
128
-
129
-
130
-
131
-
132
-
133
-
134
-
135
-
136
-
137
-
138
-
139
-
140
-
141
-
142
-
143
-
144
-
145
-
146
-
147
-
148
-
149
-
150
-
151
-
152
-
153
-
154
 |
 |
2-10
Removal and Replacement
Service Manual
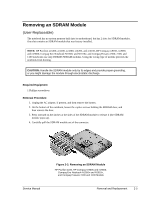
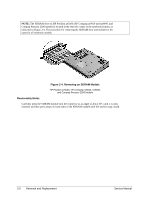
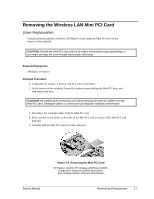
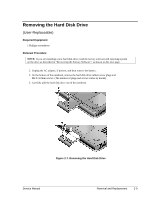
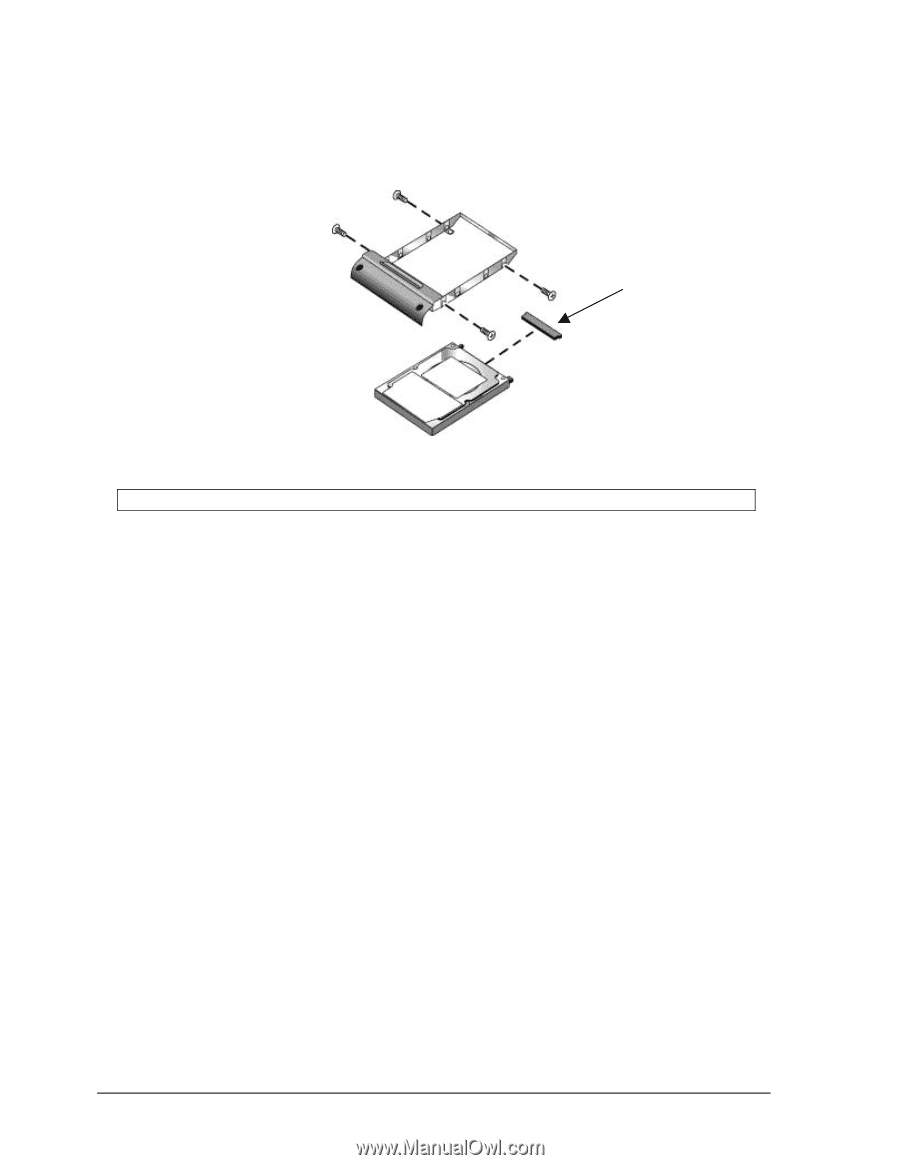
4.
Remove the four M3.0×4.0mm screws from the hard disk drive and hard disk drive tray,
and then lift the drive out of the tray.
5.
Remove the connector bar from the hard disk drive.
NOTE:
Connector bar not used on HP Pavilion ze5x00 series
Figure 2-8. Removing the Hard Disk Drive Tray
See note below