Compaq nx9010 Maintenance and Service Guide - Page 53
Removing the Display Assembly, Reassembly Notes - boot from usb
 |
View all Compaq nx9010 manuals
Add to My Manuals
Save this manual to your list of manuals |
Page 53 highlights
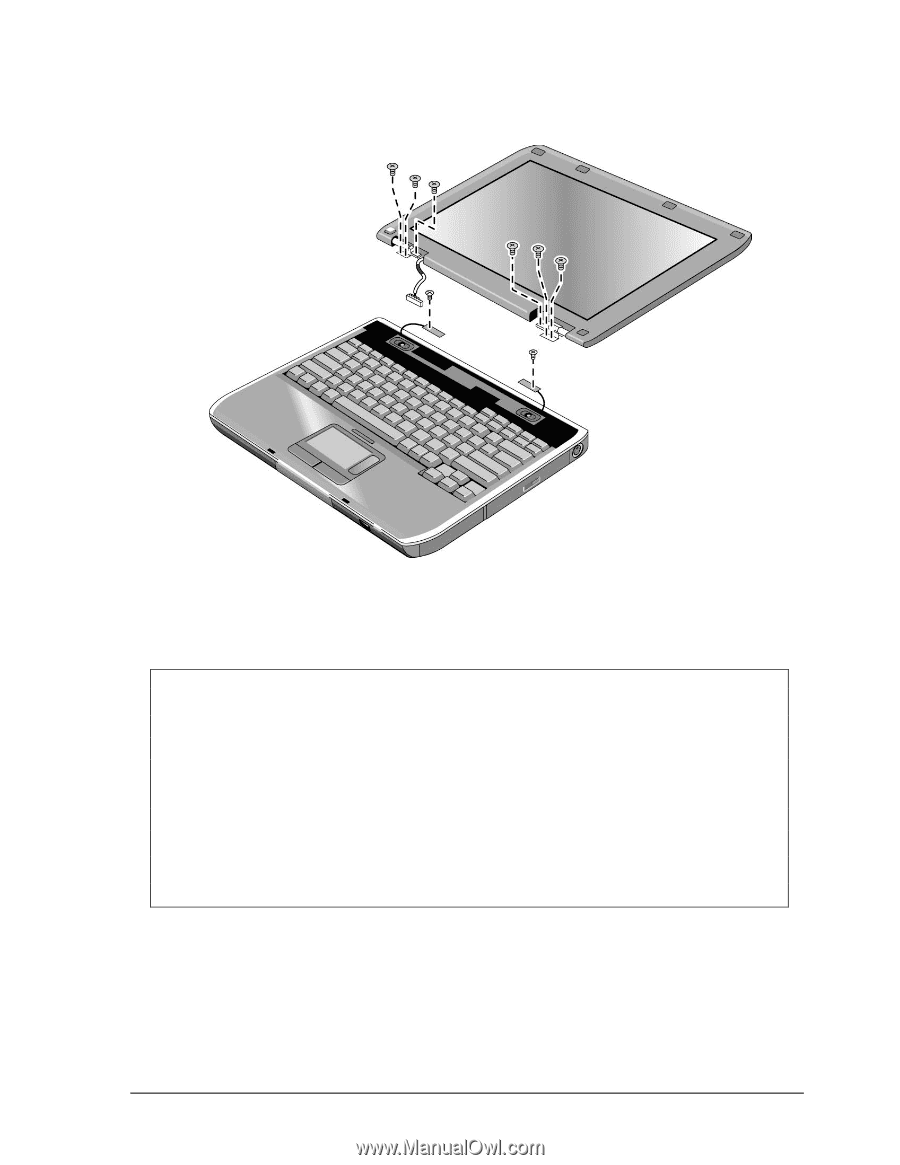
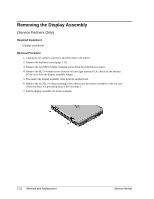
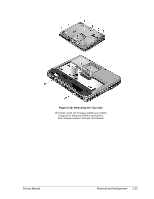
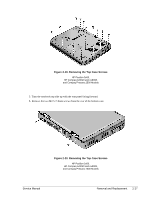
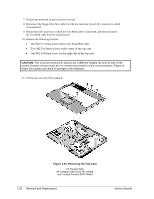
. Reassembly Notes Figure 2-17. Removing the Display Assembly NOTE: After replacing the display assembly or motherboard, you must use the Service Utilities floppy disk to reprogram the EEPROM on the motherboard for the new display. 1. Download the notebook series service package from the Partnership Web site (see page vii), and then create a Service Utilities floppy disk as described in the package's Readme file. 2. Plug in an AC adapter. 3. Insert the Service Utilities floppy disk in the floppy drive. If the unit has no internal floppy drive, connect a USB floppy drive. 4. Turn on the notebook. 5. When you see the HP logo, press esc to display the boot menu, then boot from the floppy drive. 6. Select the option to update the display/LCD identification stored on the motherboard. • Make sure you connect the grounding strap to the left display assembly hinge. • When connecting the left and right antenna PCAs, make sure they are parallel with the display assembly hinges. Service Manual Removal and Replacement 2-23
-
 1
1 -
2
-
3
-
4
-
5
-
6
-
7
-
8
-
9
-
10
-
11
-
12
-
13
-
14
-
15
-
16
-
17
-
18
-
19
-
20
-
21
-
22
-
23
-
24
-
25
-
26
-
27
-
28
-
29
-
30
-
31
-
32
-
33
-
34
-
35
-
36
-
37
-
38
-
39
-
40
-
41
-
42
-
43
-
44
-
45
-
46
-
47
-
 48
48 -
 49
49 -
 50
50 -
 51
51 -
 52
52 -
 53
53 -
 54
54 -
 55
55 -
 56
56 -
 57
57 -
 58
58 -
59
-
60
-
61
-
62
-
63
-
64
-
65
-
66
-
67
-
68
-
69
-
70
-
71
-
72
-
73
-
74
-
75
-
76
-
77
-
78
-
79
-
80
-
81
-
82
-
83
-
84
-
85
-
86
-
87
-
88
-
89
-
90
-
91
-
92
-
93
-
94
-
95
-
96
-
97
-
98
-
99
-
100
-
101
-
102
-
103
-
104
-
105
-
106
-
107
-
108
-
109
-
110
-
111
-
112
-
113
-
114
-
115
-
116
-
117
-
118
-
119
-
120
-
121
-
122
-
123
-
124
-
125
-
126
-
127
-
128
-
129
-
130
-
131
-
132
-
133
-
134
-
135
-
136
-
137
-
138
-
139
-
140
-
141
-
142
-
143
-
144
-
145
-
146
-
147
-
148
-
149
-
150
-
151
-
152
-
153
-
154
 |
 |