Compaq nx9010 Maintenance and Service Guide - Page 46
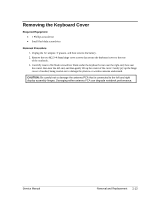
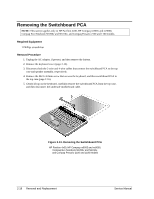
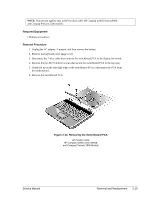
Removing the Keyboard, Required Equipment, Removal Procedure, Reassembly Notes, CAUTION
 |
View all Compaq nx9010 manuals
Add to My Manuals
Save this manual to your list of manuals |
Page 46 highlights
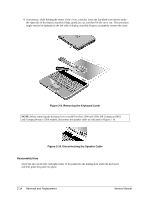
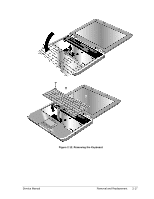
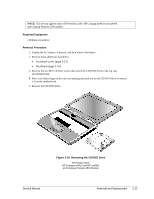
Removing the Keyboard Required Equipment 1 Phillips screwdriver Removal Procedure 1. Unplug the AC adapter, if present, and then remove the battery. 2. Remove the keyboard cover (page 2-13). 3. Remove the four M2.5×4.0mm screws that secure the keyboard to the top case. 4. Lift up on the keyboard at the switchboard PCA end, and then pull it toward the display assembly to release the tabs from the top case. 5. Turn the keyboard over, and then disconnect the motherboard cable. 6. Remove the keyboard. Reassembly Notes CAUTION: Do not excessively bend or fold the keyboard cable. Excessive flexing can damage the keyboard cable connectors. • Lay the keyboard face down on the top case, forward of its normal position, and then reconnect the keyboard cable. • Slide the metal tabs on the bottom of the keyboard into their slots in the top case, and then lower the keyboard into place. 2-16 Removal and Replacement Service Manual
-
 1
1 -
2
-
3
-
4
-
5
-
6
-
7
-
8
-
9
-
10
-
11
-
12
-
13
-
14
-
15
-
16
-
17
-
18
-
19
-
20
-
21
-
22
-
23
-
24
-
25
-
26
-
27
-
28
-
29
-
30
-
31
-
32
-
33
-
34
-
35
-
36
-
37
-
38
-
39
-
40
-
 41
41 -
 42
42 -
 43
43 -
 44
44 -
 45
45 -
 46
46 -
 47
47 -
 48
48 -
 49
49 -
 50
50 -
 51
51 -
52
-
53
-
54
-
55
-
56
-
57
-
58
-
59
-
60
-
61
-
62
-
63
-
64
-
65
-
66
-
67
-
68
-
69
-
70
-
71
-
72
-
73
-
74
-
75
-
76
-
77
-
78
-
79
-
80
-
81
-
82
-
83
-
84
-
85
-
86
-
87
-
88
-
89
-
90
-
91
-
92
-
93
-
94
-
95
-
96
-
97
-
98
-
99
-
100
-
101
-
102
-
103
-
104
-
105
-
106
-
107
-
108
-
109
-
110
-
111
-
112
-
113
-
114
-
115
-
116
-
117
-
118
-
119
-
120
-
121
-
122
-
123
-
124
-
125
-
126
-
127
-
128
-
129
-
130
-
131
-
132
-
133
-
134
-
135
-
136
-
137
-
138
-
139
-
140
-
141
-
142
-
143
-
144
-
145
-
146
-
147
-
148
-
149
-
150
-
151
-
152
-
153
-
154
 |
 |