Compaq nx9010 Maintenance and Service Guide - Page 58
CAUTION, Removing the Top Case, One M2.5×7.0mm screw next to the TouchPad cable
 |
View all Compaq nx9010 manuals
Add to My Manuals
Save this manual to your list of manuals |
Page 58 highlights
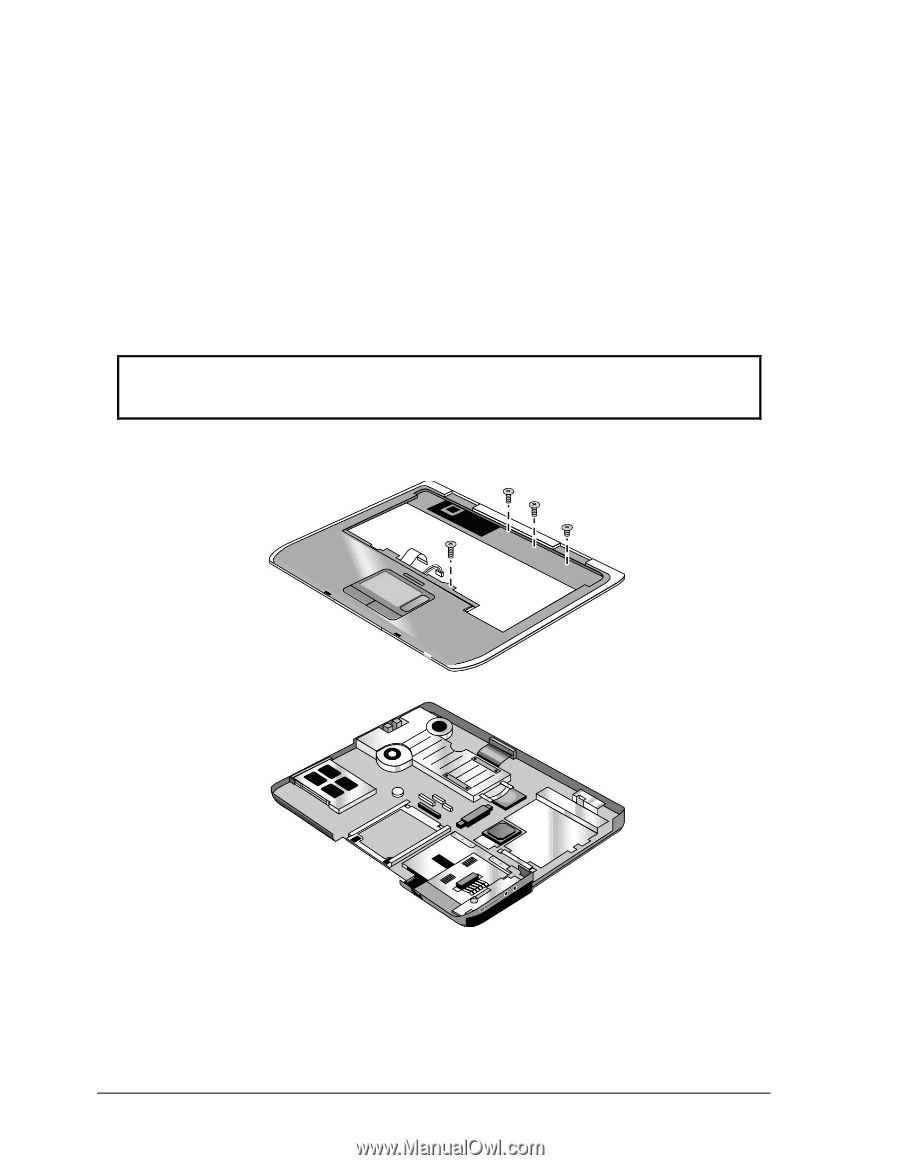
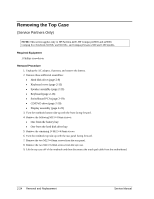
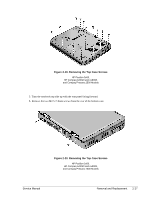
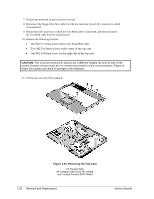
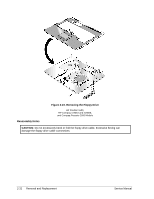
7. Position the notebook so the front faces forward. 8. Disconnect the floppy drive flex cable from the low insertion force (LIF) connector to which it is connected. 9. Release the ZIF connector to which the TouchPad cable is connected, and then disconnect the TouchPad cable from the system board. 10. Remove the following 4 screws: • One M2.5×7.0mm screw next to the TouchPad cable • Two M2.5×6.0mm screws in the center of the top case • One M2.5×4.0mm screw on the right side of the top case CAUTION: The 4 screws removed in step 10 are 3 different lengths. Be sure to note of the correct location of each screw as it is removed and install it in the correct location. Failure to follow this caution can result in damage to the notebook. 11. Lift the top case off of the notebook. Figure 2-21. Removing the Top Case HP Pavilion 5x00, HP Compaq nx9010 and HP nx9008, and Compaq Presario 2500 Models 2-28 Removal and Replacement Service Manual
-
 1
1 -
2
-
3
-
4
-
5
-
6
-
7
-
8
-
9
-
10
-
11
-
12
-
13
-
14
-
15
-
16
-
17
-
18
-
19
-
20
-
21
-
22
-
23
-
24
-
25
-
26
-
27
-
28
-
29
-
30
-
31
-
32
-
33
-
34
-
35
-
36
-
37
-
38
-
39
-
40
-
41
-
42
-
43
-
44
-
45
-
46
-
47
-
48
-
49
-
50
-
51
-
52
-
 53
53 -
 54
54 -
 55
55 -
 56
56 -
 57
57 -
 58
58 -
 59
59 -
 60
60 -
 61
61 -
 62
62 -
 63
63 -
64
-
65
-
66
-
67
-
68
-
69
-
70
-
71
-
72
-
73
-
74
-
75
-
76
-
77
-
78
-
79
-
80
-
81
-
82
-
83
-
84
-
85
-
86
-
87
-
88
-
89
-
90
-
91
-
92
-
93
-
94
-
95
-
96
-
97
-
98
-
99
-
100
-
101
-
102
-
103
-
104
-
105
-
106
-
107
-
108
-
109
-
110
-
111
-
112
-
113
-
114
-
115
-
116
-
117
-
118
-
119
-
120
-
121
-
122
-
123
-
124
-
125
-
126
-
127
-
128
-
129
-
130
-
131
-
132
-
133
-
134
-
135
-
136
-
137
-
138
-
139
-
140
-
141
-
142
-
143
-
144
-
145
-
146
-
147
-
148
-
149
-
150
-
151
-
152
-
153
-
154
 |
 |