Dell B2375dfw Dell Mono MFP User's Guide
Dell B2375dfw Manual
 |
View all Dell B2375dfw manuals
Add to My Manuals
Save this manual to your list of manuals |
Dell B2375dfw manual content summary:
- Dell B2375dfw | Dell Mono MFP User's Guide - Page 1
Dell™ B2375dfw Mono MFP Dell™ B2375dnf Mono MFP User's Guide - Dell B2375dfw | Dell Mono MFP User's Guide - Page 2
Dell™ B2375dfw/ B2375dnf Mono MFP User's Guide Click the links to the left for information on the features, options, and operation of your printer. For information on other documentation included with your printer, see "Finding Information". To order replacement toner cartridges or supplies from - Dell B2375dfw | Dell Mono MFP User's Guide - Page 3
of your printer. NOTICE: A NOTICE indicates either potential damage to hardware or loss of data and tells you how to avoid the problem. CAUTION: or their products. Dell Inc. disclaims any proprietary interest in trademarks and trade names other than its own. Google Cloud Print is a trademark of - Dell B2375dfw | Dell Mono MFP User's Guide - Page 4
Refer to the 'LICENSE.txt' file in the provided CD-ROM for the open source license information. Rev.1.00 - 3 - Dell B2375dfw | Dell Mono MFP User's Guide - Page 5
a wireless network. CAUTION: Read and follow all safety instructions in your Important Information prior to setting up and operating your printer. NOTE: Quick Reference Guide may not be provided with your product depending on your country. Setup diagram Dell™ B2375dfw / B2375dnf Mono MFP 1 Dell - Dell B2375dfw | Dell Mono MFP User's Guide - Page 6
information, order status, warranty, and repair information • Downloads - Drivers • Reference - Printer documentation and product specifications You can access Dell Support at www.dell.com/support. Select your region on the WELCOME TO DELL SUPPORT page, and fill in the requested details to - Dell B2375dfw | Dell Mono MFP User's Guide - Page 7
Dell™ B2375dfw/ B2375dnf Mono MFP User's Guide 1 Contacting Dell 1 Finding Information 4 About 18 Unpacking Your Printer 19 About Your Printer 21 Front View 21 Rear View 22 Operator Panel Button Functions 23 Introducing the Screen 25 Home screen mode 25 All Applications screen - Dell B2375dfw | Dell Mono MFP User's Guide - Page 8
Favorite Menu 56 Email Setup (Administrator only 57 Setting up the Email 57 Menu Overview 58 Dell™ B2375dfw/ B2375dnf Mono MFP Menu Functions 59 Printing the Printer Setting and Op-panel Menu Setting 61 Printing the Printer Setting 61 Printing the Op-panel Menu setting 61 Access - Dell B2375dfw | Dell Mono MFP User's Guide - Page 9
Blank Pages (Administrator only 71 Ignoring the Toner Low Message (Only for Fax) (Administrator only) . 71 Setting the Language (Administrator only 71 Setting the Quick Dial (Administrator only 72 Setting the Media Overwrite (Administrator only 72 Changing Admin Password (Administrator - Dell B2375dfw | Dell Mono MFP User's Guide - Page 10
Utility 84 Using the Dell Printer Manager 85 Understanding Dell Printer Manager 85 Advanced settings user interface overview 87 Using Dell Printer Status 88 Dell Printer Status overview 88 Using Wireless Setup Utility 90 Uninstalling Software 91 Embedded Web Service 92 Embedded Web - Dell B2375dfw | Dell Mono MFP User's Guide - Page 11
Loading Print Media in the Paper Tray 144 Using the MPF (Multi purpose feeder 145 Setting the Paper Size 148 Setting the Paper Type 148 Setting the Paper Margin 148 Setting the Paper Tray 149 Setting the Tray linking 149 Substitute Tray 149 Setting the Default Tray 149 Setting the - Dell B2375dfw | Dell Mono MFP User's Guide - Page 12
Posters 170 Printing Booklets 172 Printing on Both Sides of Paper 173 Using Watermarks 175 Using an a Document 183 Loading an Original Document 184 Making Copies 187 Using Copy and Setting Options 187 Number of Copies 187 Duplex 188 Zoom 188 Darkness 188 Original Size - Dell B2375dfw | Dell Mono MFP User's Guide - Page 13
207 Scanning using the WIA driver 208 Networking 209 Network setup (Administrator only 210 Useful network programs 211 Dell Printer Configuration Web Tool 211 SetIP wired network setup 211 Printing a network configuration report 211 Printing Across a Network 212 Setting IP address - Dell B2375dfw | Dell Mono MFP User's Guide - Page 14
Turning the Wi-Fi network on/off (Dell B2375dfw Mono MFP only) 236 Setting the Wi-Fi Direct for mobile printing 237 Setting up Wi-Fi Direct 237 Setting up the mobile device 238 Troubleshooting for wireless network 239 Other problems 240 Mobile Printing 242 Android™ OS 242 Apple® iOS - Dell B2375dfw | Dell Mono MFP User's Guide - Page 15
Save Mode (Administrator only 261 Using the Secure Receiving Mode (Administrator only 262 Using Advanced Fax Settings 263 Mac 267 Installing Software for Mac 268 Install the printer driver 268 ReInstallation the printer driver 269 Installing driver over the network 269 Printing 270 - Dell B2375dfw | Dell Mono MFP User's Guide - Page 16
Changing Printer Settings 270 Printing Multiple Pages on One Sheet 270 Printing on Both Sides of the Paper 270 Scanning 272 Wireless network setup 272 Access point via USB cable in Mac 272 Ad hoc via USB cable in Mac 274 Linux 277 Getting Started 278 Installing the MFP Driver 278 - Dell B2375dfw | Dell Mono MFP User's Guide - Page 17
the Interior 298 Cleaning the scanner 300 Maintaining the Toner Cartridge 301 Storing the Toner Cartridge 301 Redistributing Toner 301 Replacing the Toner Cartridge 303 Cleaning the Drum 304 Replacement Parts 305 Ordering Supplies 306 Troubleshooting 307 Clearing Jams in the - Dell B2375dfw | Dell Mono MFP User's Guide - Page 18
Feeding Problems 325 Printing Problems 327 Printing Quality Problems 330 Fax Problems 335 Copying Problems 338 Scanning Problems 339 Global address problems 340 Common Windows Problems 341 Common Linux Problems 342 Common Mac Problems 345 Troubleshooting PostScript (PS) Errors - Dell B2375dfw | Dell Mono MFP User's Guide - Page 19
Printer Introducing the Screen Internal Fonts Setting up the hardware Installing the Toner Cartridge Loading Paper Making Connections Powering on the Printer Using USB memory device Managing the USB Memory Setting up Address Book Using Favorite Menu (Administrator only) Email Setup (Administrator - Dell B2375dfw | Dell Mono MFP User's Guide - Page 20
. • The machine is disconnected from a wireless network. Quick Reference Guidec Telephone line corda Drivers and Documentation CDb Dell™ B2375dfw / B2375dnf Mono MFP 1 Dell 2355dn MFP Quick Reference Guide Quick Reference Guide Quick Reference Guide Front 1 2 Front 3 Front 4 5 11 12 - Dell B2375dfw | Dell Mono MFP User's Guide - Page 21
CD contains Dell printer drivers, Scan drivers, Printer Settings Utility, Set IP, Mac driver, Linux driver, Dell Toner Management System and a User's Guide. c Quick Reference Guide may not be provided with your product depending on your country. NOTE: Use the telephone line cord supplied - Dell B2375dfw | Dell Mono MFP User's Guide - Page 22
are the main components of your printer. The following illustrations show the standard Dell B2375dfw Mono MFP or Dell B2375dnf Mono MFP and an optional tray 2 attached: Front View DADF (Duplex Automatic Document Feeder) document width document input tray guides operator panel (See "Operator Panel - Dell B2375dfw | Dell Mono MFP User's Guide - Page 23
Rear View extension telephone socket (EXT)a telephone line socket (Line) LINE EXT EDI port EDI Network port USB port 5V output port for IEEE 1284 parallel connectorab power switch power receptacle OUTPUT 5V rear door a If - Dell B2375dfw | Dell Mono MFP User's Guide - Page 24
can enter or exit Power Save mode 9 Speed Dial1( ) Fax image to destination from stored speed dial1. 10 Speed Dial2 ( ) Fax image to destination from stored speed dial2. 11 Wi-Fi/WPS ( ) Configures the wireless network connection easily (Dell B2375dfw without a computer. Mono MFP only) - 23 - Dell B2375dfw | Dell Mono MFP User's Guide - Page 25
is on-line and can be used. • A minor error has occurred and the machine is waiting for the error to be cleared. Check the display message. When the problem is cleared, the machine resumes. • The toner cartridge is low. Order a new toner cartridge. You can temporarily improve print quality by - Dell B2375dfw | Dell Mono MFP User's Guide - Page 26
allows user-friendly operation of the machine. Once you press the home button( ) on the panel, it shows the home screen. • Scan to Email: You can send a scanned image through your email account. see "Scan to Email" • Copy : You can use Copy function. see "Copying" • Fax: You can use Fax function - Dell B2375dfw | Dell Mono MFP User's Guide - Page 27
through WSD. see "Scan to WSD" • Scan to PC: You can save the scanned image onto a PC. see "Scan to PC/Network PC" • Scan to Network PC: You can save the scanned image onto a network PC. see "Scan to PC/Network PC" • Scan to FTP: You can save the scanned image onto a FTP. see "Setting up an Network - Dell B2375dfw | Dell Mono MFP User's Guide - Page 28
bar on top of the display screen. The following screen appear: If you want to close the Notification Bar, re-press the black bar. - Toner: Shows the amount of remaining toner capacity. - Screen Brightness: Adjusts brightness of the display screen. - Notifications: Shows machine status informations - Dell B2375dfw | Dell Mono MFP User's Guide - Page 29
the applications screen. • USB : You can connect to USB. • Scan to Fax Server: You can save the scanned image via a Fax Server. • Scan to Network Folder: You can save the scanned image onto a network folder. • Print from My Files: You can print from My Files. • Troubleshooting: Helpful information - Dell B2375dfw | Dell Mono MFP User's Guide - Page 30
the applicaions, select the applications. • Move Apps : You can move applicaions to other screen. Press the left/right arrows to move the application. Using Favorite You can set the application which is frequently used on the home screen. NOTE: You need to Log in to use this function. Press Favorite - Dell B2375dfw | Dell Mono MFP User's Guide - Page 31
the field with the pop up keyboard. • Press Category ( ) from the screen - Favorite App : Shows favorite applications. - Copy : Shows copy related applications. - Fax : Shows fax related applications. - Scan : Shows scan related applications. - USB : Shows USB related applications. 2 Press the home - Dell B2375dfw | Dell Mono MFP User's Guide - Page 32
1 Press My Settings Machine Setup User Profile Delete ( ) button from the home screen. 2 Press Yes from the screen. Change Password You can change your password only. If you want to delete other user, you need to Log in as an administrator. 1 Press My Settings Machine Setup User Profile Check - Dell B2375dfw | Dell Mono MFP User's Guide - Page 33
( ) to return to Home Screen. Internal Fonts The Dell B2375dfw Mono MFP or Dell B2375dnf Mono MFP Laser printer supports the PCL and PS fonts. If you want to see the PCL and PS font list, follow these steps: Printing the PCL Font list 1 Press My Settings Machine Setup screen. 2 Press the Start - Dell B2375dfw | Dell Mono MFP User's Guide - Page 34
the steps to set up the hardware direct sunlight or sources of heat, cold, and humidity. Do not set the machine close to the edge of your desk or table. 100 there is no incline greater than 2 mm (0.08 inch). Otherwise, printing quality may be affected. 2 Unpack the machine and check all the - Dell B2375dfw | Dell Mono MFP User's Guide - Page 35
upside down. Otherwise, the inside of the printer may be contaminated by toner, which can cause damage to the printer or result in bad printing quality. Installing the Toner Cartridge 1 Open the front cover. CAUTION: To prevent damage, do not expose the toner cartridge to light for more than a few - Dell B2375dfw | Dell Mono MFP User's Guide - Page 36
2 Remove and discard the packing foam. 3 Pull the toner cartridge straight out. 4 Remove the label and the protective film from the toner cartridge. - 35 - Dell B2375dfw | Dell Mono MFP User's Guide - Page 37
to distribute the toner evenly inside the cartridge. NOTE: If toner comes into contact with your clothing, wipe the toner off with a dry cloth and wash your clothing in cold water. Hot water sets toner into fabric. 6 Holding the toner cartridge by the handle, slide it into the printer until it locks - Dell B2375dfw | Dell Mono MFP User's Guide - Page 38
" and "Setting the Paper Size" for the paper used in copying and faxing, or "Paper Tab" for computer printing. Load the paper: 1 Pull the paper tray out of the printer. 2 If you load paper that is longer than a standard (Letter or A4) size, such as Legal paper, press and unlatch the guide lock, and - Dell B2375dfw | Dell Mono MFP User's Guide - Page 39
3 Slide in the paper length guide until it rests against the end of the paper stack. For paper smaller than Letter size, adjust the rear paper length guide so that it lightly touches the paper stack. 4 Pinch the paper width guide, and move it towards the stack of paper until it touches the side - Dell B2375dfw | Dell Mono MFP User's Guide - Page 40
. Align the edges on a level surface. 6 Insert the paper stack into the paper tray with the side to be printed on facing down. 7 Do not exceed the maximum stack height indicated by the paper limit marks on both the inside walls of the tray. NOTE: - Dell B2375dfw | Dell Mono MFP User's Guide - Page 41
8 Slide the paper tray back into the printer. 9 Set the paper type and size. For more information, see "Setting the Paper Type" and "Setting the Paper Size". - 40 - Dell B2375dfw | Dell Mono MFP User's Guide - Page 42
Connections Connecting the Telephone Line RJ11 telephone line socket (Line) To the wall jack 1 Plug one end of a telephone line cord into the RJ11 telephone line socket (FAX) and the other end into an active wall jack. To connect a telephone and/or answering machine to your printer, remove the plug - Dell B2375dfw | Dell Mono MFP User's Guide - Page 43
than the "Using an Answering machine" setting for the telephone answering device (TAD). If connecting a FAX using a computer modem: LINE EXT Telephone Answering Device NOTE: Set rings to answer to digit greater than the "Using an Answering machine" setting for the telephone answering device (TAD - Dell B2375dfw | Dell Mono MFP User's Guide - Page 44
NOTE: Phone adaptor not supplied for the United Kingdom. You are advised to buy from local suppliers. If the phone communication is serial in your country (such as Germany, Sweden, Denmark, Austria, Belgium, Italy, France, and Switzerland), connect the telephone or answering machine as shown in the - Dell B2375dfw | Dell Mono MFP User's Guide - Page 45
to a network instead of your computer, skip this step and go on to "Connecting the Printer to the Network". NOTE: USB cables are sold separately. Contact Dell to purchase a USB cable. NOTE: Connecting the printer to the USB port of the computer requires a certified USB cable. You will need to buy - Dell B2375dfw | Dell Mono MFP User's Guide - Page 46
to a LAN drop or hub, and the other end to the Ethernet network port on the back of the printer. The printer automatically adjusts for the network speed. NOTE: After connecting the printer, you need to configure the network parameters on the operator panel. See "Configuring Network Parameters on the - Dell B2375dfw | Dell Mono MFP User's Guide - Page 47
home screen appears on the display indicating that the printer is now on. NOTE: If you power on the printer for the first time, you have to set the language, date, time, country and fax setup sequence. These settings may be needed also after the firmware upgrade or after the printer is reset. - 46 - Dell B2375dfw | Dell Mono MFP User's Guide - Page 48
Select the country. See "Selecting Country (Administrator only)". 3 Set the date and time. See "Setting the Time and Date (Administrator only)". 4 When fax setup confirmation window appears, select or . If you selected , your printer restores the fax settings as default. If you selected Check - Dell B2375dfw | Dell Mono MFP User's Guide - Page 49
's misuse. CAUTION: If your USB memory device has certain features such as security settings and password settings, your machine may not automatically detect it. For details about these features, see the user's guide of the USB memory device. Direct USB 1 Insert the USB memory device into the USB - Dell B2375dfw | Dell Mono MFP User's Guide - Page 50
catons ) Scan to USB from the home screen. 4 If necessary, customize the scan settings including scan resolution, scan color, scan format, pdf encryption, duplex, original size and original type by using Setting( ) from the screen. 5 Press Start ( ) from the screen. Your printer begins scanning the - Dell B2375dfw | Dell Mono MFP User's Guide - Page 51
Color, Gray, Mono Format Duplex JPEG, BMP, TIFF, PDF, Separate PDF,Multi-Pag e TIFF, XPS, Multi-Page XPS Off, Short Edge, Long Edge 1 Press My Settings Machine Setup Default Setting Scan Default Scan to USB 2 Click Options to adjust the settings for each scan. • Original Type: Sets the original - Dell B2375dfw | Dell Mono MFP User's Guide - Page 52
a USB memory device. File is supported by Direct Print option. • PRN: Only files created by provided driver with your machine are compatible. NOTE: If you print PRN files created from other machine, the printout would be different. • TIFF • JPEG: JPEG Baseline • PDF: PDF 1.7 or lower version. - 51 - Dell B2375dfw | Dell Mono MFP User's Guide - Page 53
1 Insert the USB memory key into the USB memory port on your printer. NOTE: Insert the USB memory key as soon as the pop-up window appears. OR Press All Appli(c atons ) USB from the home screen. 2 Press Print From USB. 3 Press the up/down arrows to select the folder or file you want - Dell B2375dfw | Dell Mono MFP User's Guide - Page 54
you use frequently via Embedded Web Service and then easily and quickly enter email addresses by entering the location numbers assigned to them in Address Book. Storing Individual address 1 Press My Settings Address Book Address Book from the home screen. 2 Press Add ( ) icon. 3 Press New - Dell B2375dfw | Dell Mono MFP User's Guide - Page 55
2 seconds. NOTE: You can print the address book list by selecting Press My Settings Address Book Print Start ( ) from the home screen. or Press My Settings Machine Setup Reports Address Book Start ( ) from the home screen. Storing Group address 1 Press My Settings Address Book Address Book from - Dell B2375dfw | Dell Mono MFP User's Guide - Page 56
in not allowed. - Fax: This field is not mandatory. You can enter up to 40 byte using numbers (0-9) and special characters (#,*,-). - Email: This field is not mandatory. You can enter up to 128 byte in email address format (ex: [email protected]) 1 Access the Embedded Web Service. See "Embedded Web - Dell B2375dfw | Dell Mono MFP User's Guide - Page 57
My Settings Address Book Print from the home screen. 2 Press Start ( ) from the screen. The machine begins printing. Using Favorite Menu (Administrator only) You can set the option which is frequently used on home screen. Creating Favorite Menu 1 Press My Settings Machine Setup Email Setup from - Dell B2375dfw | Dell Mono MFP User's Guide - Page 58
such as Scan to Email and Fax Forward to email addresses, you first need to configure the SMTP server settings under network settings. See "Network setup (Administrator only)" for network parameters. Setting up the Email 1 Press My Settings Machine Setup Email Setup from the home screen. 2 Press - Dell B2375dfw | Dell Mono MFP User's Guide - Page 59
Menu Overview Dell™ B2375dfw/ B2375dnf Mono MFP Menu Functions Printing the Printer Setting and Op-panel Menu Setting Access Google Drive Scan to SharePoint Online My Files My Forms My Calendar Machine Setup - 58 - Dell B2375dfw | Dell Mono MFP User's Guide - Page 60
Dell™ B2375dfw/ B2375dnf Mono MFP Menu Functions The control panel provides access to various menus to set up the machine or use the machine's functions. These menus can be accessed by touching them on the display screen. NOTE: Some menus may not appear in the display depending on options or setup - Dell B2375dfw | Dell Mono MFP User's Guide - Page 61
My Forms My Calender My Settings USB Print from My files Troubleshooting Machine Setup Default Setting Paper Setup Tray Behavior Reports Fax Setup Email Setup Network Setup Security User Profile Initial Setup Quick Dial Setup Restore Options Factory Reset Job Management Stamp Application Management - Dell B2375dfw | Dell Mono MFP User's Guide - Page 62
helpful for the users to maneuver through the op-panel setting and tree in changing the defaults. Printing the Printer Setting 1 Press My Settings Machine Setup screen. 2 Press Start ( ) on screen. 3 The Printer Settings page prints out. Reports Printer Settings from the home Printing the Op - Dell B2375dfw | Dell Mono MFP User's Guide - Page 63
want. If necessary, customize the scan settings including Resolution, Color, Format, Original Size, Original Type, Duplex, PDF Encryption, File Name, File Conversion and Create Folder by pressing Setting( ) from the screen. 4 Press Start ( ) on the screen. Print from Google Drive 1 Press Access - Dell B2375dfw | Dell Mono MFP User's Guide - Page 64
Online from the home screen. OR Press All Appli(c atons ) Scan to SharePoint Online from the home screen. 2 Enter URL, User ID and Password. I f you want to log in automatically, check Remember me. Then click Yes when pop up shows up. Then you can using without Log in next time. If you want to - Dell B2375dfw | Dell Mono MFP User's Guide - Page 65
home screen. a Scan to My Files : Scans and save to My Files. b Print from My Files : Prints files in My Files. c File Manager : Creates folder, delete folder and files. d Folder Size : Shows hard disk information. NOTE: All files stored in My Files are not encrypted and can be accessed by all users - Dell B2375dfw | Dell Mono MFP User's Guide - Page 66
a Form from the home screen. 3 Select folder you want. • My Files : Scans to My Files. • Network Folder : Scans to Network Folder. • FTP : Scans to FTP. If necessary, customize the scan settings including Resolution, Color, Format, Original Size, Original Type, Duplex, PDF Encryption, File Name - Dell B2375dfw | Dell Mono MFP User's Guide - Page 67
, print settings including Number of Copies, Auto Fit, Duplex and Tray by pressing Setting( ) from the screen. - Add Bookmark ( ) : Add bookmark. - Save ( ) : Save Forms. - Preview ( ) : Preview a document (JPEG Only). 2 Select Type and input Path. - Type : Choosing protocol (support navigation - Dell B2375dfw | Dell Mono MFP User's Guide - Page 68
panel in My Calendar and re-Log in. 3 If necessary, customize the print settings including Number of Copies, Tray by pressing Options( ) from the screen. - Favorite ( ) button : Setting Favorites. See "Using Favorite Menu (Administrator only)" - Log out : Logs out from My Calendar. - Back icon - Dell B2375dfw | Dell Mono MFP User's Guide - Page 69
Administrator only) You can set the machine ID and fax number which will be printed at the top of each page. If you have installed the fax multi-line kit, you need to select a line first, follow these steps: 1 Press My Settings Machine Setup Initial Setup Machine ID & Fax Number from the home screen - Dell B2375dfw | Dell Mono MFP User's Guide - Page 70
Setting the Time and Date (Administrator only) The time and date are printed on all faxes. NOTE: It may be necessary to reset the correct time and date if loss of power to the printer occurs. To set the time and date: 1 Press My Settings Machine Setup Initial Setup Date & Time from the home screen - Dell B2375dfw | Dell Mono MFP User's Guide - Page 71
Home Screen. Setting the Timeout Option (Administrator only) You can set the time the printer waits before it restores the default copy or fax settings if you do not start copying or faxing after changing the settings on the operator panel. 1 Press My Settings Machine Setup Initial Setup Timeout - Dell B2375dfw | Dell Mono MFP User's Guide - Page 72
Setup Print Blank Pages from the home screen. 2 Press the left/right arrows to select On. 3 Press the home icon ( ) to return to Home Screen. Ignoring the Toner Low Message (Only for Fax) (Administrator only) When the toner cartridge has almost reached its estimated cartridge life, the printer - Dell B2375dfw | Dell Mono MFP User's Guide - Page 73
hard disk will be overwritten as many times as the number you select. 3 Press Start ( ) on the screen. If you select Yes, all jobs will be delete and system reboot immediately. Changing Admin Password (Administrator only) You can change admin passwod. 1 Press My Settings Machine Setup Initial - Dell B2375dfw | Dell Mono MFP User's Guide - Page 74
Accounting Only: Allows users to login by entering ID and password. 4 Press and home icon ( ) to return to Home Screen. Accounting You can set usage limits for each user to use each feature if Standard accounting method is chosen. 1 Press My Settings Machine Setup Security Accounting from the - Dell B2375dfw | Dell Mono MFP User's Guide - Page 75
Administrator only) You can choose the altitude of the place where your machine is located. The print quality is affected by atmospheric pressure, which is determined by the height of the machine above sea level. Therefore, it is important to set the right altitude. 1 Press My Settings Machine Setup - Dell B2375dfw | Dell Mono MFP User's Guide - Page 76
Press My Settings Machine Setup Initial Setup Firmware Version from the home screen. 2 You can check the firmware version used in the machine. Reports The following reports are available: Printer Settings Report This list shows the status of the user-selectable options. You may print this list to - Dell B2375dfw | Dell Mono MFP User's Guide - Page 77
about the emails that you have recently sent. Printing a Report 1 Press My Settings Machine Setup from the home screen. 2 Select Reports. 3 Select the reports you want and Press Start ( ) from the screen. • Printer Settings: Printer Settings list • Network Settings: Network Settings list - Dell B2375dfw | Dell Mono MFP User's Guide - Page 78
Click the Detail ( ) icon. Factory Reset (Administrator only) Clears all of the data stored in the memory and resets all of your settings to the factory default. 1 Press My Settings Machine Setup Factory Reset 2 Press Start ( ) on the screen. 3 After factory reset, machine will reboot automatically - Dell B2375dfw | Dell Mono MFP User's Guide - Page 79
Software Software Overview Installing Software in Microsoft® Windows® Operating System Accessing management tools Firmware Update Utility Using the Dell Supplies Ordering Utility Using the Dell Printer Manager Using Dell Printer Status Using Wireless Setup Utility Uninstalling Software - 78 - Dell B2375dfw | Dell Mono MFP User's Guide - Page 80
settings into one location. • Dell Printer Status- This program allows you to monitor the printer's status and alerts you when an error occurs during printing. • Scan Driver- TWAIN or Windows Image Acquisition (WIA) drivers are available for scanning documents on your printer. • User's Guide- PDF - Dell B2375dfw | Dell Mono MFP User's Guide - Page 81
". NOTE: Vista®, FWoirnMdoicwross7oaftnWd iWndinodwosw®sXSPe, rWveinrd®o2w0s0S8eRrv2e,rW® i2n0d0o3wSse8rvtehre® 2008, Windows system administrator should install Dell software. Supported Operating Systems • Windows XP Home edition or Professional • Windows Server 2003, Windows Server - Dell B2375dfw | Dell Mono MFP User's Guide - Page 82
Dell Software for Network Printing" or attached to a network instead of your computer,go on to A printer driver is a software that lets your computer communicate with your printer. The procedure to install drivers Apps and search for Run. Type in X:\Setup.exe, replacing "X" with the letter that - Dell B2375dfw | Dell Mono MFP User's Guide - Page 83
5 Select USB on the Select a Connection Method. 6 Enter the your printer name. Then click Next. 7 Follow the instructions in the installation window. - 82 - Dell B2375dfw | Dell Mono MFP User's Guide - Page 84
You can update your printer's firmware using the Firmware Update Utility. 1 From the Start menu, select Programs Dell Printers Dell B2375dfw Mono MFP or Dell B2375dnf Mono MFP Firmware Update Utility. 2 Download the latest firmware. Click www.dell.com/support 3 If your printer is connected with an - Dell B2375dfw | Dell Mono MFP User's Guide - Page 85
order replacement toner cartridges or supplies from Dell: NOTE: Availabe for Windows or Mac OS users only. 1 Double-click the Dell Supplies Ordering Utility icon on your desktop. OR From the Start menu, select Programs Dell Printers Dell B2375dfw Mono MFP or Dell B2375dnf Mono MFP Dell Supplies - Dell B2375dfw | Dell Mono MFP User's Guide - Page 86
the advanced user interface. Switching between the two interfaces is easy: just click a button. Understanding Dell Printer Manager To open the program: For Windows, Select Start Programs or All Programs Dell Printers Dell B2375dfw Mono MFP Dell Printer Manager. Dell B2375dnf Mono MFP or • For - Dell B2375dfw | Dell Mono MFP User's Guide - Page 87
discovery (Windows only). 2 Printer information This area gives you general information about your machine. You can check information, such as the machine's model name, IP address (or Port name), and machine status. NOTE: You can view the online User's Guide. 3 Application information Includes - Dell B2375dfw | Dell Mono MFP User's Guide - Page 88
this device. • Enable Fax Receiving from Device: Enables faxing on the device and allow more options to be set. Alert Settings (Windows only) This menu includes settings related to error alerting. • Printer Alert: Provides settings related to when alerts will be received. • Email Alert: Provides - Dell B2375dfw | Dell Mono MFP User's Guide - Page 89
OS users only Dell Printer Status overview If an error occurs while operating, you can check the error from the Dell Printer Status. Dell Printer Status is installed automatically when you install the machine software. You can also launch Dell Printer Status manually. Go to the Printing Preferences - Dell B2375dfw | Dell Mono MFP User's Guide - Page 90
depending on the machine in use. Some machines do not have this feature. 2 Option You can set printing job alert related settings. 3 Order Supplies You can order replacement toner cartridge(s) from online. 4 User's Guide You can view the online User's Guide. 5 Close Close the window. - 89 - Dell B2375dfw | Dell Mono MFP User's Guide - Page 91
Connect the USB cable to your machine. 2 Print the Network Configuration page of the printer to see the current network configuration. 3 From the Start menu, select Programs Dell Printers Dell B2375dfw Mono MFP Wireless Setup Utility. 4 Follow the instructions in the installation window. - 90 - Dell B2375dfw | Dell Mono MFP User's Guide - Page 92
, and then restart your computer after uninstalling the software. 1 From the Start menu, select Programs Dell Printers Dell B2375dnf Mono MFP or Dell B2375dfw Mono MFP Uninstall. 2 Select the software you want to remove. Click Next. The selected driver and all of its components are removed from your - Dell B2375dfw | Dell Mono MFP User's Guide - Page 93
Embedded Web Service Embedded Web Service What is Embedded Web Service Required web browser Logging into Embedded Web Service Embedded Web Service overview - 92 - Dell B2375dfw | Dell Mono MFP User's Guide - Page 94
and check its current status. • Change TCP/IP parameters and set up other network parameters. • Change the printer preference. • Set the email notifications advising of the machine's status. • Get support for using the machine. • Upgrade machine software. Required web browser You need one of the - Dell B2375dfw | Dell Mono MFP User's Guide - Page 95
as an administrator. You can still use Embedded Web Service without Logging in but you won't have access to Settings tab and Security tab. 1 Click Login on the upper right of the Embedded Web Service website. 2 Type in the ID and Password then click Login. • ID: admin • Password: admin Embedded Web - Dell B2375dfw | Dell Mono MFP User's Guide - Page 96
tray settings. - Printer : Shows printing related settings. - Copy : Shows copy related settings. - Fax : Shows fax related settings. - Scan to Email : Shows scan to email related settings. - Scan to Network Folder : Shows scan to network foler related settings. - Scan to FTP : Shows scan to - Dell B2375dfw | Dell Mono MFP User's Guide - Page 97
necessary server information. Click the Test button to test the server. 7 Click Apply. Deleting an individual address book entry NOTE: You need to Log in as an administrator to manage the address book. See "Logging into Embedded Web Service" 1 From the Embedded Web Service, select the Address Book - Dell B2375dfw | Dell Mono MFP User's Guide - Page 98
book as .csv file and save it on the computer. NOTE: You need to Log in as an administrator to manage the address book. See "Logging into Embedded Web Service" 1 From the Embedded Web Service, select the Address Book tab Individual. 2 Select Export from the Task drop down list. A pop-up window - Dell B2375dfw | Dell Mono MFP User's Guide - Page 99
• Time : When you set the time and date, it will be used for sending/printing delayed fax/print jobs or will be printed on reports Printer You can set copy related settings such as darkness or adjust the background. • General : You can set the basic settings for printing. • Graphic : You can set the - Dell B2375dfw | Dell Mono MFP User's Guide - Page 100
PDF : You can set PDF related settings. • XPS : You can set XPS related settings. • Font and Macro Download : You can download fonts and macro to the machine. Copy You can set copy related settings such as a darkness. • Change Default : You can set copy related default settings. Fax You can set fax - Dell B2375dfw | Dell Mono MFP User's Guide - Page 101
setting 1 From the Embedded Web Service, select the Settings tab Fax Send Foward. 2 Enter the necessary information. - General - Send Foward : Enable the send forward function. Machine Settings - Attachment Format : Select the file format for the fax attachment. - Fax Forward To Email - Default - Dell B2375dfw | Dell Mono MFP User's Guide - Page 102
the destination, you can manually enter the information by clicking the Direct Input. Also you can foward to PC and fax. 4 Click Apply. Deleting a fax forwarding setting 1 From the Embedded Web Service, select the Settings tab Fax Receive Fax Foward. 2 Select the setting you want to delete and - Dell B2375dfw | Dell Mono MFP User's Guide - Page 103
of the authenticated user if possible. - Send to Self : Select whether to enable auto send to self feature, which is sending a copy of email to oneself. -Print Confirmation Sheet : Select when to print the print confirmation sheet. - Change Default You can set scan to Email related settings such as - Dell B2375dfw | Dell Mono MFP User's Guide - Page 104
You can set the time value between 1-300 second(s). The time value should be 30 seconds or more for reliable operation over congested enterprise networks. - Scan to FTP : You can set the Print Confirmation Sheet.Select when to print the print confirmation sheet. - Change Default You can set scan to - Dell B2375dfw | Dell Mono MFP User's Guide - Page 105
Email & Fax You can settings for Scan to Email and Fax. - Change Default You can set scan to network folder related settings such as Email Settings-From:, Email Settings-Subject:, Resolution, Color, Format, Duplex, Original Size, Original Type, Darkness, Qualty. Email Notification When an error - Dell B2375dfw | Dell Mono MFP User's Guide - Page 106
automatically allocates a Link-Local IP address, which is the 169.254.0.0/16 set of addresses defined in RFC 3927. • Domain Name : Set the DNS server settings. - Host Name : Shows the host name. You can change the name in Settings tab Network Settings General Printer Name. - Domain Name: Enter - Dell B2375dfw | Dell Mono MFP User's Guide - Page 107
the network environment you are using changes. • Internet Printing Protocol (IPP) - IPP Protocol : Check to enable IPP. - Printer Name : Enter the printer name. - Network Path : Shows the printer URI. AirPrint You can set AirPrint related settings. • AirPrint : If you want to use AirPrint, check - Dell B2375dfw | Dell Mono MFP User's Guide - Page 108
. Default port is 23. - Login ID : Enter the ID when connecting to print with telnet. - Password : Enter the password when connecting to print with telnet. - Confirm Password : Enter the password again. WSD If you are using Windows Vista® or later as an operating system, you can set WSD (Web Service - Dell B2375dfw | Dell Mono MFP User's Guide - Page 109
set scan to My Files settings. • CIF Server : If you want to use CIF Server, Check to enable. - Max Connection : You can set the available number of connecting user. - Anonymous : If you want to use everyone, check the Allow everyone to connect. - Login ID : Enter the Log in ID. - Password : Enter - Dell B2375dfw | Dell Mono MFP User's Guide - Page 110
the Delete button above the list. c A confirmation window appears. Click on Yes. - Editing the SNMP Community a From the Embedded Web Service, select the Settings tab Network Settings SNMP SNMPv1/v2 Community Name. b Check the checkbox of the name) you want to edit from the list and click - Dell B2375dfw | Dell Mono MFP User's Guide - Page 111
c Change the necessary information. d Click Apply. SNMPv3 You can set SNMPv3 settings. • General - SNMPv3 Protocol : Check to enable SNMPv3 protocol. • Authentication - User Name : Check to enable SNMPv3 protocol. - Authentication Password : Enter the password you want to use for read-and-write - Dell B2375dfw | Dell Mono MFP User's Guide - Page 112
is set as a default value. • SMTP Login Information - SMTP Requires Authentication : Check if you went to set authentication when sending outgoing emails. - Login ID : Enter the Log in ID used for authentication. You can enter up to 64 characters. - Password : Enter the password for authentication - Dell B2375dfw | Dell Mono MFP User's Guide - Page 113
the user ID for proxy server authentication. - Password : Enter the password for proxy server authentication. Wireless (Dell B2375dfw Mono MFP only) You can set Wireless and WiFi settings. Wireless • General - Wireless : Check to enable wireless. • Wireless Settings - Easy Wireless Settings : You - Dell B2375dfw | Dell Mono MFP User's Guide - Page 114
filename On/Off. • Change Default - Scan to Google Drive : You can set Resolution, Color, Format, Duplex, Original Size, Original Type, Overwrite and Create Folder. - Print From Google Drive : You can set Number of Copies, Auto Fit, Duplex and Collation. • Auto Login User Lists You can check and - Dell B2375dfw | Dell Mono MFP User's Guide - Page 115
delete the auto Login lists. Scan to SharePoint Online • General - Send Confirmation Report : You can set your printer to print and scan confirmation report automatically. - File Prefix Name : You can set the file prefix name. - Allow user to enter filename : You can set to allow users to enter the - Dell B2375dfw | Dell Mono MFP User's Guide - Page 116
you want. 4 Click Apply. Searching an Bookmark entry NOTE: You need to Log in as an administrator to manage the bookmark. See "Logging into Embedded Web Service" 1 From the Embedded Web Service, select the Settings tab My Forms Bookmark. 2 Enter the key word for your search and from the drop down - Dell B2375dfw | Dell Mono MFP User's Guide - Page 117
in My Files are not encrypted and can be accessed by all users. • Change Default - Scan to My Files : You can set Resolution, Color, Format, Duplex, Original Size, Original Type and Overwrite. - Print from My Files : You can set Number of Copies, Auto Fit and Duplex. Security tab The security tab - Dell B2375dfw | Dell Mono MFP User's Guide - Page 118
Collapse All button. • To have safe communication between the Embedded Web Service and the machine, add a certificate beforehand and check Secure HTTP to Next. b Enter the certificate's Friendly Name, Private Password, and Confirm Password. c Select the CA signed certificate using the Browse - Dell B2375dfw | Dell Mono MFP User's Guide - Page 119
http://certification server's IP address/certsrv/. 2. the certificate from the download certificate. d Find and a certificate a From the Embedded Web Service, select the Security tab Network Security DigitalCertificate set scure connection. NOTE: To set a secure connection, Digital Certificate is required. - Dell B2375dfw | Dell Mono MFP User's Guide - Page 120
IPSec connection. Also you can check IPSec status. IP/MAC Filtering You can set filtering options for IP and MAC addresses. If the administrator does not add a filtering rule for IPv4, IPv6, and MAC addresses, nothing is filtered. If the administrator has added a filtering rule, filtering will be - Dell B2375dfw | Dell Mono MFP User's Guide - Page 121
the list of servers that were added by using the adding a server feature. 3 Click the Test button. SMB Server You can set SMB server settings. Adding a SMB server 1 From the Embedded Web Service, select the Security tab External Authentication Server SMB Server. 2 Click the Add button. A pop-up - Dell B2375dfw | Dell Mono MFP User's Guide - Page 122
Enter the backup server. - Port Number : Enter the backup port number from 1 to 65535. 445is set as a default value. 4 Click Apply. Deleting a SMB server 1 From the Embedded Web Service, select the Security tab Network Security External Authentication Server SMB Server. 2 From the SMB server list - Dell B2375dfw | Dell Mono MFP User's Guide - Page 123
65535. 389 is set as a default value. - Match User's Login ID to the following LDAP attribute : Select the attribute. • LDAP User Search - Search Click Apply. Deleting a LDAP server 1 From the Embedded Web Service, select the Security tab Network Security External Authentication Server LDAP Server. - Dell B2375dfw | Dell Mono MFP User's Guide - Page 124
You can restrict users from accessing the machine or application. You can also give specific permission for user to only use certain feature of the machine. For example, you can allow user A to only use print feature. In this case, user A will not be able to scan, copy or fax with the machine - Dell B2375dfw | Dell Mono MFP User's Guide - Page 125
options that are only available to administrators. Those options are marked with "a" or "(administrator only)" in this guide. - Device Authentication : Activate device authentication. Device authentication requests user to Log in before using the device. Users cannot use any application without Log - Dell B2375dfw | Dell Mono MFP User's Guide - Page 126
necessary information. NOTE: If you group a user in a group with ADMIN rights, the user will be able to use the same ADMIN rights. 4 Click Apply. Deleting a user profile 1 From the Embedded Web Service, select the Security tab User Access Control User Profile Individual . 2 Check the checkbox of - Dell B2375dfw | Dell Mono MFP User's Guide - Page 127
the password for confirmation. - Domain : Enter the domain name. Depending on the protocol you select, this field may not be available. - Path : Enter the path for saving the log backup file. - Manual backup : Backup immediately with the current settings. If you backup manually, the settings will - Dell B2375dfw | Dell Mono MFP User's Guide - Page 128
the log file(s) you want to delete and click the Delete button. 3 A confirmation message appears, click OK. Searching the log file 1 From the Embedded Web Service, select the Security tab System Log Log Viewer. 2 Enter the keyword in the field, and select the category from the drop-down list next to - Dell B2375dfw | Dell Mono MFP User's Guide - Page 129
firmware, managing applications, and setting contact information for sending emails. You can also connect to the Dell website or download manuals and drivers by selecting the Link menu. Firmware Upgrade You can check the firmware 1 From the Embedded Web Service, select the Maintenance tab - Dell B2375dfw | Dell Mono MFP User's Guide - Page 130
etc.) between devices that have the Cloning feature in Embedded Web Service. Contact Information Shows information of a system administrator. General Settings You can set Asset Tag. Weblink Options Shows links to useful sites where you can download or check information. You can also add useful sites - Dell B2375dfw | Dell Mono MFP User's Guide - Page 131
Paper Handling Print Media Guidelines Storing Print Media Identifying Print Media Sources and Specifications Selecting an Output Location Loading Print Media in the Paper Tray Using the MPF (Multi purpose feeder) Setting the Paper Size Setting the Paper Type Setting the Paper Margin Setting the - Dell B2375dfw | Dell Mono MFP User's Guide - Page 132
, transparencies, labels, and envelopes. Your printer provides high quality printing on a variety of print media. Selecting the appropriate print media for your printer helps you to avoid printing problems. This chapter provides information on how to help you make print media selections, how to care - Dell B2375dfw | Dell Mono MFP User's Guide - Page 133
feeding problems and better print quality. laser printers. Unacceptable Paper The following papers are not recommended for use with the printer printer • Preprinted papers that can be affected by the temperature in the printer fuser • Preprinted papers that require a registration (the precise print - Dell B2375dfw | Dell Mono MFP User's Guide - Page 134
of 180°C (356°F) without melting or releasing hazardous emissions. Use inks that are not affected by the resin in the toner or the silicone in the fuser. Inks that are oxidation-set or oil-based should meet these requirements; latex inks might not. If you are in doubt, contact your paper supplier - Dell B2375dfw | Dell Mono MFP User's Guide - Page 135
acceptable for laser printers. Page orientation is important when printing on a printer first Selecting Prepunched Paper Prepunched paper brands can differ in the number and placement of holes and in manufacturing techniques. Use the following guidelines to select and use prepunched paper: • Test - Dell B2375dfw | Dell Mono MFP User's Guide - Page 136
quantities. See "Using the MPF (Multi purpose feeder)" for instructions on loading an envelope. When printing on envelopes: • To achieve the best possible print quality, use only high-quality envelopes that are designed for use in laser printers. • For best performance, use envelopes made from 80 - Dell B2375dfw | Dell Mono MFP User's Guide - Page 137
are considering using, check with the envelope supplier. • Adjust the width guide to fit the width of the envelopes. • Load an envelope with the Using the MPF (Multi purpose feeder)" for instructions on loading an envelope. NOTE: You can improve the printing quality of envelopes by pulling down the - Dell B2375dfw | Dell Mono MFP User's Guide - Page 138
a time in the MPF. Try a sample of any label you are considering using with the printer before purchasing a large quantity: • Use full label sheets. Partial sheets may cause labels to peel off during printing, resulting in a jam. Partial sheets also contaminate your printer and your cartridge with - Dell B2375dfw | Dell Mono MFP User's Guide - Page 139
print media storage. These help avoid print media feeding problems and uneven print quality: • For best results, store print print media sizes that you can select from the paper size menu and supported weights. NOTE: If you use a print a Recommend the use of manual for special media such as - Dell B2375dfw | Dell Mono MFP User's Guide - Page 140
for envelope and thick paper. b Push the two blue pressure levers down for better printing quality of envelope, label, card, and thick paper. Print Media Sizes and Support Legend Dimensions Y- indicates Support Print Media Size A4 8.27 x 11.7 in. (210 x 297 mm) A5a 5.83 x 8.27 in. (148 - Dell B2375dfw | Dell Mono MFP User's Guide - Page 141
mm to 216 x 356 mm) a Ensure the A5 paper is NOT A4 paper that has been cut in half. Duplex printing - Print Media Supported Print Media (Paper) Types Paper Tray (tray 1 and optional tray 2) Plain, Thin, Recycled Y Thick, Bond, Card Stock , Archive Y Preprinted - Color - Transparency - Dell B2375dfw | Dell Mono MFP User's Guide - Page 142
and Weights Print Media Type Print Media Weight Tray 1 and Optional Tray 2 MPF Plain paper Xerographic or 60 to 70 g/m2 (16 to 19 lbs bond) 60 to 70 g/m2 (16 to 19 lbs bond) Transparency Laser printer - 138 to 146 g/m2 (36.81 to 38.91 lbs bond) Labels Paper , Dual-web paper ,Polyester - Dell B2375dfw | Dell Mono MFP User's Guide - Page 143
, ensure that the rear door is closed. To use the rear door, open it. NOTE: If paper coming out of the output tray has problems, such as excessive curl, try printing to the rear door. NOTE: To avoid paper jams, do not open or close the rear door while the printer is printing. - 142 - Dell B2375dfw | Dell Mono MFP User's Guide - Page 144
. Make sure that you do not touch the surface, and do not allow children near it. Printing to the Rear Door (Face up) Using the rear door, the paper comes out of the printer face up. Printing from the MPF to the rear door provides a straight paper path. Using the rear door might - Dell B2375dfw | Dell Mono MFP User's Guide - Page 145
The fuser area inside of the rear door of your printer becomes very hot when in use. Take care when you access this area. Loading Print Media an Optional Tray 2" for installing instructions. For faxing, you can use A4, letter or legal paper only. For copying or printing, you can use many different - Dell B2375dfw | Dell Mono MFP User's Guide - Page 146
. (index) cards and other custom-sized materials can be printed with this printer. The minimum size is 3.0 by 5.0 in. (76 print quality problems. NOTE: Flatten any curl on postcards, envelopes and labels before loading them into the MPF. To use the MPF: 1 Open the MPF and unfold the paper support - Dell B2375dfw | Dell Mono MFP User's Guide - Page 147
the design face up, top edge toward the printer. • Card stock: load them with the print side up and the short edge entering the printer first. • Pre printed paper: the printed side should be facing down with an uncurled edge toward the printer. 4 Squeeze the width guide and adjust it to the width of - Dell B2375dfw | Dell Mono MFP User's Guide - Page 148
and size for the MPF. See "Setting the Paper Type" for copying and faxing or "Paper Tab" for Computer printing. NOTE: The settings made from the printer driver override the settings on the operator panel. CAUTION: Ensure that the rear door opens when you print on transparencies. If not, they may - Dell B2375dfw | Dell Mono MFP User's Guide - Page 149
the paper size from the operator panel. This setting will apply to Fax and Copy modes. For Computer printing, you need to select the paper type in the application program you use. 1 Press My Settings Machine Setup Paper Setup from the main screen. 2 Press the paper tray you want to use. 3 Press - Dell B2375dfw | Dell Mono MFP User's Guide - Page 150
Size. 5 Press the home icon ( ) to return to Home Screen. Setting the Default Tray You can select the tray you want to use for printing job. 1 Press My Settings Machine Setup from the home screen. 2 Press the Tray Behavior. 3 Press the Default Source. 4 Press the left/right arrows to select the - Dell B2375dfw | Dell Mono MFP User's Guide - Page 151
paper feeding flow 1 Press My Settings Machine Setup from the home screen. 2 Press the Tray Behavior. 3 Press the Configure MPF. 4 Press the left/right arrows to select the paper tray you are using. • Tray Mode: When sending a print job from the computer, the printer uses paper in the tray which - Dell B2375dfw | Dell Mono MFP User's Guide - Page 152
Mode In this mode the MPF is treated as another paper tray. Instead of treating MPF as first preference paper source, printer pulls paper from the tray that matches the size and type. The first preference goes to the default source. NOTE: You can use this feature in print, copy, and fax job. - 151 - Dell B2375dfw | Dell Mono MFP User's Guide - Page 153
Printing Printing a Document Opening printing preferences Printing Multiple Pages on One Sheet of the Paper Change Percentage of Your Document Printing Posters Printing Booklets Printing on Both Sides of Paper Using Watermarks Using Overlays - 152 - Dell B2375dfw | Dell Mono MFP User's Guide - Page 154
4 Select the printer driver that you want to use from the Print window. 5 The basic print settings including the number of copies and print range are selected within the Print window. 6 To start the print job, click OK or Print in the Print window. Canceling a Print Job If the print job is waiting - Dell B2375dfw | Dell Mono MFP User's Guide - Page 155
appears in this user's guide may differ depending on the machine in use. • When you select an option in Printing Preferences, you setting or environment. 1 Open the document you want to print. 2 Select Print from the file menu. The Print window appears. 3 Select your machine from the Select Printer - Dell B2375dfw | Dell Mono MFP User's Guide - Page 156
by reversing the horizontal coordinates. This feature is available only when using the PostScript (PS) driver. Layout Options allows you to select advanced printing options. For details, see "Printing Multiple Pages on One Sheet of the Paper", "Printing Posters" and "Printing Booklets". - 155 - Dell B2375dfw | Dell Mono MFP User's Guide - Page 157
Property Description Double-Sided Double-Sided Printing allows you to print on both sides of paper. For Printing details, see "Printing on Both Sides of Paper". Paper Tab Use the following options to set the paper handling needs when you access the printer properties. Click the Paper tab to - Dell B2375dfw | Dell Mono MFP User's Guide - Page 158
storage so that you can prevent the other users from accessing it. To print the document, you must enter the password. After printing, the document is cleared from printer storage. • Store : Select this setting to save a document in the hard disk without printing. When you want to save your document - Dell B2375dfw | Dell Mono MFP User's Guide - Page 159
any private document box. If you set the password a specific file, you must enter the password to print or delete the file. Print At : Select this setting to set the time when the printer begins printing. You can use this setting only if you select Print Schedule. Copies Copies allows you to - Dell B2375dfw | Dell Mono MFP User's Guide - Page 160
the properties shown below. Property Quality Description You can select the printing resolution by choosing from Best or Normal. The higher the setting, the sharper the clarity of printed characters and graphics. Higher settings may increase the time it takes to print a document. - 159 - Dell B2375dfw | Dell Mono MFP User's Guide - Page 161
on the screen. When it is not checked, colored text is allowed to print in shades of gray. Advanced True Type Options determines what the driver tells the printer about how to image the text in your document. Select the appropriate setting according to the status of your document. • Download as - Dell B2375dfw | Dell Mono MFP User's Guide - Page 162
the printer, your printed output will appear very different from what it looks like on the screen. NOTE: If you click Reset, settings in the options returns to the default setting. This feature is available only when using the PostScript (PS) driver. Negative Effect: allows users to print a negative - Dell B2375dfw | Dell Mono MFP User's Guide - Page 163
Tab Property Watermark Overlay Description You can create a background image of text to print on each page of your document. See "Using Watermarks". This feature is available only when using the PCL driver. Overlays are often used to take the place of preprinted forms and letterhead - Dell B2375dfw | Dell Mono MFP User's Guide - Page 164
option allows you to specify not to print blank pages in the original data. • Manual Margin : This option allows you to specify binding margin. Binding margin adjusts binding position. This option is not available when you use the PS printer driver. Advanced (This feature is available only when - Dell B2375dfw | Dell Mono MFP User's Guide - Page 165
PassThrough may cause unexpected printout. • Send PostScript Error Handler : specifies whether a PostScript error handler message is sent. If you want the printer to print an error page when an error occurs in the print job, check this option. Security You can set the job encryption. - 164 - Dell B2375dfw | Dell Mono MFP User's Guide - Page 166
settings to share job accounting information with clients. • Accounting Type : You can select an accounting type specified by your system administrator. • Accounting : You can enable print authentication by user ID and password. • ID Only : You can enable print authentication by user ID only. - User - Dell B2375dfw | Dell Mono MFP User's Guide - Page 167
drop-down list. The machine is now set to print according to the setting you selected. To delete a saved setting, select it from the Favorite drop-down list and click Delete ( ). You can also restore the printer driver's default settings by selecting Printer Default from the list. - 166 - Dell B2375dfw | Dell Mono MFP User's Guide - Page 168
keyword, click the Dell tab in the Printing Preferences window, and enter a keyword in the input line of the Help option. Printing Multiple Pages on One You can print up to 16 pages on one sheet. 1 When you change the print settings from your software application, access the printer properties. 2 - Dell B2375dfw | Dell Mono MFP User's Guide - Page 169
42 Right, Then Down Down, Then Right Left, Then Down Down, Then Left Check Print Page Border to print a border around each page on the sheet. Print Page Border is enabled only if the Pages per Side setting is set to a number greater than one. 5 Click the Paper tab and select the paper source - Dell B2375dfw | Dell Mono MFP User's Guide - Page 170
Change Percentage of Your Document You can scale your print job on a page. 1 When you change the print settings from your software application, access the printer properties. 2 From the Paper tab. 3 Enter the scaling rate in the Percentage input box. You can also click the or button. 4 Select the - Dell B2375dfw | Dell Mono MFP User's Guide - Page 171
onto 4, 9, or 16 sheets of paper, for the purpose of pasting the sheets together to form one poster-size document. 1 When you change the print settings from your software application, access the printer properties. 2 From the Basic tab, select Poster Printing in the Type drop-down list. - 170 - Dell B2375dfw | Dell Mono MFP User's Guide - Page 172
make it easier to paste the sheets together. 0.1 inches 0.1 inches 5 Click the Paper tab and select the paper source, size, and type. 6 Click OK and print the document. You can complete the poster by reconstructing the results. - 171 - Dell B2375dfw | Dell Mono MFP User's Guide - Page 173
paper and arranges the pages so that the paper can be folded in half after printing to produce a booklet. 1 When you change the print settings from your software application, access the printer properties. 2 From the Basic tab, select Booklet Printing in the Type drop-down list. NOTE: The Booklet - Dell B2375dfw | Dell Mono MFP User's Guide - Page 174
paper jamming might result. NOTE: To use the double-sided printing, you can use only the following paper size: A4, Letter, Legal and Folio. 1 When you change the print settings from your software application, access the printer properties. 2 From the Basic tab, select the paper orientation. - 173 - Dell B2375dfw | Dell Mono MFP User's Guide - Page 175
3 From the Double-Sided Printing section, select the desired binding option. 4 Click the Paper tab and select the paper source, size and type. 5 Click OK and print the document. Your printer prints on both sides of the paper automatically. - 174 - Dell B2375dfw | Dell Mono MFP User's Guide - Page 176
. They can be modified or you can add new ones to the list. Using an Existing Watermark 1 When you change the print settings from your software application, access the printer properties. 2 Click the Advanced tab and select a watermark on the Watermark drop-down list. It appears in the preview image - Dell B2375dfw | Dell Mono MFP User's Guide - Page 177
message and options. 4 Click Update to save the changes. 5 Click OK. Deleting a Watermark 1 When you change the print settings from your software application, access the printer properties. 2 Click the Advanced tab and click Edit... in the Watermark section. The Edit Watermarks window appears - Dell B2375dfw | Dell Mono MFP User's Guide - Page 178
or images stored in the computer hard disk drive (HDD) as a special file format that can be printed on any document. Overlays are when printed as an overlay. If needed, save the file for later use. 2 When you change the print settings from your software application, access the printer properties - Dell B2375dfw | Dell Mono MFP User's Guide - Page 179
3 Click the Advanced tab and click Edit... in the Overlay section. 4 In the Edit Overlays window, click Create. - 178 - Dell B2375dfw | Dell Mono MFP User's Guide - Page 180
must be the same as the resolution of the document that will print with the overlay. 1 Create or open the document you want to print. 2 When you change the print settings from your software application, access the printer properties. 3 Click the Advanced tab. 4 Select the desired overlay from the - Dell B2375dfw | Dell Mono MFP User's Guide - Page 181
Printing. When this box is checked, a message window appears each time you submit a document for printing, asking you to confirm that you want to print printed with your document. 7 Click OK or Yes until the printing starts. The overlay is downloaded with your print job and printed on your document - Dell B2375dfw | Dell Mono MFP User's Guide - Page 182
Deleting a Page Overlay You can delete page overlays that are no longer used. 1 In the printer properties window, click the Advanced tab. 2 Click Edit... in the Overlay section. 3 Select the overlay you want to delete from the Overlay List box. 4 Click - Dell B2375dfw | Dell Mono MFP User's Guide - Page 183
Copying Loading Paper for Copying Selecting the Paper Tray Preparing a Document Loading an Original Document Making Copies Using Copy and Setting Options Changing the Default Settings - 182 - Dell B2375dfw | Dell Mono MFP User's Guide - Page 184
for Copying The instructions for loading print materials are the same whether you are printing, faxing, or copying. Home Screen. Preparing a Document You can use the document glass or the DADF (Duplex Automatic Document Feeder) to load an original document for copying, scanning and sending a fax. - Dell B2375dfw | Dell Mono MFP User's Guide - Page 185
any glue, ink or correction fluid paper at a time. Using the document glass, you can load one sheet at a time. NOTE: Ensure scan quality, especially for color or gray scale images, use the document glass instead of the DADF. NOTE: If you use duplex copy features, see "Changing the Default Settings - Dell B2375dfw | Dell Mono MFP User's Guide - Page 186
2 Adjust the document width guides to the correct document size. Ensure that the bottom of the document stack matches the paper size marked on the document input tray. For detailed - Dell B2375dfw | Dell Mono MFP User's Guide - Page 187
2 Place the document face down on the document glass and align it with the registration guide on the top left corner of the glass. For detailed guidelines for preparing an original document, see . NOTE: Leaving the cover open while copying may affect the copy quality and toner consumption. - 186 - Dell B2375dfw | Dell Mono MFP User's Guide - Page 188
, clean the document glass before use. See "Cleaning the scanner". 1 Load the document(s) face up with the top edge Setting Options". 3 Press Start ( ) on screen to begin copying. NOTE: You can cancel the copy job at any time. Press ( the copying will stop. ) on screen, and Using Copy and Setting - Dell B2375dfw | Dell Mono MFP User's Guide - Page 189
Duplex You can set the printer to print copies on both sides of paper. 1 Load the documents to be copied in the DADF. For details about loading a document, see "Loading an Original Document". 2 Press Copy from the home screen 3 Press the left/right arrows to select Duplex. 4 Select the binding - Dell B2375dfw | Dell Mono MFP User's Guide - Page 190
You can cancel the copy job at any time. Press ( the copying will stop. ) on screen, and Original Size You can set the size of a copied image, when you copy original documents from the documents glass or the DADF. 1 Press Copy from the home screen. 2 Press the left/right arrows to select Original - Dell B2375dfw | Dell Mono MFP User's Guide - Page 191
type. See "Using Copy and Setting Options". 6 Press to go to the upper menu. 7 Press Start ( ) on screen to begin copying. NOTE: You can cancel the copy job at any time. Press ( the copying will stop. ) on screen, and Booklet Copying The machine automatically prints on one or both sides of - Dell B2375dfw | Dell Mono MFP User's Guide - Page 192
the text will be upright in the booklet. 4 Press Start ( ) from the screen. NOTE: You can cancel the copy job at any time. Press ( the copying will stop. ) on screen, and ID Copying When you copy using this feature, the printer prints one side on the upper half of the paper and the other side - Dell B2375dfw | Dell Mono MFP User's Guide - Page 193
close the scanner lid. 7 Press Start ( ) from the screen. NOTE: You can cancel the copy job at any time. Press ( the copying will stop. ) on screen, and from the home screen. 3 Press the left/right arrows to select Layout Clone. 4 If necessary, customize the copy settings including number of - Dell B2375dfw | Dell Mono MFP User's Guide - Page 194
to select Layout Poster. 4 Press Start ( ) on screen to begin copying. NOTE: You can cancel the copy job at any time. Press ( the copying will stop. ) on screen, and Your original document is divided into 9 portions. Each portion is scanned and printed one by one in the following order: - 193 - Dell B2375dfw | Dell Mono MFP User's Guide - Page 195
30 mm (1.18 inches), start copying with the scanner lid open. This special copy mode can be Prints both facing pages of the book. • Left: Prints left page of the book. • Right: Prints right page of the book. 4 Press Start ( ) on screen to begin copying. NOTE: You can cancel the copy job at any time - Dell B2375dfw | Dell Mono MFP User's Guide - Page 196
can manage document using prints the date and time, page number or user ID on printouts. 1 Press Copy from the home screen. 2 Press the left/right arrows to select Stamp. OR Press My Settings Machine Setup Stamp. In case of this method, inactive in Copy menu and do not apply to fax pritouts. - 195 - Dell B2375dfw | Dell Mono MFP User's Guide - Page 197
options you want. • Item : Prints the time and date, IP address, page number, device information, comment, or user ID, to the copy output. • Opacity : You can select the transparent or opaque. • Position : Sets the position. Watermark The watermark option allows you to print text over an existing - Dell B2375dfw | Dell Mono MFP User's Guide - Page 198
most frequently used modes. When you copy a document, the default settings are used unless they are changed by using the operator panel. To create your own default settings: 1 Press My Settings Machine Setup Default Setting Common from the home screen. 2 Select the option you want. 3 Press the home - Dell B2375dfw | Dell Mono MFP User's Guide - Page 199
Scanning Scanning Overview Scan to Email Scan to PC/Network PC Scan to Network Folder/FTP Server Scan to Fax Server Scan to WSD Email & Fax Scanning from image editing program Scanning using the WIA driver - 198 - Dell B2375dfw | Dell Mono MFP User's Guide - Page 200
Mono MFP or Dell B2375dnf Mono MFP to convert pictures and text into editable images on your computer. After you install the software from the Drivers and Documentation CD, you can scanning images using Dell Scan Manager, which enables you to scan a document on your printer as a JPEG, TIFF or PDF - Dell B2375dfw | Dell Mono MFP User's Guide - Page 201
3 Press the left/right arrows to select Send Email. 4 Enter the recipient's email address using Direct Input or Address ( screen. ) from the 5 If necessary, customize the scan settings including scan resolution, scan color, scan format, pdf encryption, duplex, original size and original type by - Dell B2375dfw | Dell Mono MFP User's Guide - Page 202
mode → Scan to PC Settings. 4 The selected application window opens. Adjust the scan settings and scan. For details, please refer to the user's guide of the application. 5 Press Start ( ) from the screen. The printer begins scanning and then sends the scanned data to Dell Printer Manager. NOTE - Dell B2375dfw | Dell Mono MFP User's Guide - Page 203
NOTE: You can use Twain driver to scan quickly in Dell Scan Manager program. Scan to Network Folder/FTP Server Setting up an Network Folder/FTP server 1 Access the Dell Printer Configuration Web Tool. See "Embedded Web Service" 2 Select Address Book Individual Add. 3 Check the box next to Add - Dell B2375dfw | Dell Mono MFP User's Guide - Page 204
details about loading a document, see "Loading an Original Document". 3 Press All Appli(catons screen. ) Scan to FTP or Scan to Network Folder from the home 4 Select a server and scan format you want. 5 The machine begins scanning and then sends the scanned image to the specified server. - 203 - Dell B2375dfw | Dell Mono MFP User's Guide - Page 205
recipient. First, the printer sends the scanned data to the fax server. Then, the fax server uses PSTN to send a fax/Email data to recipient. To use fax server features as scan to Email, you first need to configure the network settings. See "Embedded Web Service" for network parameters. 1 Make - Dell B2375dfw | Dell Mono MFP User's Guide - Page 206
is displayed in the list, click The printer that I want isn't listed Add a printer using a TCP/IP address or hostname and select Web Services Device from Device type. Then enter the printer's IP address. 4 Follow the instructions in the installation window. Scanning using the WSD feature 1 Make sure - Dell B2375dfw | Dell Mono MFP User's Guide - Page 207
the screen. 4 If necessary, customize the scan settings including scan resolution, scan color, scan format, pdf encryption, duplex, original size ,original type and etc by using Setting( ) from the screen. 5 Press Start ( ) from the screen. The printer begins scanning and then sends Email and fax - Dell B2375dfw | Dell Mono MFP User's Guide - Page 208
scan and import documents in the image editing software such as Adobe Photoshop, if the software is TWAIN-compliant. Follow the steps below to scan with TWAIN-compliant software . 4 Click File Import, and select the scanner device. 5 Set the scan options. 6 Scan and save your scanned image. - 207 - Dell B2375dfw | Dell Mono MFP User's Guide - Page 209
scanners. Unlike the TWAIN driver, the WIA driver allows you to scan and easily adjust images without using additional software: NOTE: The WIA driver works and Printers. 4 Right-click on device icon in Printers and Faxes Start Scan. 5 New Scan application appears. 6 Choose your scanning preferences - Dell B2375dfw | Dell Mono MFP User's Guide - Page 210
Networking Network setup (Administrator only) Useful network programs Setting IP address Installing driver over the network IPv6 configuration Wireless network setup (Dell B2375dfw only) Using the WPS button (Dell B2375dfw Mono MFP only) Setup using Windows (Dell B2375dfw Mono MFP only) Turning the - Dell B2375dfw | Dell Mono MFP User's Guide - Page 211
Network setup (Administrator only) NOTE: You can also use this feature from the Dell Printer Configuration Web Tool. Open the Web browser from your networked computer and type the IP address of your machine. When Dell Printer Configuration Web Tool opens, click Settings Network Settings. • Press - Dell B2375dfw | Dell Mono MFP User's Guide - Page 212
are several programs available to setup the network settings easily in a network environment. For the network administrator especially, managing several machines on the network is possible. NOTE: Before using the programs below, set the IP address first. Dell Printer Configuration Web Tool The web - Dell B2375dfw | Dell Mono MFP User's Guide - Page 213
your product Support or Downloads). 2 Follow the instructions in the installation window. 3 Connect your machine to the network with a network cable. 4 Turn on the machine. 5 From the Windows Start menu, select All Programs Dell Printers Dell B2375dfw Mono MFP or Dell B2375dnf Mono MFP SetIP - Dell B2375dfw | Dell Mono MFP User's Guide - Page 214
• DNS, WINS, Bonjour, SLP, UPnP • Standard TCP/IP Printing (RAW), LPR, IPP, WSD, AirPrint, Google Cloud Print • SNMPv 1/2/3, HTTP, IPSec • TCP/IPv6 (DHCP, DNS, RAW, LPR, SNMPv 1/2/3, HTTP, IPSec) Wireless security (Dell B2375dfw Mono MFP only) • Authentication: Open System, Shared Key • Encryption - Dell B2375dfw | Dell Mono MFP User's Guide - Page 215
3 Select Setup... in New Printer area. 4 Select Ethernet. - 214 - Dell B2375dfw | Dell Mono MFP User's Guide - Page 216
system, refer to its on-line guide. 7 Follow the instructions in the installation window. From the Windows 8 Start Screen • Dell Printer Experience app can only be used in the Start screen when V4 driver is installed. The V4 driver is automatically downloaded from the Windows Update if your - Dell B2375dfw | Dell Mono MFP User's Guide - Page 217
• If you install the driver using the supplied software CD, V4 driver is not installed. If you want to use the V4 driver in the Desktop screen, you can download from the Dell website, www.dell.com find your product Support or downloads. • If you want to install Dell's printer management tools, you - Dell B2375dfw | Dell Mono MFP User's Guide - Page 218
My Settings Machine Setup Network Setup TCP/IP (IPv6) 3 Press the left/right arrows to select Select On and press . 4 Turn the machine off and turn it on again. 5 Reinstall your printer driver. Setting IPv6 addresses The machine supports the following IPv6 addresses for network printing and - Dell B2375dfw | Dell Mono MFP User's Guide - Page 219
Wireless network setup (Dell B2375dfw only) NOTE: Make sure your machine supports wireless networking. Wireless networking may not be available depending on the model. (Dell B2375dfw Mono MFP only) Getting started Understanding your network type Typically, you can only have one connection between - Dell B2375dfw | Dell Mono MFP User's Guide - Page 220
B2375dfw Mono MFP only)". • Windows user, See "Access point via USB cable in Windows". • Mac user, See "Access point via USB cable in Mac". • Windows user, See "Ad hoc via USB cable in Windows". • Mac user, See "Ad hoc via USB cable in Mac". NOTE: If problems occur during wireless set up or driver - Dell B2375dfw | Dell Mono MFP User's Guide - Page 221
Using the WPS button (Dell B2375dfw Mono MFP only) If your machine and an access point (or wireless router) support Wi-Fi Protected Setup™ (WPS), you can easily configure the wireless network settings by pressing the (WPS) button on the control panel without a computer. • If you want to use the - Dell B2375dfw | Dell Mono MFP User's Guide - Page 222
S) button (on the control panel) Connect via PBC (from the home screen). OR Press My Settings Machine Setup Network Setup Wi-Fi WPS Connect via PBC from the home screen. 2 Press the WPS (PBC) button on the access point (or wireless router). a The light blinks fast on the WPS LED. The machine is - Dell B2375dfw | Dell Mono MFP User's Guide - Page 223
completing the wireless network connection, you need to install a machine driver to print from an application. See "Installing driver over the network". 1 Press My Settings Machine Setup Network Setup Wi-Fi Wi-Fi Activate On and select Wi-Fi Settings from the home screen . 2 select the setup method - Dell B2375dfw | Dell Mono MFP User's Guide - Page 224
Setup using Windows (Dell B2375dfw Mono MFP only) Dell Printer Easy Wi-Fi Install Before Using Dell Printer Easy Wi-Fi Install, please ensure that OS of your computer should be Windows 7 and above. • Items to prepare - Access point - Network-connected computer - Software CD that was provided with - Dell B2375dfw | Dell Mono MFP User's Guide - Page 225
4 Click New Printer . 5 Choose Wireless. - 224 - Dell B2375dfw | Dell Mono MFP User's Guide - Page 226
6 The software searches for printers. 7 Set your printer name and click Next. - 225 - Dell B2375dfw | Dell Mono MFP User's Guide - Page 227
8 Setup installing printer software. 9 After the installation is finished, a window asking you to print a test page appears. If you want to print a test page, click Print a test page. Otherwise, just click Next and go to step 10. 10 Click Finish. - 226 - Dell B2375dfw | Dell Mono MFP User's Guide - Page 228
Network-connected computer - Software CD that was provided with your machine - The machine installed with a wireless network interface - USB cable appear, from Charms, select Search Apps and search for Run. Type in X:\Setup.exe, replacing "X" with the letter that represents your CD/DVD drive and - Dell B2375dfw | Dell Mono MFP User's Guide - Page 229
4 Select New Printer . 5 Choose Wireless. - 228 - Dell B2375dfw | Dell Mono MFP User's Guide - Page 230
the instructions on the window. 8 After searching, the window shows the wireless network devices. Select the name (SSID) of the access point you are using and click Next. NOTE: If you cannot find the network name you want to choose, or if you want to set the wireless configuration manually, click - Dell B2375dfw | Dell Mono MFP User's Guide - Page 231
you must know the computer's network configuration information. If the computer is set to DHCP, you must contact the network administrator to get the static IP address. For example: If the computer's network information is as shown below: - IP address: 169.254.133.42 - Subnet Mask: 255.255.0.0 Then - Dell B2375dfw | Dell Mono MFP User's Guide - Page 232
The Wireless Network Setting Complete window appears. To print from a Wi-Fi Direct supported mobile device, set the Wi-Fi Direct Option. NOTE: Wi-Fi Direct Option: - Wi-Fi Direct option appears on the screen only if your printer supports this feature. - Can start to build Wi-Fi Direct by using Dell - Dell B2375dfw | Dell Mono MFP User's Guide - Page 233
do not have an access point (AP), you may still connect the machine wirelessly to your computer by setting up an ad-hoc wireless network by following the simple steps below. • Items to prepare - Network-connected computer - Software CD that was provided with your machine - The machine installed with - Dell B2375dfw | Dell Mono MFP User's Guide - Page 234
the instruction in the window. 7 After searching the wireless networks, a list of wireless networks your machine has searched appears. If you want to use the Dell default ad hoc setting, select the last wireless network on the list, Network Name(SSID) is Dell_device and Dell_Signal is Printer - Dell B2375dfw | Dell Mono MFP User's Guide - Page 235
, if the computer's network configuration is set to Static, the wireless network setting should also be Static. If your computer is set to DHCP and you want to use the Static wireless network setting, you must contact the network administrator to get the static IP address. - For the DHCP method: If - Dell B2375dfw | Dell Mono MFP User's Guide - Page 236
machine driver to print from an application. See "Wireless network setup (Dell B2375dfw only)". See your network administrator, or the person that set up your wireless network, for information about your network configuration. • Items to prepare - Access point - Network-connected computer - Software - Dell B2375dfw | Dell Mono MFP User's Guide - Page 237
-Fi network on/off (Dell B2375dfw Mono MFP only) There are two methods available to disconnect the wireless network on your machine. a Press (WPS) button (on the control panel) less than 2 seconds Wi-Fi (from the home screen) Off . b Press My Settings Machine Setup Network Setup Wi-Fi Wi-Fi Activate - Dell B2375dfw | Dell Mono MFP User's Guide - Page 238
users only. - Click Start Programs or All Programs Dell Printers Dell Printer Manager Device Settings Network. • Wi-Fi Direct On/Off: Select On to enable. • Device Name: Enter the printer's name for searching for your printer on a wireless network. By default, the device name is the model name. • IP - Dell B2375dfw | Dell Mono MFP User's Guide - Page 239
its Wi-Fi Direct. • After setting up Wi-Fi Direct, you need to download the mobile printing application (For example: Dell Mobile printer) to print from your smartphone. NOTE: If your mobile device does not support WPS, you need to enter the "Network Password" of a printer instead of pushing the WPS - Dell B2375dfw | Dell Mono MFP User's Guide - Page 240
Troubleshooting for wireless network Problems during setup or driver installation Connecting Failure - Verify Wireless Network Name • The machine Veriy IP Address • Your machine is not receiving a IP from AP. Check the configured security on your access point and machine. Verify Network Settings • - Dell B2375dfw | Dell Mono MFP User's Guide - Page 241
• Check whether the access point (or wireless router) has a configured security (password). If it has a password, refer to the access point (or wireless router) administrator. • Check the machine's IP address. Reinstall the machine driver and change the settings to connect to the machine on the - Dell B2375dfw | Dell Mono MFP User's Guide - Page 242
ad hoc mode, in operating systems such as Windows Vista, you might need to set the wireless connection setting every time you use the wireless machine. • You cannot use infrastructure mode and ad hoc mode at the same time for Dell wireless network machines. • The machine is within the range of the - Dell B2375dfw | Dell Mono MFP User's Guide - Page 243
Dell B2375dnf Mono MFP support printing from a variety of mobile devices. Android™ OS • Download the Dell Mobile Print app for free from Google Play™. Easy to use and navigate, the Dell Mobile Print app enables direct printing of photos, documents, web content and more, to supported Dell Printers - Dell B2375dfw | Dell Mono MFP User's Guide - Page 244
to change the default password for security reasons. • ID: admin • Password: admin 5 When the Embedded Web Service window opens, click Settings Network Settings. 6 Click AirPrint. You can enable AirPrint. Printing via AirPrint For example, the iPad manual provides these instructions: 1 Open your - Dell B2375dfw | Dell Mono MFP User's Guide - Page 245
the Google Cloud Print™ service. You can print your document or email with Chrome OS, Chrome browser, or a Gmail™/ Google Docs™ application on your mobile device, so you don't need to install the printer driver on the mobile device. Refer to the Google website (http://support.google.com/cloudprint - Dell B2375dfw | Dell Mono MFP User's Guide - Page 246
device you are using. You can see the application list that supports Google Cloud Print™ service. NOTE: Make sure the printer is turned on and connected to a wired or wireless network that has access to the Internet. Printing from an application on mobile device The following steps are an example - Dell B2375dfw | Dell Mono MFP User's Guide - Page 247
Faxing Setting the Printer ID Setting up the Fax System Sending a Fax Receiving a Fax Automatic Dialing Other Ways to Fax Additional Features - 246 - Dell B2375dfw | Dell Mono MFP User's Guide - Page 248
from your printer. 1 Press My Settings Machine Setup Initial Setup Machine ID & Fax Number from the home screen. 2 Enter the Fax and ID field using the pop-up keyboard. Setting up the Fax System Changing the Fax Setup Options 1 Press My Settings Machine Setup Default Setting Fax Default from the - Dell B2375dfw | Dell Mono MFP User's Guide - Page 249
Testing Fax line connection 1 Press My Settings Maintenance Fax Line Test from the home screen. 2 Press Check( ) from the screen. The printer display the test result. If the fax line connection test has failed, check the telephone line cord connection or contact your telephone service - Dell B2375dfw | Dell Mono MFP User's Guide - Page 250
containing small characters or thin lines or documents printed using a dot-matrix printer. Documents containing extremely fine detail. The super fine mode is enabled only if the remote printer also supports the Super Fine resolution. See the notes below. NOTE: Faxes scanned in Super Fine quality - Dell B2375dfw | Dell Mono MFP User's Guide - Page 251
Yes. Repeat as necessary. After all of the pages are scanned, select No when the display shows Another Page? 8 it dials the number then sends the fax when the printer establishes contact with the receiving machine. NOTE: Press to cancel the fax job at any time while sending the fax. - 250 - Dell B2375dfw | Dell Mono MFP User's Guide - Page 252
additional pages, remove the scanned page and load the next page from the glass and select Yes. Repeat as necessary. After all of the pages are scanned, select No when the display shows Another Page? 6 it dials the number then sends the fax when the printer establishes contact with the receiving - Dell B2375dfw | Dell Mono MFP User's Guide - Page 253
additional pages, remove the scanned page and load the next page from the glass and select Yes. Repeat as necessary. After all of the pages are scanned, select No when the display shows Another Page? it dials the number then sends the fax when the printer establishes contact with the receiving - Dell B2375dfw | Dell Mono MFP User's Guide - Page 254
". If you receive an error message, press to clear the message and try to send the document again. You can set your printer to print a confirmation report automatically after each fax transmission. For further details, see the MSG Confirm item in "Available Fax Defaults Options". - 253 - Dell B2375dfw | Dell Mono MFP User's Guide - Page 255
is no answer when you send a fax, the machine automatically redials the number. The redial time depends on the country's factory default setting. To change the time interval between redials and the number of redial attempts, see "Available Fax Defaults Options". Redialing fax number When you want to - Dell B2375dfw | Dell Mono MFP User's Guide - Page 256
the factory. When you receive a fax, the printer answers the call on a specified number of rings and automatically receives the fax. To change the number of rings, see "Available Fax Defaults Options". If you want to adjust the ringer volume, see "Setting the Sound/Volume (Administrator only - Dell B2375dfw | Dell Mono MFP User's Guide - Page 257
number from another line. To set up the DRPD mode: 1 Press My Settings Machine Setup Fax Setup DRPD Mode from the home screen. 2 Press Next( ) from the screen. 3 Call your fax number from another telephone. It is not necessary to place the call from a fax machine. 4 When your printer begins to ring - Dell B2375dfw | Dell Mono MFP User's Guide - Page 258
consumables, the printer automatically prints the fax. Automatic Dialing Speed Dialing You can store up to 400 frequently dialed numbers in one, two or three-digit speed dial locations (1-400). Storing a Number for Speed Dialing 1 Press My Settings Address Book from the home screen. 2 Press Add - Dell B2375dfw | Dell Mono MFP User's Guide - Page 259
select Yes. Repeat as necessary. After all of the pages are scanned, select No when the display shows Another Page? 8 it dials the number then sends the fax when the printer establishes contact with the receiving machine. NOTE: Press to cancel the fax job at any time while sending the fax. - 258 - Dell B2375dfw | Dell Mono MFP User's Guide - Page 260
to all the destinations in the group. NOTE: You cannot include one group dial number within another group dial number. Setting Group 1 Press My Settings Address Book from the home screen. 2 Press Add ( ) icon. 3 Press New Group . 4 Enter the group name then press the Add ( ) icon from the - Dell B2375dfw | Dell Mono MFP User's Guide - Page 261
be installed when you installed the printer driver. 1 Open the document to be sent. 2 Select Print from the File menu. The Print window will be displayed. It may look slightly different depending on your application. 3 Select Dell Network PC Fax from the Print window 4 Click Print or OK. 5 Enter the - Dell B2375dfw | Dell Mono MFP User's Guide - Page 262
Mode (Administrator only) The Toll Save mode can be used to save scanned documents for transmission at a specified time in order to take advantage of lower long distance rates. To turn the Toll Save mode on: 1 Press My Settings Machine Setup Fax Setup Toll Save from the home screen. 2 Press - Dell B2375dfw | Dell Mono MFP User's Guide - Page 263
secure receiving mode off: 1 Press My Settings Machine Setup Fax Setup home screen. 2 Select Off in the Configuration. 3 Enter the four-digit passcode and press OK. Secure Receive from the The mode is deactivated and the printer prints all of the faxes which have been stored in memory. 4 Press - Dell B2375dfw | Dell Mono MFP User's Guide - Page 264
can foward to Fax(1), Email(20), SMB(20), PC(1). Number in the "()" is available to regist numers. Toll Save You can set your printer to store your faxes in memory and to send them at the specified toll-saving time. For details about sending toll save faxes, see "Toll Save Mode (Administrator only - Dell B2375dfw | Dell Mono MFP User's Guide - Page 265
the printer to automatically print the page number, and the date and time of the reception at the bottom of each page of a received document. Select Off to turn this feature off. Select On to turn this feature on. The Error Correction Mode helps with poor line quality and ensures that faxes are - Dell B2375dfw | Dell Mono MFP User's Guide - Page 266
are gathered for users to set fax settings easily. Using an Answering machine Line Telephone Answering Device LINE EXT Line Phone Dell B2375dfw Mono MFP Dell B2375dnf Mono MFP Figure 1 You can connect a telephone answering device (TAD) directly to the back of your printer as shown in - Dell B2375dfw | Dell Mono MFP User's Guide - Page 267
LINE EXT Computer Dell B2375dfw Mono MFP / Dell B2375dnf Mono MFP Figure 2 If you want to use your computer modem for faxing or for a dial-up internet connection, connect the computer modem directly to the back of your printer with the TAD as shown here in Figure 2. • Set your printer to Ans/Fax - Dell B2375dfw | Dell Mono MFP User's Guide - Page 268
Mac Installing Software for Mac Printing Scanning Wireless network setup - 267 - Dell B2375dfw | Dell Mono MFP User's Guide - Page 269
the PPD file that allows you to use the PostScript driver, for printing on a Mac computer. Verify the following before you install the printer software: Operating System Requirements CPU Mac OS X 10.5 • 867MHz or faster Power PC G4/G5 • Intel processors Mac OS X 10.6 • Intel processors Mac - Dell B2375dfw | Dell Mono MFP User's Guide - Page 270
printer software, click Continue. 3 Check the program you want to delete and click Uninstall. 4 Enter the password and click OK. 5 After the uninstallation is finished, click Close. NOTE: If a machine has already been added, delete it from the Print Setup Utility or Print & Fax. Installing - Dell B2375dfw | Dell Mono MFP User's Guide - Page 271
with a Mac, you need to check the printer software setting in each application you use. Follow these steps to print from a Mac. 1 Open the document to print. 2 Open the File menu and click Page Setup (Document Setup in some applications). 3 Choose your paper size, orientation, scaling, and other - Dell B2375dfw | Dell Mono MFP User's Guide - Page 272
3 Select a binding orientation from Two Sided option. 4 Select the other options to use. 5 Click Print and the printer prints on both sides of the paper. Using help Click the question mark on the bottom-left corner of the window and click on the topic - Dell B2375dfw | Dell Mono MFP User's Guide - Page 273
the option you want. 5 Scan and save your scanned image. NOTE: If scanning does not operate in Image Capture, update Mac OS to the latest version. Wireless network setup Access point via USB cable in Mac Items to prepare - Access point - Network-connected computer - Software CD that was provided - Dell B2375dfw | Dell Mono MFP User's Guide - Page 274
See "Using the Dell Printer Manager" - Network Name(SSID): The default Network Name is the model name and the maximum length is 22 characters (not including "Direct-xx-"). - Network Password is the numeric string, and the size is 8 ~ 64 characters. 13 When the wireless network settings are completed - Dell B2375dfw | Dell Mono MFP User's Guide - Page 275
, you need to install a machine driver to print from an application. See "Installing Software for Mac" Ad hoc via USB cable in Mac If you do not have an access point (AP), you may still connect the machine wirelessly to your computer by setting up an ad hoc wireless network by following these simple - Dell B2375dfw | Dell Mono MFP User's Guide - Page 276
, if the computer's network configuration is set to Static, the wireless network setting should also be Static. If your computer is set to DHCP and you want to use Static wireless network setting, you must contact the network administrator to get the static IP address. • For the DHCP method If - Dell B2375dfw | Dell Mono MFP User's Guide - Page 277
connects according to the network configuration. 15 Wireless network set up is completed. After installation is finished, click Quit. NOTE: After completing the wireless network connection, you need to install a machine driver to print from an application. See "Install the printer driver" - 276 - Dell B2375dfw | Dell Mono MFP User's Guide - Page 278
Linux Getting Started Installing the MFP Driver Installing driver over the network Printing a Document Printing Files Scanning a Document - 277 - Dell B2375dfw | Dell Mono MFP User's Guide - Page 279
Getting Started The supplied Drivers and Documentation CD provides you with Dell's MFP driver package for using your printer with a Linux computer. Dell's MFP driver package contains printer and scanner drivers, providing the ability to print documents and scan images. The package also delivers - Dell B2375dfw | Dell Mono MFP User's Guide - Page 280
Login field and enter the system password. You must log in as a super user (root) to uninstall the printer driver. If you are not a super user, ask your system administrator. 3 Open the Terminal program. When the Terminal screen appears, type in the following. • [root@localhost root]#cd /opt/DELL - Dell B2375dfw | Dell Mono MFP User's Guide - Page 281
to install the printer software (http://www.dell.com find your product Support or Downloads). Install the Linux driver and add network printer 1 Make sure that the machine is connected to your network and powered on. Also, your machine's IP address should have been set. 2 Download the Unified Linux - Dell B2375dfw | Dell Mono MFP User's Guide - Page 282
also click the Startup Menu icon and select DELL Unified Driver and then DELL Unified Driver Configurator. 2 Click each button on the left to switch to the corresponding configuration window. Printers Configuration button Scanners Configuration button MFP Ports Configuration button You can use the - Dell B2375dfw | Dell Mono MFP User's Guide - Page 283
• Refresh: Renews the available printers list. • Add Printer: Allows you to add a new printer. • Remove Printer: Removes the selected printer. • Set as Default: Sets the current printer as a default printer. • Stop/Start: Stops/starts the machine. • Test: Allows you to print a test page to check if - Dell B2375dfw | Dell Mono MFP User's Guide - Page 284
Tab The Classes tab shows a list of available printer classes. Shows all of the printer classes. Shows the status of the class and the number of printers in the class. • Refresh: Renews the classes list. • Add Class...: Allows you to add a new printer class. • Remove Class: Removes the selected - Dell B2375dfw | Dell Mono MFP User's Guide - Page 285
package provides an appropriate port sharing mechanism that is used by Dell printer and scanner drivers. The drivers address their devices via so-called MFP ports. The current status of any MFP port can be viewed via the MFP Ports Configuration. The port sharing prevents you from accessing one - Dell B2375dfw | Dell Mono MFP User's Guide - Page 286
necessary. 8 Click Print. Printing Files You can print text, image, pdf files on your machine using the standard CUPS directly from the command line interface. The CUPS lp or lpr utility allows you to do that. You can print these files by using below command format. "lp -d -o - Dell B2375dfw | Dell Mono MFP User's Guide - Page 287
or vice versa while in use, you must re-configure the printer port in this tab. • Driver: allows you to view or select another printer driver. By clicking Options, you can set the default device options. • Jobs: shows the list of print jobs. Click Cancel Job to cancel the selected job and select - Dell B2375dfw | Dell Mono MFP User's Guide - Page 288
computer and powered on. 2 Double-click the Unified Driver Configurator on your desktop. 3 Click the button to switch to Scanners Configuration. 4 Select the scanner on the list. Click your scanner. 5 Click Properties. 6 Load the document to be scanned face up into the DADF or face down on - Dell B2375dfw | Dell Mono MFP User's Guide - Page 289
Preview Pane. Drag the pointer to set the image area to be scanned. 9 Drag the pointer to set the image area to be scanned in the Preview Pane. 10 Select the option you want. 11 Scan and save your scanned image. NOTE: For later use, you can save as your scan settings and add it to the Job - Dell B2375dfw | Dell Mono MFP User's Guide - Page 290
Editing an image with Image Manager The Image Manager window provides you with menu commands and tools to edit your scanned image. Use these tools to edit the image. - 289 - Dell B2375dfw | Dell Mono MFP User's Guide - Page 291
Unix Installing driver over the network Uninstalling the printer driver Setting up the printer Printing a Document Changing the machine settings - 290 - Dell B2375dfw | Dell Mono MFP User's Guide - Page 292
the UNIX printer driver, you have to install the UNIX printer driver package first, then setup the printer. Installing driver over the network To use the UNIX printer driver, you have to install the UNIX printer driver package first, then setup the printer. System Requirements Supported OS • Sun - Dell B2375dfw | Dell Mono MFP User's Guide - Page 293
" Uninstalling the printer driver The utility should be used to delete the printer installed in the system. Setting up the printer To add the printer to your UNIX system, run 'installprinter' from the command line. This will bring up the Add Printer Wizard window. Setup the printer - Dell B2375dfw | Dell Mono MFP User's Guide - Page 294
To take advantage of the printer features provided by your printer driver, press Properties. 5 Press OK to start the print job. Changing the machine settings The UNIX printer driver Print Job Manager in which the user can select various print options in printer Properties. The following hot keys - Dell B2375dfw | Dell Mono MFP User's Guide - Page 295
space, or the columns of the actual print output. Margins tab Set the character margin, line space, or the columns of the actual print output. • Use Margins: Set the margins for the document. By default, margins are not enabled. The user can change the margin settings by changing the values in the - Dell B2375dfw | Dell Mono MFP User's Guide - Page 296
Maintenance Clearing the printer NVRAM Backing up Data Cleaning Your Printer Maintaining the Toner Cartridge Replacement Parts Ordering Supplies - 295 - Dell B2375dfw | Dell Mono MFP User's Guide - Page 297
memory. 1 Press My Settings Machine Setup from the home screen. 2 Scroll to select Restore Options. 3 Scroll until you see the option you want to clear. • Printer Setup: Clears all of the data stored in the memory and resets all of your settings to the factory default. • Paper Setup: Restores all of - Dell B2375dfw | Dell Mono MFP User's Guide - Page 298
Backing up Data Date in the printer's memory can be accidentally erased due to power failure or storage failure. Backup helps you protect your Email/Fax List entries and the system settings by storing them as backup files on a USB memory key. NOTE: In case of the phonebook, you can save the - Dell B2375dfw | Dell Mono MFP User's Guide - Page 299
cleaning procedures below, each time the toner cartridge is replaced or if print quality problems occur. NOTE: Do not touch the transfer roller located under the toner cartridge when cleaning inside the printer. Oil from your fingers may cause print quality problems. CAUTION: Cleaning solvents that - Dell B2375dfw | Dell Mono MFP User's Guide - Page 300
free cloth, wipe away any dust and spilled toner from the toner cartridge area and the toner cartridge cavity. CAUTION: Do not touch the transfer roller inside the printer. Oil from your fingers may cause print quality problems. 4 Reinsert the toner cartridge and close the front cover. 5 Plug in the - Dell B2375dfw | Dell Mono MFP User's Guide - Page 301
and DADF glass clean ensure the highest quality copies, scans, and sent faxes. Dell recommends cleaning the scanner at the start of each day and during the day, as needed. NOTE: If there are lines present on copied or faxed documents, check your scanner and DADF glass for any particles. 1 Slightly - Dell B2375dfw | Dell Mono MFP User's Guide - Page 302
life, white streaks or light print occurs. The toner-related message saying that the toner is low may appear on the display. Thoroughly shake the cartridge from side-to-side 5 or 6 times to distribute the toner evenly inside the cartridge and temporarily improve print quality. This is not intended - Dell B2375dfw | Dell Mono MFP User's Guide - Page 303
to avoid touching this area. 4 Holding the toner cartridge by the handle and slowly insert the cartridge into the opening in the printer. 5 Tabs on the sides of the cartridge and corresponding grooves within the printer will guide the cartridge into the correct position until it locks into place - Dell B2375dfw | Dell Mono MFP User's Guide - Page 304
eventually runs out, only blank pages print when a print job or copy job are sent. The toner-related message saying that the toner is empty may appear on the display. In that case the incoming faxes are only saved in the memory and not printed. At this stage, the toner cartridge needs to be replaced - Dell B2375dfw | Dell Mono MFP User's Guide - Page 305
Photo Conductor (OPC) drum of the toner cartridge may require cleaning. 1 Before setting the cleaning procedure, ensure that paper is loaded in the paper tray. 2 Press My Settings from the home screen. 3 Press Maintenance Clean Drum. 4 Press Start ( ) on screen. The printer prints out a cleaning - Dell B2375dfw | Dell Mono MFP User's Guide - Page 306
Replacement Parts From time to time, you needs to replace the rollers and fuser unit to maintain top performance and to avoid print quality problems and paper feed problems resulting from worn parts. The following items should be replaced after you have printed the specified number of pages. Item - Dell B2375dfw | Dell Mono MFP User's Guide - Page 307
2375dfw Mono MFP Toner Reorder or Dell 2375dnf Mono MFP Toner Reorder icon on your desktop. OR 2 From the Start menu, select Programs Dell Printers Dell B2375dfw Mono MFP or Dell B2375dnf Mono MFP Dell 2375dfw Mono MFP Toner Reorder or Dell 2375dnf Mono MFP Toner Reorder. The Order Toner Cartridges - Dell B2375dfw | Dell Mono MFP User's Guide - Page 308
Troubleshooting Clearing Jams in the DADF Clearing Jams in the Paper Tray Clearing LCD Error Messages Solving Problems - 307 - Dell B2375dfw | Dell Mono MFP User's Guide - Page 309
Clearing Jams in the DADF When a document jams while it passes through the DADF, a warning message appears on the display. NOTE: To prevent document jams, use the document glass for thick, thin or mixed documents. 1 Remove the remaining documents from the DADF. If the document is jammed in the - Dell B2375dfw | Dell Mono MFP User's Guide - Page 310
c Close the DADF cover. Then reload the document into the DADF. If the document is jammed in the paper exit area: a Open the DADF cover. b Remove the document by gently pulling it out. c Close the DADF cover and the document input tray. Then load the documents back into the DADF. If the document - Dell B2375dfw | Dell Mono MFP User's Guide - Page 311
a Open the DADF cover. b Open the DADF inner cover. c Remove the document by gently pulling it out. d Close the DADF inner cover and the DADF cover. Then load the documents back into the DADF. - 310 - Dell B2375dfw | Dell Mono MFP User's Guide - Page 312
Jam (optional tray 2) "Paper Feed Jam (optional Paper Feed Jam (MPF) tray 2)" "MPF Jam" Paper jam inside of machine Fuser Area Jam "Fuser Area Jam". Paper jam in exit area between the fuser and exit area "Paper Exit Jam". Jam Paper jam in duplex path in the duplex unit "Duplex Jam 1". To - Dell B2375dfw | Dell Mono MFP User's Guide - Page 313
Paper Feed Jam (tray 1) 1 Open and close the front cover. The jammed paper automatically exits the printer. If the paper does not exit, go to the next step. 2 Pull the paper tray open. 3 Remove the paper by gently pulling it straight out. - Dell B2375dfw | Dell Mono MFP User's Guide - Page 314
4 Insert the paper tray into the printer until it snaps into place. Printing automatically resumes. Paper Feed Jam (optional tray 2) 1 Pull the optional tray 2 open. 2 Remove the jammed paper from the printer. If you cannot see the paper in this area or the paper does not move when pulled, go to the - Dell B2375dfw | Dell Mono MFP User's Guide - Page 315
4 Pull the paper straight up and out. 5 Insert the trays back into the printer. Printing automatically resumes. MPF Jam 1 If the paper is not feeding properly, pull the paper out of the printer. 2 Open and close the front cover to resume printing. - 314 - Dell B2375dfw | Dell Mono MFP User's Guide - Page 316
Jam NOTICE: The fuser area is hot. Take care when removing paper from the printer. 1 Open the front cover and lightly pull the toner cartridge straight out. 2 Remove the paper by gently pulling it straight out. 3 Replace the toner cartridge and close the front cover. Printing automatically resumes - Dell B2375dfw | Dell Mono MFP User's Guide - Page 317
Paper Exit Jam 1 Open and close the front cover. The jammed paper automatically exits the printer. If the paper does not exit, go to the next step. 2 Gently pull the paper out of the output tray. 3 If you cannot see the - Dell B2375dfw | Dell Mono MFP User's Guide - Page 318
pressure levers down and remove the paper. Skip to step 7. If you do not see the paper, go to the next step. 5 While pushing the fuser lever to the down, open the fuser door. NOTE: Ensure that to unfold the duplex guide before opening the fuser door or you may damage the - Dell B2375dfw | Dell Mono MFP User's Guide - Page 319
jammed paper does not move when you pull, push the two blue pressure levers up to loosen the paper, and then remove it. 7 Return the fuser door, and duplex guide to their original position. 8 Close the rear door. 9 Open and close the front cover. Printing automatically resumes. - 318 - Dell B2375dfw | Dell Mono MFP User's Guide - Page 320
Duplex Jam Duplex Jam 0 1 Pull the duplex unit out of the printer. 2 Remove the jammed paper from the duplex unit. If the paper does not come out with the duplex unit, remove the paper from the bottom of the printer. - 319 - Dell B2375dfw | Dell Mono MFP User's Guide - Page 321
3 Push the duplex unit to the printer. 4 Open and close the front cover. Printing automatically resumes. CAUTION: If you do not push the duplex unit correctly, paper jam may occur. Duplex Jam 1 1 Open the rear door. 2 Unfold the duplex guide fully. 3 Pull the jammed paper out. 4 Return the duplex - Dell B2375dfw | Dell Mono MFP User's Guide - Page 322
size. NOTE: Some error messages are provided with graphical images on the LCD of the operator panel. NOTE: If the message is not in the table, cycle the power and try the printing job again. If the problem persists, call for service. NOTE: When you call for service, provide display message - Dell B2375dfw | Dell Mono MFP User's Guide - Page 323
unit Error There is a problem in Unplug the power cord and plug it back the fuser unit. in. If the problem persists, please call for service. Invalid Cartridge The toner cartridge Install a Dell-genuine toner cartridge, you have installed is designed for your printer. not for your printer. IP - Dell B2375dfw | Dell Mono MFP User's Guide - Page 324
back. the main motor. If the problem persists, please call for service. Paper jam in MPF Paper jam in printer resumes printing. Toner Cartridge is not The toner cartridge is Install the toner cartridge. See "Installing installed not installed. the Toner Cartridge". Toner Supply Error Toner - Dell B2375dfw | Dell Mono MFP User's Guide - Page 325
Replace the tray pickup roller with a new one. Contact the service representatives. All Tray Empty There is no paper in Load paper in the tray. See "Loading all tray. Print Media in the Paper Tray". Scanner Locked The scanner is locked. Reboot the power. If the problem persists, please call - Dell B2375dfw | Dell Mono MFP User's Guide - Page 326
memory is almost full. No more fax data can be received. Print or remove the received fax data in the memory. Fax memory is full. Print or remove the received fax data in the memory. The UI system is failure. Check UI connection. Solving Problems The following chart lists some conditions that - Dell B2375dfw | Dell Mono MFP User's Guide - Page 327
the printer. See "Identifying Print Media Sources and Specifications". The paper keeps jamming. • Ensure that the correct paper size is selected. See "Setting the for a laser printer. Remove each transparency as it exits from the printer. Envelopes skew or fail Ensure that the paper guides are - Dell B2375dfw | Dell Mono MFP User's Guide - Page 328
-click the Dell B2375dfw Mono MFP or Dell B2375dnf Mono MFP printer icon and select Set as Default Printer. Check the printer for the following: • The front or rear door is not closed. • Paper is jammed. • No paper is loaded. • The toner cartridge is not installed. If a printer system error occurs - Dell B2375dfw | Dell Mono MFP User's Guide - Page 329
is blank. The page Change the page orientation in your orientation setting application. See "Basic Tab". may be incorrect. The paper size and Ensure that the paper size in the printer driver the paper size settings matches the paper in the tray. settings do not match. The printer prints - Dell B2375dfw | Dell Mono MFP User's Guide - Page 330
not contain blank pages. blank pages. Some parts, such as the controller or the board, may be defective. Contact a service representative. The illustrations print incorrectly in Adobe Illustrator. The setting in the software application is wrong. Print the document by selecting Download as - Dell B2375dfw | Dell Mono MFP User's Guide - Page 331
paper is too moist or too rough. See "Identifying Print Media Sources and Specifications". • A combination of faded or smeared defects may indicate that the toner cartridge needs cleaning. See "Cleaning the Interior". • The surface of the LSU part inside the printer may be dirty. Clean the LSU (see - Dell B2375dfw | Dell Mono MFP User's Guide - Page 332
service representative. • If black vertical streaks appear on the page, the drum inside the toner cartridge has probably been scratched. Install a new toner cartridge. See "Replacing the Toner Cartridge". • If white vertical streaks appear on the page, the surface of the LSU part inside the printer - Dell B2375dfw | Dell Mono MFP User's Guide - Page 333
mark occurs on the page, print a cleaning sheet several times to clean the cartridge; see "Cleaning the Drum". After the printout, if you still have the same problems, install a new toner cartridge. See "Replacing the Toner Cartridge". • Parts of the printer may have toner on them. If the defects - Dell B2375dfw | Dell Mono MFP User's Guide - Page 334
. See "Identifying Print Media Sources and Specifications". • Ensure that the paper or other material is loaded correctly and the guides are not too paper tray. • Try printing to the rear door. Back of printouts are Check for leaks in the toner. Clean the inside of the printer. dirty See "Cleaning - Dell B2375dfw | Dell Mono MFP User's Guide - Page 335
be installed improperly. Remove the toner cartridge and reinsert. • The toner cartridge may be defective. Install a new toner cartridge. See "Replacing the Toner Cartridge". • If the problem persists, the printer may require repair. Contact a service representative. If the printed paper is curled or - Dell B2375dfw | Dell Mono MFP User's Guide - Page 336
. Please carry out Fax Line Test from Op-panel to confirm line status. See "Testing Fax line connection". • The printer is monitoring line condition while it is receiving or sending a fax job. If an error occurs during the transmission and the ECM Mode setting is On, the printer may request that the - Dell B2375dfw | Dell Mono MFP User's Guide - Page 337
printed by the printer Receive Forward feature might be turned Off, try enabling this setting. You can set the printer to forward all incoming faxes to specified Email addresses. Please carry out Fax Line Test from Op-panel to confirm line status. See "Testing Fax line connection". The printer - Dell B2375dfw | Dell Mono MFP User's Guide - Page 338
• The printer is monitoring line condition while it is receiving or sending a fax job. If an error occurs during the transmission and the ECM Mode setting is On, the printer may request that the portion of the fax job to be resent. You should turn off ECM Mode only if you are having trouble sending - Dell B2375dfw | Dell Mono MFP User's Guide - Page 339
machine that is connected to the same line shared by the printer. • The fax line cord connection or configuration issue. See "Making Connections". • The receive mode or rings-to-answer settings might be incorrectly set. See "Setting up the Fax System". • The telephone answering machine or extension - Dell B2375dfw | Dell Mono MFP User's Guide - Page 340
from the toner cartridge than expected prints out. • Your originals may contain pictures, solids or heavy lines. For example, your originals may be forms, newsletters, books or other documents that use more toner. • The document cover may be left open while copies are being made. Scanning Problems - Dell B2375dfw | Dell Mono MFP User's Guide - Page 341
printer cable may be improperly connected or the power • "Port is being used may be off. by another program." • The scanner driver is not installed or an operating environment • "Port is Disabled." is not set up properly. • "Scanner is busy receiving or printing a user sees this error message, - Dell B2375dfw | Dell Mono MFP User's Guide - Page 342
A user can test server operation with other queries. Common Windows Problems Condition Suggested solutions "File in Use" message appears during installation. Exit all software applications. Remove all software from the StartUp Group, then restart Windows. Reinstall the printer driver. "General - Dell B2375dfw | Dell Mono MFP User's Guide - Page 343
activated when some problems in printing occurred. For instance, this could be an attempt to print document when MFP port is claimed by a scanning application. • Check if the MFP port is not busy. Since functional components of MFP (printer and scanner) share the same I/O interface (MFP port), the - Dell B2375dfw | Dell Mono MFP User's Guide - Page 344
via the USB port and is turned on. • Check if the scanner driver for your printer is installed in your system. Open MFP Configurator, switch to Scanners configuration, then press Drivers. Ensure that driver with a name corresponding to your printer's name is listed in the window. • Check if the - Dell B2375dfw | Dell Mono MFP User's Guide - Page 345
the computer. Ensure that if it is connected properly if I/O error is reported while scanning. • Check if MFP port is not busy. Since functional components of MFP (printer and scanner) share the same I/O interface (MFP port), the situation of simultaneous access of different "consumer" application - Dell B2375dfw | Dell Mono MFP User's Guide - Page 346
The resolution setting in the printer driver may not be matched document in Mac with with the one in Acrobat Reader. Acrobat Reader 6.0 or higher, colors print incorrectly. NOTE: Refer to Mac OS User's Guide that came with your computer for further information on Mac OS error messages. - 345 - Dell B2375dfw | Dell Mono MFP User's Guide - Page 347
quality settings. Or, expand the memory capacity. A PS error page prints. Print job may not be PS. Ensure that the print job is a PS job. Check to see whether the software application expected a setup or PS header file to be sent to the printer. The optional tray 2 is not selected in the driver - Dell B2375dfw | Dell Mono MFP User's Guide - Page 348
Installing Accessories Installing Printer Accessories Installing an Optional Tray 2 - 347 - Dell B2375dfw | Dell Mono MFP User's Guide - Page 349
in. To avoid the possibility of an electrical shock, always disconnect the power cord when installing or removing ANY internal or external printer option. The control board is sensitive to static electricity. Before installing or removing an internal cord, discharge static electricity from your - Dell B2375dfw | Dell Mono MFP User's Guide - Page 350
3 Grasp the control board cover and open it. 4 Connect the cable as below. - 349 - Dell B2375dfw | Dell Mono MFP User's Guide - Page 351
5 Close the control board cover. 6 Combine machine and optional tray 2 as below. - 350 - Dell B2375dfw | Dell Mono MFP User's Guide - Page 352
in the optional tray 2. For information about loading paper in this tray, see "Loading Paper". 9 Reconnect the power cord and cables and then power the printer on. After installing the optional tray 2, printer drivers will automatically sense tray 2. - 351 - Dell B2375dfw | Dell Mono MFP User's Guide - Page 353
Specifications General Specifications Dell technical support policy Contacting Dell Warranty and return policy - 352 - Dell B2375dfw | Dell Mono MFP User's Guide - Page 354
See www.dell.com or www.dell.com/support for possible changes than 26 dB (A) Print mode Less than 54 dB (A) Copy mode Less than 56 dB (A) Scan mode (scanner glass) Less than 56 dB (A) Scan mode (document feeder) Less tested: basic machine installation, A4 paper, simplex printing. - 353 - Dell B2375dfw | Dell Mono MFP User's Guide - Page 355
software, and hardware drivers to the original default configuration as shipped from Dell, as well as the verification of appropriate functionality of the printer and all Dell-installed hardware. In addition to this technician assisted technical support, online technical support is available at Dell - Dell B2375dfw | Dell Mono MFP User's Guide - Page 356
(Canada only) Anonymous file transfer protocol (FTP) - ftp.dell.com Log in as user: anonymous, and use your email address as your password. Electronic Support Service - [email protected] - [email protected] - [email protected] (Latin America and Caribbean countries only) - apsupport - Dell B2375dfw | Dell Mono MFP User's Guide - Page 357
glass cleaning, 300 driver, printer installing, 81 uninstalling, 91 drum, cleaning, 304 F fax system, setting advanced, 263 basic, 247 faxing automatically, 250-251 manually, 251 problem, 335 fit to page printing, 170 G graphic properties, printing, 159 group dial, faxing dialing, 260 editing - Dell B2375dfw | Dell Mono MFP User's Guide - Page 358
toner cartridge, 303 reports, printing, 263 resolution, printing, 161 S scanner, cleaning, 300 scanning from operator panel, 200 from WIA, 205, 208 problem, 339 setup to email, 57 software installing, 81 uninstalling, 91 speed dial, fax dialing, 257 storing, 257 supplies, ordering, 306 T tel line - Dell B2375dfw | Dell Mono MFP User's Guide - Page 359
USB memory managing, 51 W watermarks, printing, 175 - 358
-
 1
1 -
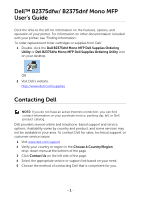 2
2 -
 3
3 -
 4
4 -
 5
5 -
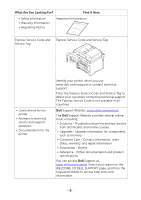 6
6 -
 7
7 -
8
-
9
-
10
-
11
-
12
-
13
-
14
-
15
-
16
-
17
-
18
-
19
-
20
-
21
-
22
-
23
-
24
-
25
-
26
-
27
-
28
-
29
-
30
-
31
-
32
-
33
-
34
-
35
-
36
-
37
-
38
-
39
-
40
-
41
-
42
-
43
-
44
-
45
-
46
-
47
-
48
-
49
-
50
-
51
-
52
-
53
-
54
-
55
-
56
-
57
-
58
-
59
-
60
-
61
-
62
-
63
-
64
-
65
-
66
-
67
-
68
-
69
-
70
-
71
-
72
-
73
-
74
-
75
-
76
-
77
-
78
-
79
-
80
-
81
-
82
-
83
-
84
-
85
-
86
-
87
-
88
-
89
-
90
-
91
-
92
-
93
-
94
-
95
-
96
-
97
-
98
-
99
-
100
-
101
-
102
-
103
-
104
-
105
-
106
-
107
-
108
-
109
-
110
-
111
-
112
-
113
-
114
-
115
-
116
-
117
-
118
-
119
-
120
-
121
-
122
-
123
-
124
-
125
-
126
-
127
-
128
-
129
-
130
-
131
-
132
-
133
-
134
-
135
-
136
-
137
-
138
-
139
-
140
-
141
-
142
-
143
-
144
-
145
-
146
-
147
-
148
-
149
-
150
-
151
-
152
-
153
-
154
-
155
-
156
-
157
-
158
-
159
-
160
-
161
-
162
-
163
-
164
-
165
-
166
-
167
-
168
-
169
-
170
-
171
-
172
-
173
-
174
-
175
-
176
-
177
-
178
-
179
-
180
-
181
-
182
-
183
-
184
-
185
-
186
-
187
-
188
-
189
-
190
-
191
-
192
-
193
-
194
-
195
-
196
-
197
-
198
-
199
-
200
-
201
-
202
-
203
-
204
-
205
-
206
-
207
-
208
-
209
-
210
-
211
-
212
-
213
-
214
-
215
-
216
-
217
-
218
-
219
-
220
-
221
-
222
-
223
-
224
-
225
-
226
-
227
-
228
-
229
-
230
-
231
-
232
-
233
-
234
-
235
-
236
-
237
-
238
-
239
-
240
-
241
-
242
-
243
-
244
-
245
-
246
-
247
-
248
-
249
-
250
-
251
-
252
-
253
-
254
-
255
-
256
-
257
-
258
-
259
-
260
-
261
-
262
-
263
-
264
-
265
-
266
-
267
-
268
-
269
-
270
-
271
-
272
-
273
-
274
-
275
-
276
-
277
-
278
-
279
-
280
-
281
-
282
-
283
-
284
-
285
-
286
-
287
-
288
-
289
-
290
-
291
-
292
-
293
-
294
-
295
-
296
-
297
-
298
-
299
-
300
-
301
-
302
-
303
-
304
-
305
-
306
-
307
-
308
-
309
-
310
-
311
-
312
-
313
-
314
-
315
-
316
-
317
-
318
-
319
-
320
-
321
-
322
-
323
-
324
-
325
-
326
-
327
-
328
-
329
-
330
-
331
-
332
-
333
-
334
-
335
-
336
-
337
-
338
-
339
-
340
-
341
-
342
-
343
-
344
-
345
-
346
-
347
-
348
-
349
-
350
-
351
-
352
-
353
-
354
-
355
-
356
-
357
-
358
-
359
 |
 |

Dell™ B2375dfw Mono MFP±
Dell™ B2375dnf Mono MFP±
User’s Guide±