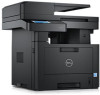
Dell B2375dfw Dell Mono MFP User's Guide - Page 20
Unpacking Your Printer - mono mfp driver
 |
View all Dell B2375dfw manuals
Add to My Manuals
Save this manual to your list of manuals |
Page 20 highlights
Unpacking Your Printer 1 Select a location for your printer. CAUTION: The printer requires at least two people to lift it safely. • Leave enough room to open the printer tray, covers, doors, and options. It is also important to allow enough space around the printer for proper ventilation. • Provide the proper environment: • A firm, level surface. • Away from the direct airflow of air conditioners, heaters, or ventilators. • Away from sunlight, extreme humidity, or high fluctuations in temperature. • A clean, dry, and dust free location. • Select a level, stable place with adequate space for air circulation. See "Setting up the hardware". • Do not set the machine close to the edge of your desk or table. NOTE: Leave the printer in the box until you are ready to install it. 2 In addition to the Dell B2375dfw Mono MFP or Dell B2375dnf Mono MFP, ensure that you have the following items in the box. If there is a missing item, contact Dell: Toner cartridge Power corda Dell™ B2375dfw / B2375dnf Mono MFP Quick Reference Guide About Your Printer 1 2 3 45 HMCWMA01 JC68-03031A00 Operator Panel Button Functions 12 34 5 6 14 13 12 11 1 Operator Panel 3 Document Width Guide 5 Document Output Tray 7 Control Board Cover 9 Output Tray 11 Tray 1 13 Paper Output Extension 10 9 8 7 6 2 Duplex Automatic Document Feeder (DADF) 4 Document Input Tray 6 Document Glass 8 USB Memory Port 10 Front Cover 12 Multipurpose Feeder (MPF) 14 Toner Cartridge Locating the Service Tag Service Tag XXXXXXX Service Tag XXXXXXX 000 000 000 00 Express Service Code 11 10 9 87 1 Home Go to home screen. 2 Log In/Out You can log in or log out. 3 Status LED Status LED indicates the status of your machine. 4 Redial/Pause Redials the recently sent fax number or received caller ID in ready mode, or inserts a pause(-) into a fax number in edit mode. 5 Copy Start copy job using copy default setting regardless of which screen the user is in if it is selected. 6 Power Saver You can enter or exit Power Save mode. 7 Speed Dial1 Fax image to destination from stored speed dial1. 8 Speed Dial2 Fax image to destination from stored speed dial2. 9 Wi-Fi/WPS Configures the wireless network connection easily without a computer. (Dell B2375dfw Mono MFP only) 10 Job Status Job status shows the jobs currently running and in queue. 11 Info Gives detailed information about product feature guide machine's info. reports, troubleshooting guide, and quick reference guide. Understanding the Status LED LED Status Status Off Green Blinking On Orange Blinking Wireless Blue Blinking On Off Description • The machine is off-time. • The machine is in power save mode. When data is received, or any button is pressed, it switches to on-line automatically. The machine is warming up or ready to receive the data. The machine is on-line and can be used. • A minor error has occurred and the machine is waiting for the error to be cleared. Check the display message. When the problem is cleared, the machine resumes operation. • The toner cartridge is low. Order a new toner cartridge. You can temporarily improve print quality by redistribution. • The toner cartridge is totally empty. Remove the old toner cartridge and install a new one. • A paper jam has occurred. • There is no paper in the tray. Load paper in the tray. • The machine has stopped due to a major error. Check the display message. • The machine is connecting to a wireless network. • The machine is connected to a wireless network. • The machine is disconnected from a wireless network. Quick Reference Guidec Telephone line corda Drivers and Documentation CDb Dell™ B2375dfw / B2375dnf Mono MFP 1 Dell 2355dn MFP Quick Reference Guide Quick Reference Guide Quick Reference Guide Front 1 2 Front 3 Front 4 5 11 12 Front 13 6 7 8 1. DADF 2. Document width guides 3. Document input tray 4. Document output tray 5. Operator panel 6. Output tray (face down) 7. MPF (Multi purpose feeder) 8. Front cover 9. Tray 1 10. Optional tray 2 11. USB memory port 12. Paper output extension 13. Document glass 14. Toner cartridge 15. Express šervice code 19 10 15 1. DADF 2. Document width guides 3. Document input tray 4. Document output tray 5. Operator panel 6. Output tray (face down) 7. MPF (Multi purpose feeder) 8. Front cover 9. Tray 1 10. Optional tray 2 11. USB memory port 12. Paper output extension 13. Document glass 14. Toner cartridge 15. Express šervice code Back Back 1 Back 10 14 1. DADF 2. Document width guides 3. Document input tray 4. Document output tray 5. Operator panel 6. Output tray (face down) 7. MPF (Multi purpose feeder) 8. Front cover 9. Tray 1 10. Optional tray 2 11. USB memory port 12. Paper output extension 13. Document glass 14. Toner cartridge 15. Express šervice code 11 9 7 8 1. USB port 2. Locking slot 3. Network port 4. Optional tray 2 cable connector 5. Telephone line socket (Line) 6. Extension telephone socket (EXT) 7. Rear door 8. Power receptacle 910. P. Eoxwperressswšitecrhvice code 11. Optional memory 12. Optional wireless card 2 12 4 3 5 6 1. USB port 2. Locking slot 3. Network port 4. Optional tray 2 cable connector 5. Telephone line socket (Line) 6. Extension telephone socket (EXT) 7. Rear door 8. Power receptacle 9. Power switch 10. Express šervice code 11. Optional memory 12. Optional wireless card 1. USB port 2. Locking slot 3. Network port 4. Optional tray 2 cable connector 5. Telephone line socket (Line) 6. Extension telephone socket (EXT) 7. Rear door 8. Power receptacle 9. Power switch 10. Express šervice code 11. Optional memory 12. Optional wireless card Operator Panel Operator Panel Operator Panel 1. LCD: Display. 2. Status LED: Shows the status of your machine. 3. Job Status button: Shows the jobs. 4. M/C Setup button: Leads you to the machine setup and advanced settings. 5 Start button: Initiate operation. 6. Cancel button: Cancel displayed operation. 1. LCD: Display. 2. Status LED: Shows the status of your machine. 3. Job Status button: Shows the jobs. 4. M/C Setup button: Leads you to the machine setup and advanced settings. 5 Start button: Initiate operation. 6. Cancel button: Cancel displayed operation. 1. LCD: Display. 2. Status LED: Shows the status of your machine. 3. Job Status button: Shows the jobs. 4. M/C Setup button: Leads you to the machine setup and advanced settings. 5 Start button: Initiate operation. 6. Cancel button: Cancel displayed operation. Touch Screen Touch Screen Touch Screen 1.Copy: Enters the copy menu. 2. Fax: Enters the fax menu. 3. Scan: Enters the scan menu. 4. Setup: Enters the advanced settings. 8. : Return to the upper menu. 9. : Scroll through available options. 10. : Start a job. 5. None: You can set the option which is frequently uses on main screen. Also you can change shortcut name as well. 6. : Shows the main screen. 7. : Enters the LCD brightness, the USB memory, language, and job status. 1.Copy: Enters the copy menu. 2. Fax: Enters the fax menu. 3. Scan: Enters the scan menu. 4. Setup: Enters the advanced settings. 8. : Return to the upper menu. 9. : Scroll through available options. 10. : Start a job. 5. None: You can set the option which is frequently uses on main screen. Also you can change shortcut name as well. 6. : Shows the main screen. 7. : Enters the LCD brightness, the USB memory, language, and job status. 1.Copy: Enters the copy menu. 2. Fax: Enters the fax menu. 3. Scan: Enters the scan menu. 4. Setup: Enters the advanced settings. 8. : Return to the upper menu. 9. : Scroll through available options. 10. : Start a job. 5. None: You can set the option which is frequently uses on main screen. Also you can change shortcut name as well. 6. : Shows the main screen. 7. : Enters the LCD brightness, the USB memory, language, and job status. 2 Setting Up Your Printer Configuration de votre imprimante | Configurazione della stampante Einrichten des Druckers | Configuración de la impresora Verify the contents of the box Vérifiez le contenu de votre carton Verificare il contenuto della confezione Überprüfen Sie den Inhalt der Box Compruebe el contenido de la caja 3 Remove the packing material Retirez les matériaux d'emballage Rimuovere il materiale di imballo Entfernen Sie das Verpackungsmaterial Retire el material de embalaje 4 (For Ethernet connection only) Insert Ethernet cable (Uniquement pour la connexion Ethernet) Insérez le câble Ethernet (solo per la connessione Ethernet) Inserire il cavo Ethernet (Nur für Ethernet-Verbindung) Schließen Sie das Ethernet-Kabel an (Solamente para la conexión Ethernet) Inserte el cable Ethernet Turn on the printer Mettez l'imprimante sous tension Accendere la stampante Schalten Sie den Drucker ein Encienda la impresora Set the language, country, time zone, date, and time. Wait until "Ready" appears on the screen. Réglez la langue, le pays, le fuseau horaire, la date et l'heure. Patientez jusqu'à ce que "Prêt" s'affiche à l'écran. Impostare la lingua, il paese, il fuso orario, la data e l'ora. Attendere finché non viene visualizzato "Pronto" sullo schermo. Legen Sie Sprache, Land, Zeitzone, Datum und Uhrzeit fest. Warten Sie, bis "Bereit" im Display angezeigt wird. Configure el idioma, el país, la zona horaria, la fecha y la hora. Espere hasta que aparezca "Lista" en la pantalla. Setup diagram Important Information PaperPort14 CD a The appearance of the power cord and the telephone line cord may differ according to your country's specifications. - 19 -
-
 1
1 -
2
-
3
-
4
-
5
-
6
-
7
-
8
-
9
-
10
-
11
-
12
-
13
-
14
-
 15
15 -
 16
16 -
 17
17 -
 18
18 -
 19
19 -
 20
20 -
 21
21 -
 22
22 -
 23
23 -
 24
24 -
 25
25 -
26
-
27
-
28
-
29
-
30
-
31
-
32
-
33
-
34
-
35
-
36
-
37
-
38
-
39
-
40
-
41
-
42
-
43
-
44
-
45
-
46
-
47
-
48
-
49
-
50
-
51
-
52
-
53
-
54
-
55
-
56
-
57
-
58
-
59
-
60
-
61
-
62
-
63
-
64
-
65
-
66
-
67
-
68
-
69
-
70
-
71
-
72
-
73
-
74
-
75
-
76
-
77
-
78
-
79
-
80
-
81
-
82
-
83
-
84
-
85
-
86
-
87
-
88
-
89
-
90
-
91
-
92
-
93
-
94
-
95
-
96
-
97
-
98
-
99
-
100
-
101
-
102
-
103
-
104
-
105
-
106
-
107
-
108
-
109
-
110
-
111
-
112
-
113
-
114
-
115
-
116
-
117
-
118
-
119
-
120
-
121
-
122
-
123
-
124
-
125
-
126
-
127
-
128
-
129
-
130
-
131
-
132
-
133
-
134
-
135
-
136
-
137
-
138
-
139
-
140
-
141
-
142
-
143
-
144
-
145
-
146
-
147
-
148
-
149
-
150
-
151
-
152
-
153
-
154
-
155
-
156
-
157
-
158
-
159
-
160
-
161
-
162
-
163
-
164
-
165
-
166
-
167
-
168
-
169
-
170
-
171
-
172
-
173
-
174
-
175
-
176
-
177
-
178
-
179
-
180
-
181
-
182
-
183
-
184
-
185
-
186
-
187
-
188
-
189
-
190
-
191
-
192
-
193
-
194
-
195
-
196
-
197
-
198
-
199
-
200
-
201
-
202
-
203
-
204
-
205
-
206
-
207
-
208
-
209
-
210
-
211
-
212
-
213
-
214
-
215
-
216
-
217
-
218
-
219
-
220
-
221
-
222
-
223
-
224
-
225
-
226
-
227
-
228
-
229
-
230
-
231
-
232
-
233
-
234
-
235
-
236
-
237
-
238
-
239
-
240
-
241
-
242
-
243
-
244
-
245
-
246
-
247
-
248
-
249
-
250
-
251
-
252
-
253
-
254
-
255
-
256
-
257
-
258
-
259
-
260
-
261
-
262
-
263
-
264
-
265
-
266
-
267
-
268
-
269
-
270
-
271
-
272
-
273
-
274
-
275
-
276
-
277
-
278
-
279
-
280
-
281
-
282
-
283
-
284
-
285
-
286
-
287
-
288
-
289
-
290
-
291
-
292
-
293
-
294
-
295
-
296
-
297
-
298
-
299
-
300
-
301
-
302
-
303
-
304
-
305
-
306
-
307
-
308
-
309
-
310
-
311
-
312
-
313
-
314
-
315
-
316
-
317
-
318
-
319
-
320
-
321
-
322
-
323
-
324
-
325
-
326
-
327
-
328
-
329
-
330
-
331
-
332
-
333
-
334
-
335
-
336
-
337
-
338
-
339
-
340
-
341
-
342
-
343
-
344
-
345
-
346
-
347
-
348
-
349
-
350
-
351
-
352
-
353
-
354
-
355
-
356
-
357
-
358
-
359
 |
 |
